Names in project : FDPlayerState (C++), BP_FDPlayerState (BP)

Tasks :
- Has the FDPlayerInfo which goes with the client
– Set FDPlayerInfo

Names in project : FDPlayerState (C++), BP_FDPlayerState (BP)
Tasks :
Names in project : FDGameStateBase (C++),

Tasks :
Names in project : FDGameModeBase (C++), BP_FDGameModeBase (BP)

Tasks
Names in project : FDGameInstance (C++), BP_FDGameInstance
Tasks :
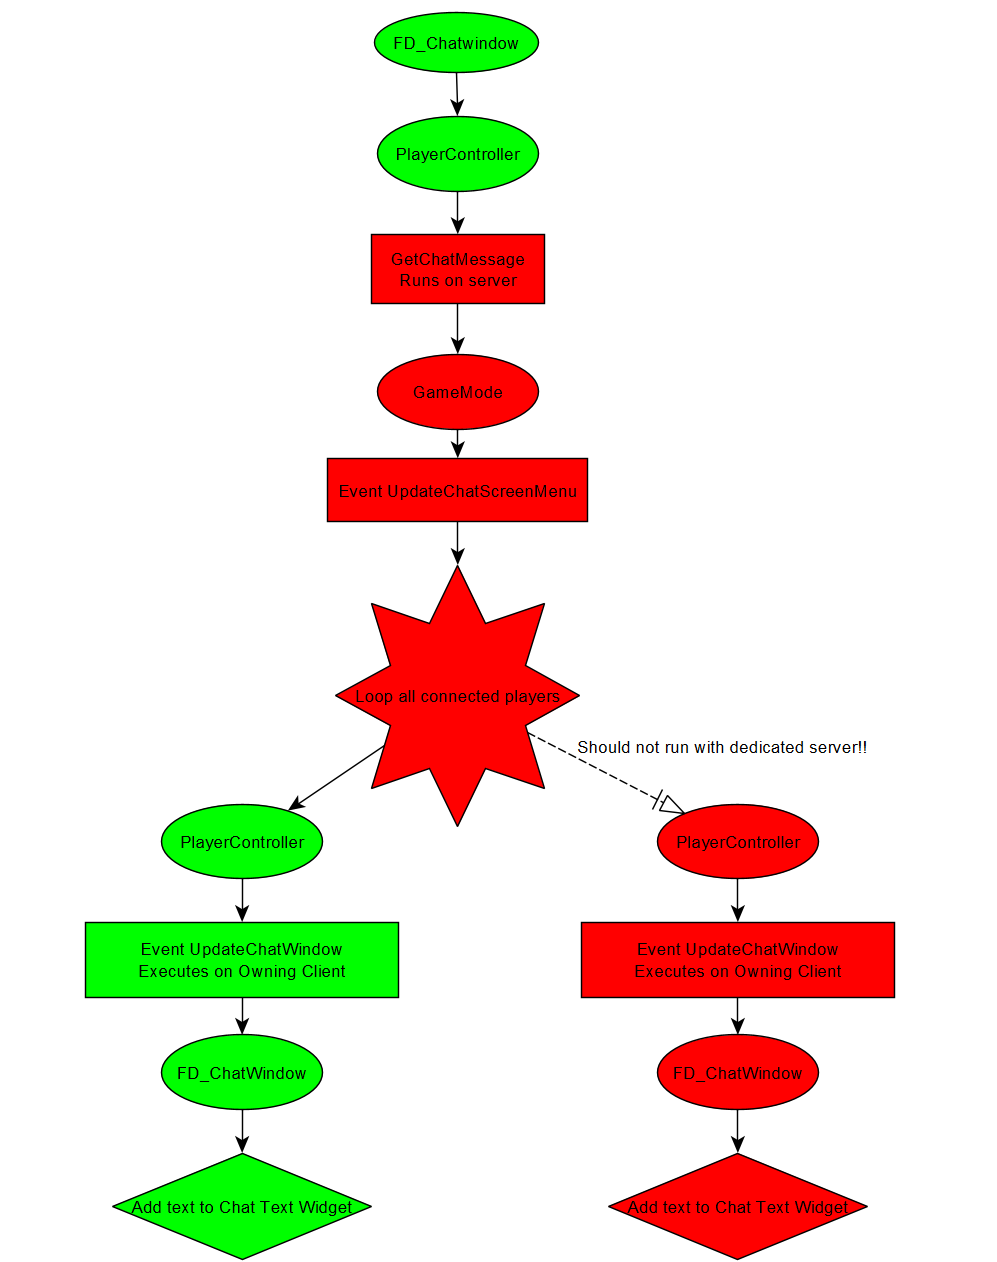
The different flows of information in the project.
Information will be stored on the server, by using Json.
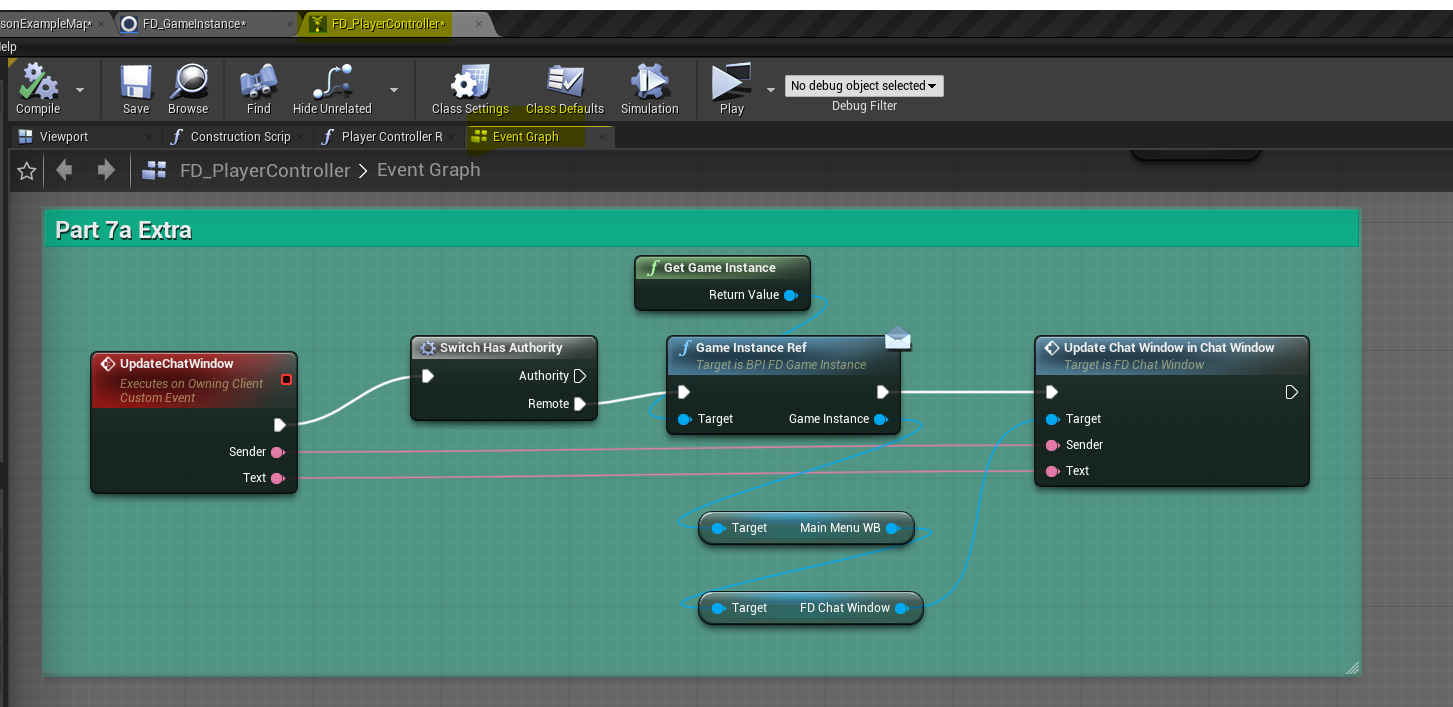
Chat text:
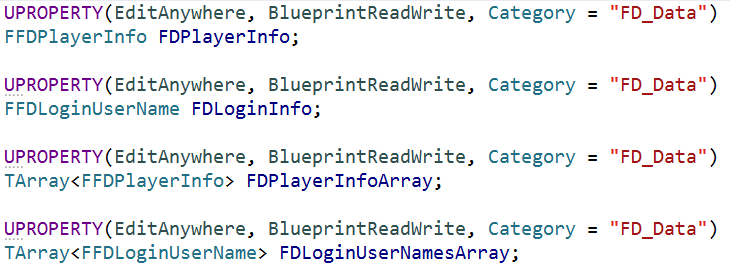
In C++ map Framework :
In Blueprint Framework
In Blueprint Interfaces
Software :
Plugins Built-In Engine
Plugins from marketplace
Settings :
Step 1 : Create new project UE 4.25.4. From architecture .. , blank, with starter content, no raytracing, no BP.
From learn : https://learn.unrealengine.com/course/2436632/module/5367573?moduletoken=UHxxnDLPW8Q5KSe4aguQ3gEEpywFgqqAzh6V1R2ea4tXGNsf7prUPDq~vgBaxSsF&LPId=0
Make sure the python and datasmith plugin’s are selected
https://docs.unrealengine.com/en-US/ProductionPipelines/ScriptingAndAutomation/Python/index.html
We are going to create a chatbox on all clients.
All steps are also explained in a video at the end.
Note : When building you sometime have to go back and forth.
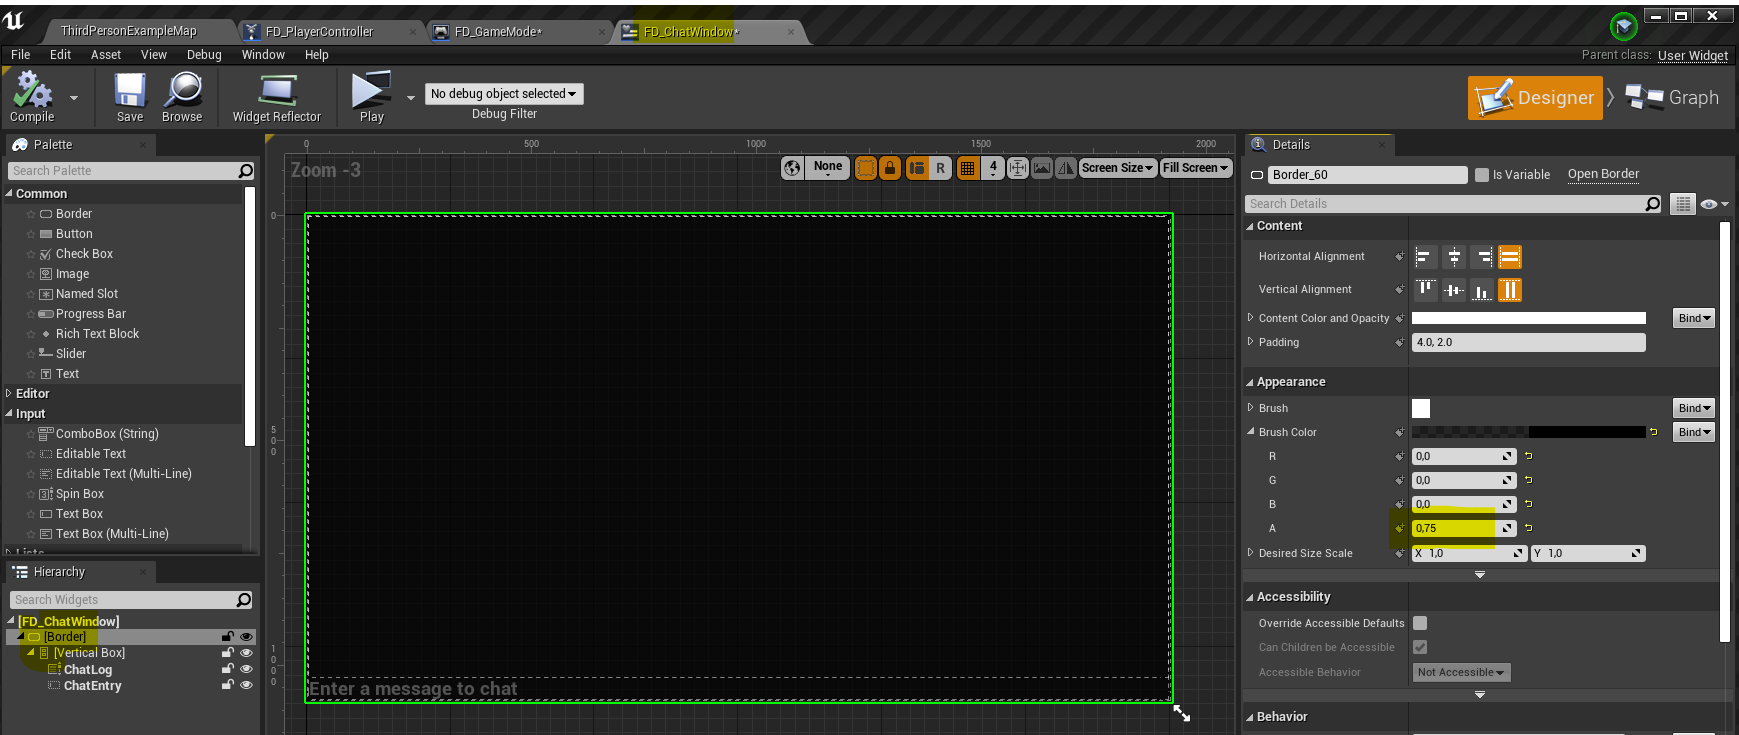
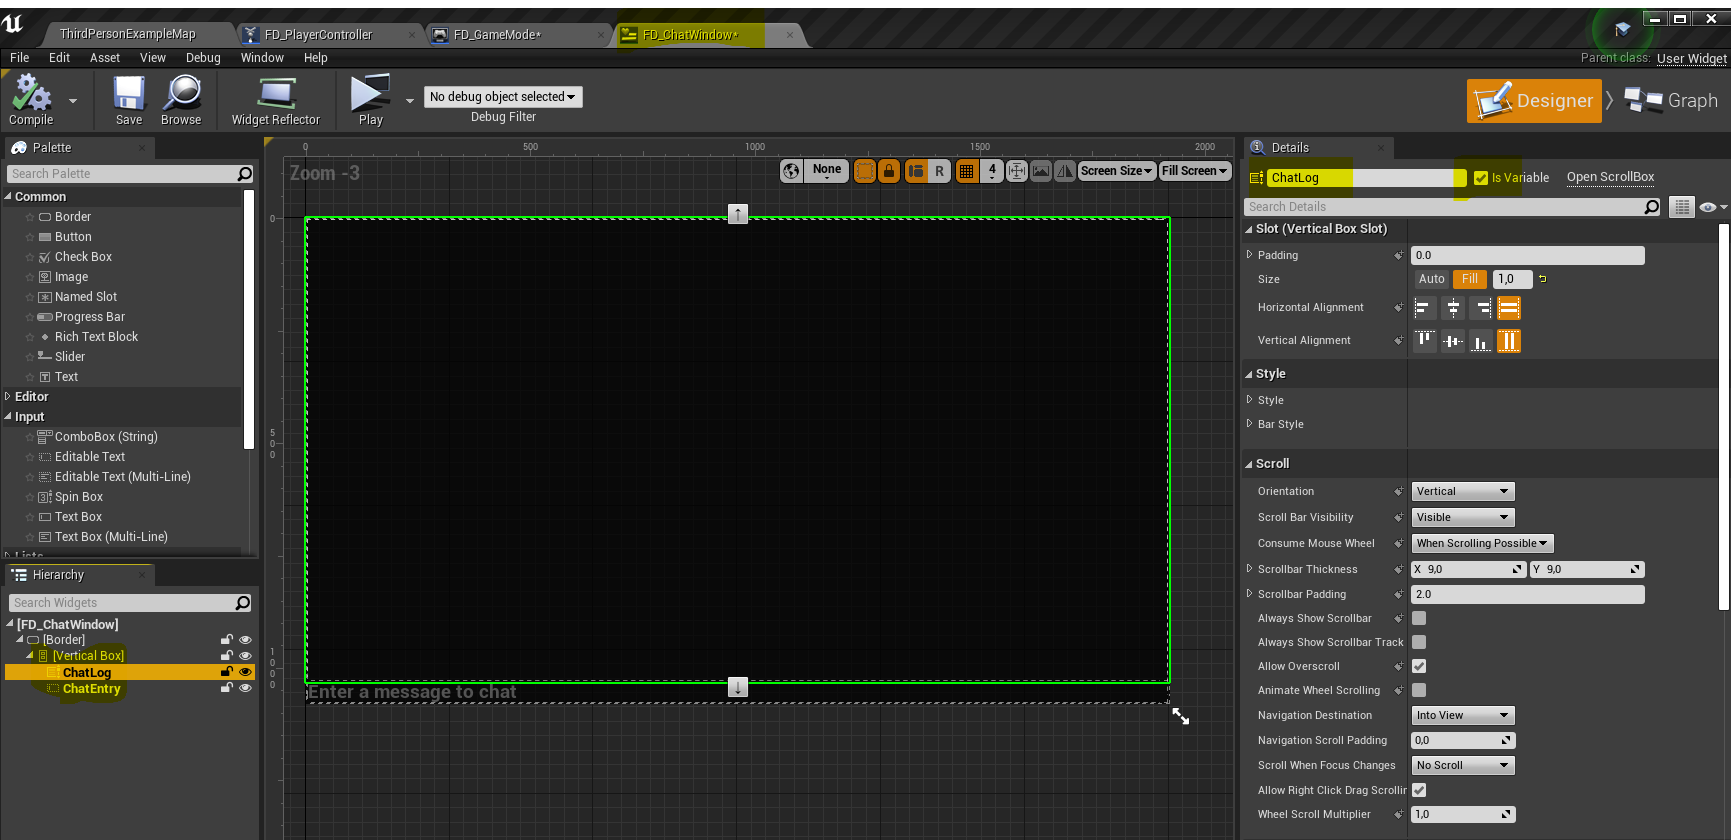
Step 1: Create widget FD_ChatWindow and FD_ChatText
FD_ChatWindow:

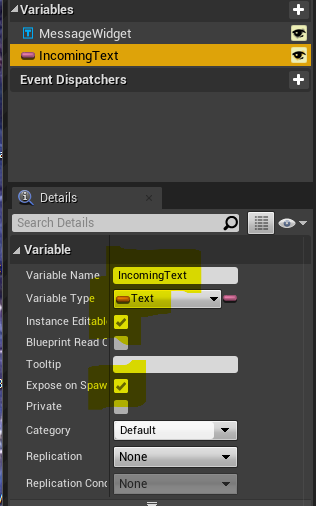
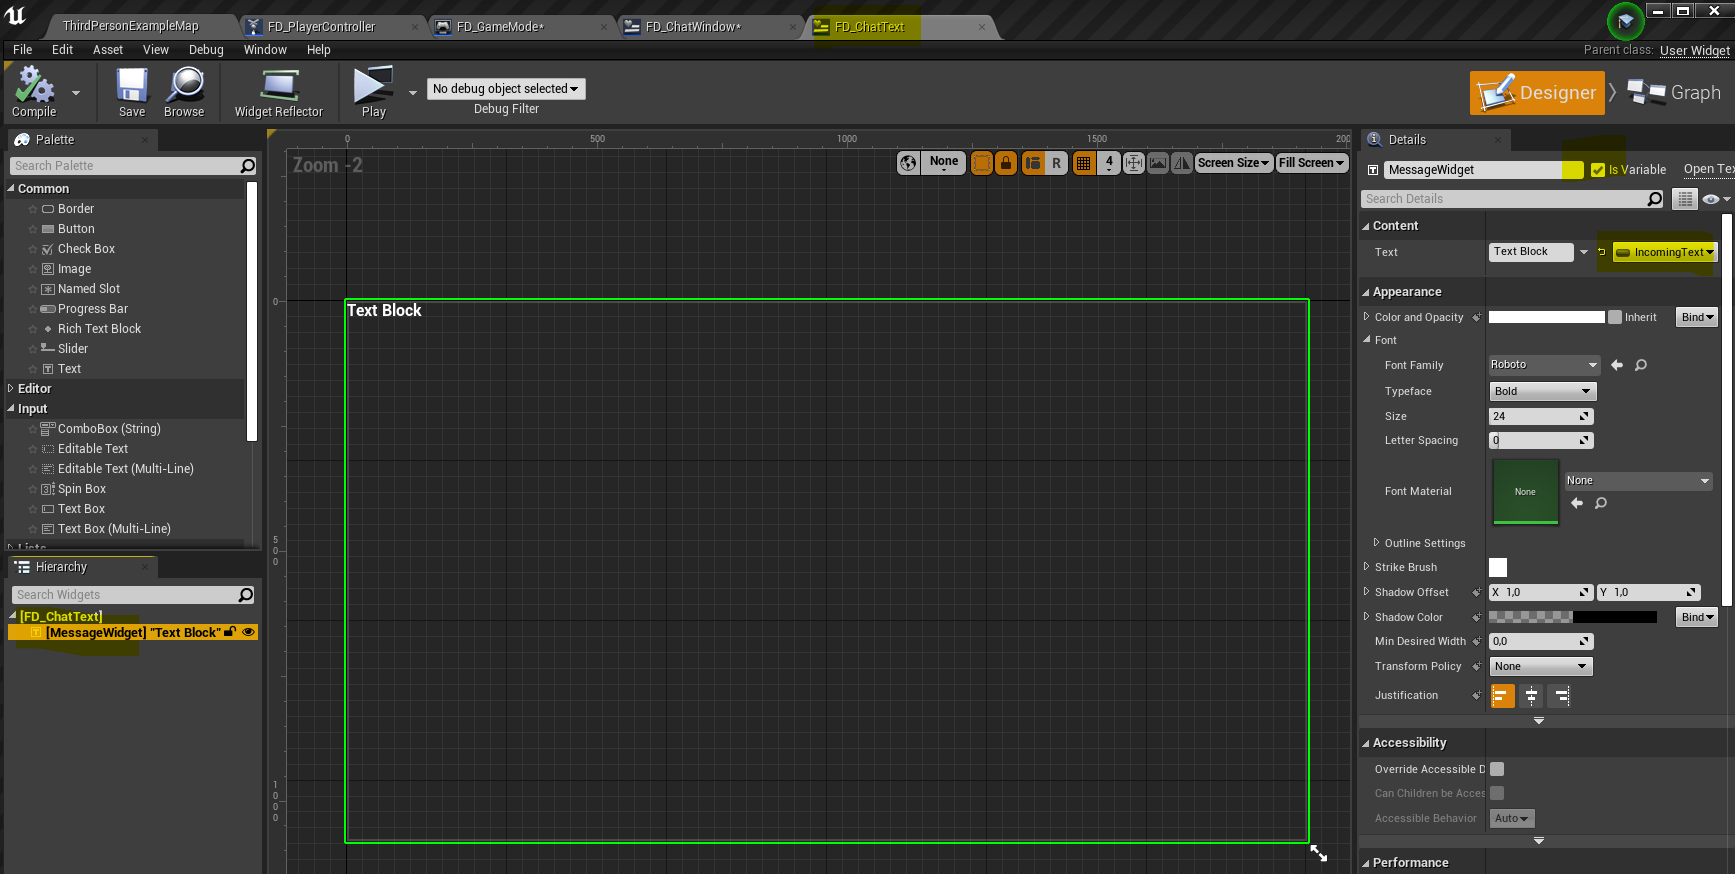
FD_ChatText
Step 2 Add FD_ChatWindow and chatbutton in MainMenu.


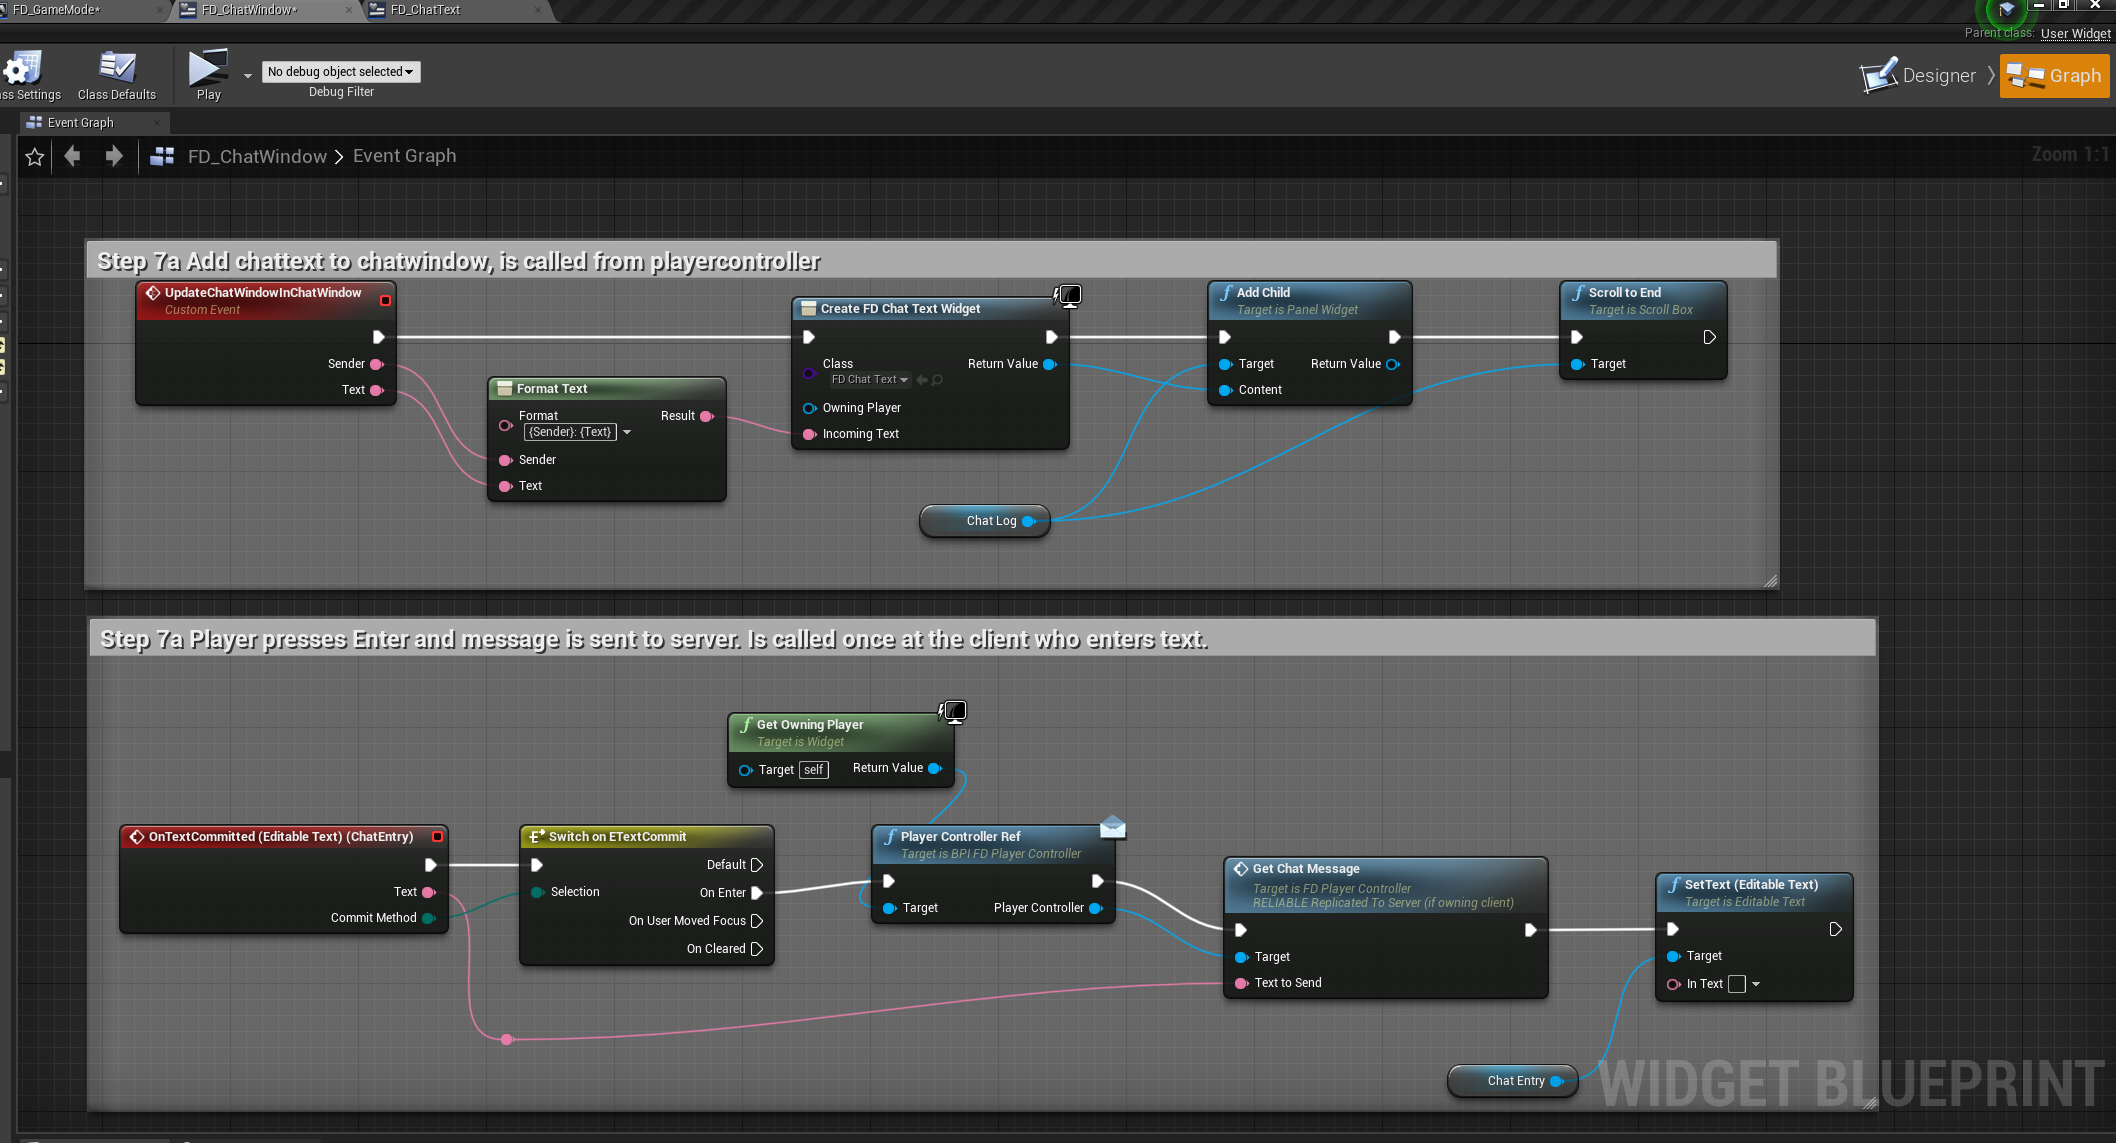
Step 3 : Blueprints FD_Chatwindow
You first have to make some events at the playercontroller
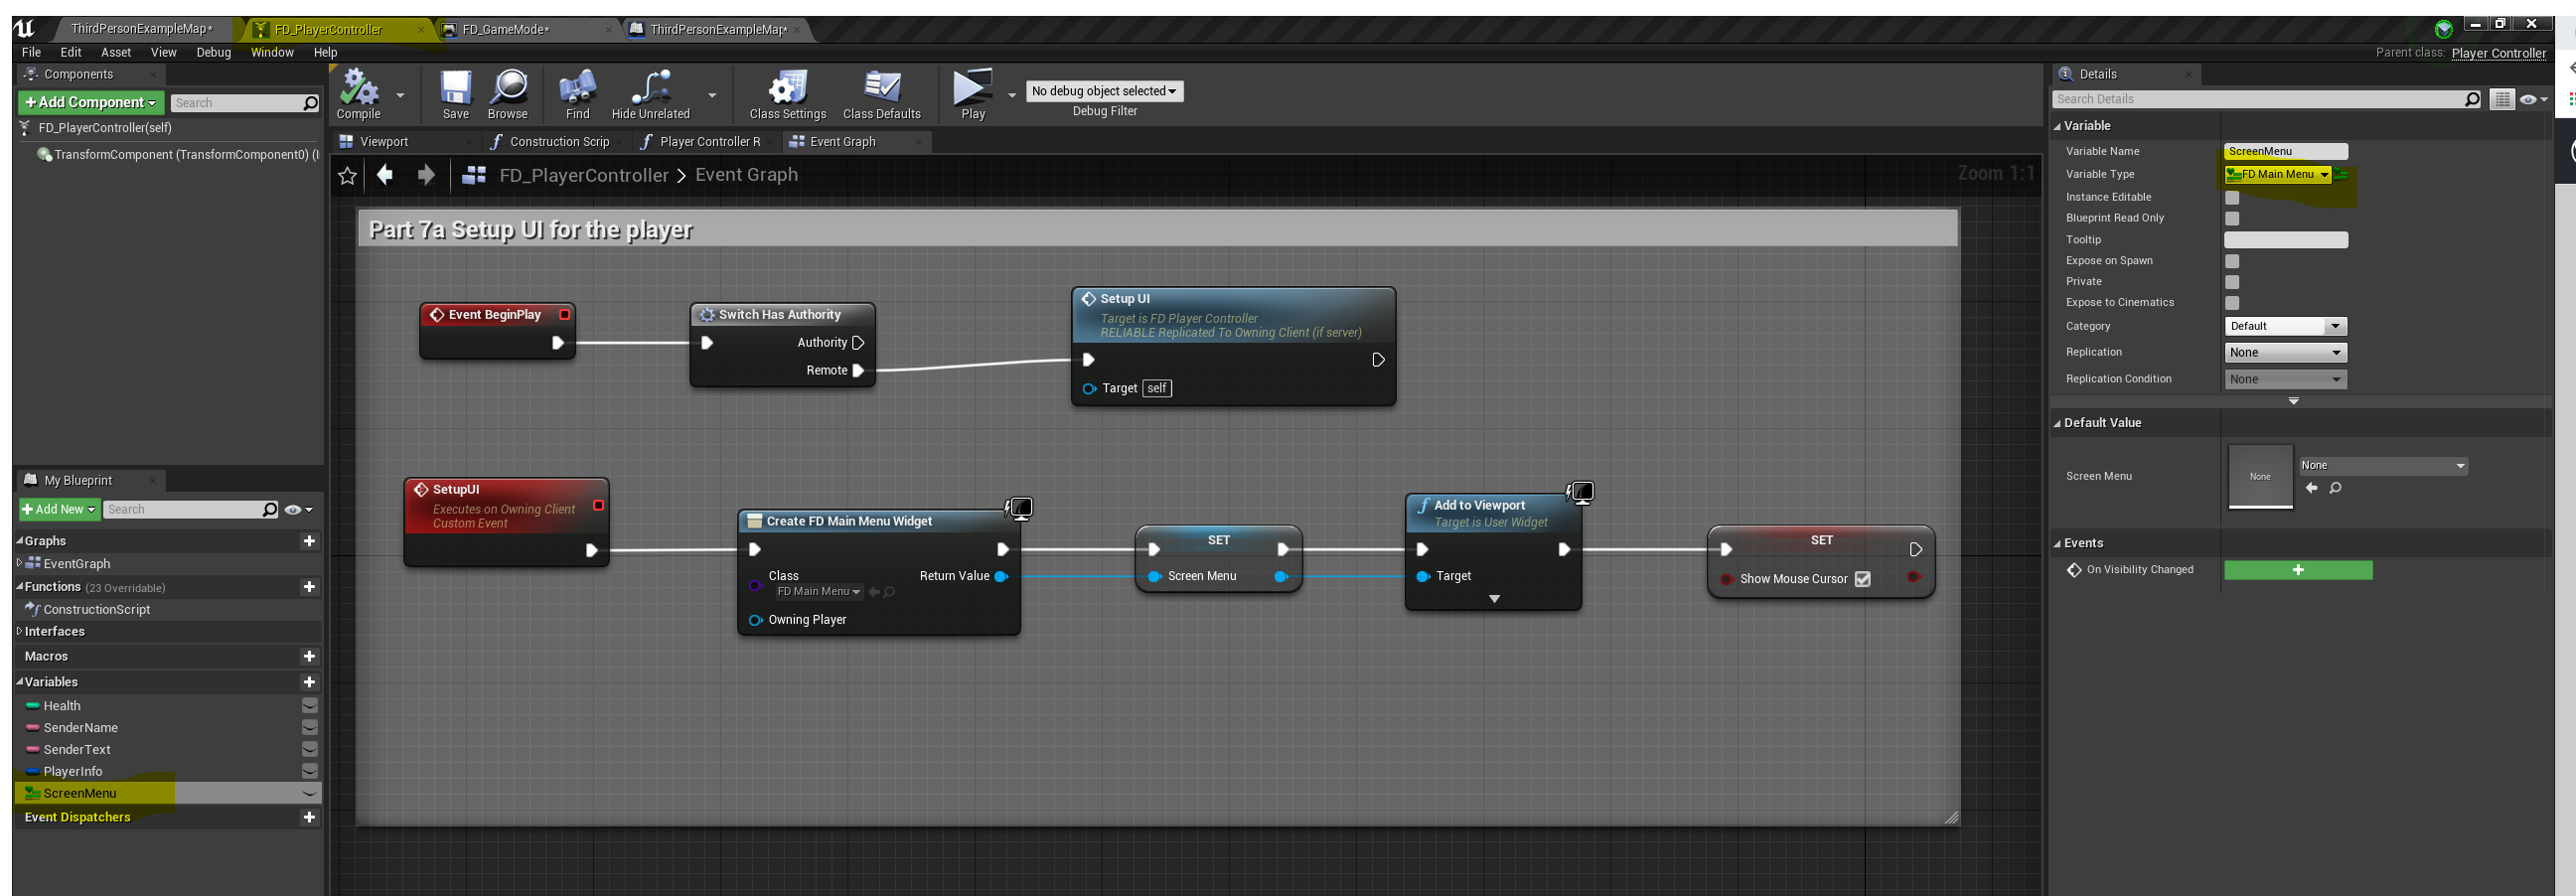
Step 4 : Add mainmenu in playercontroller, delete from gameinstance!

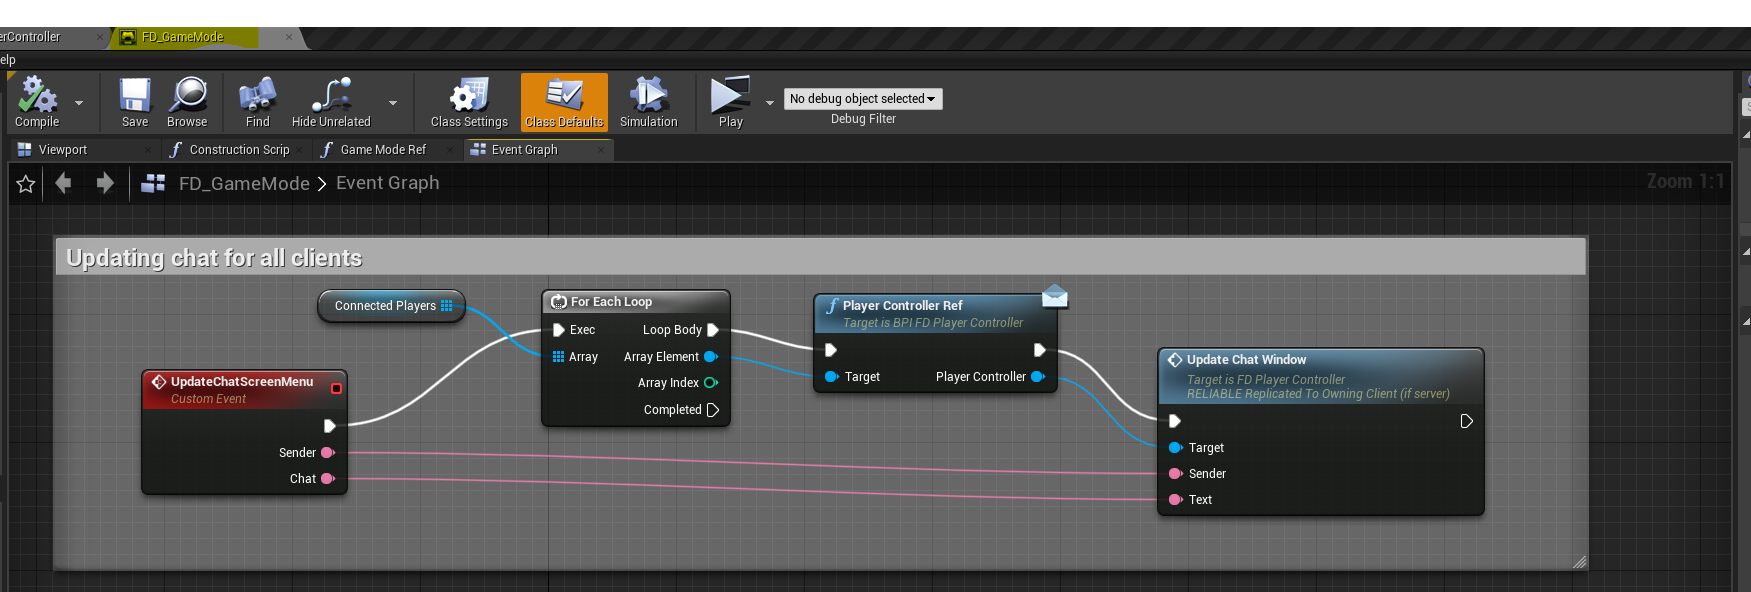
Step 5 : Gamemode
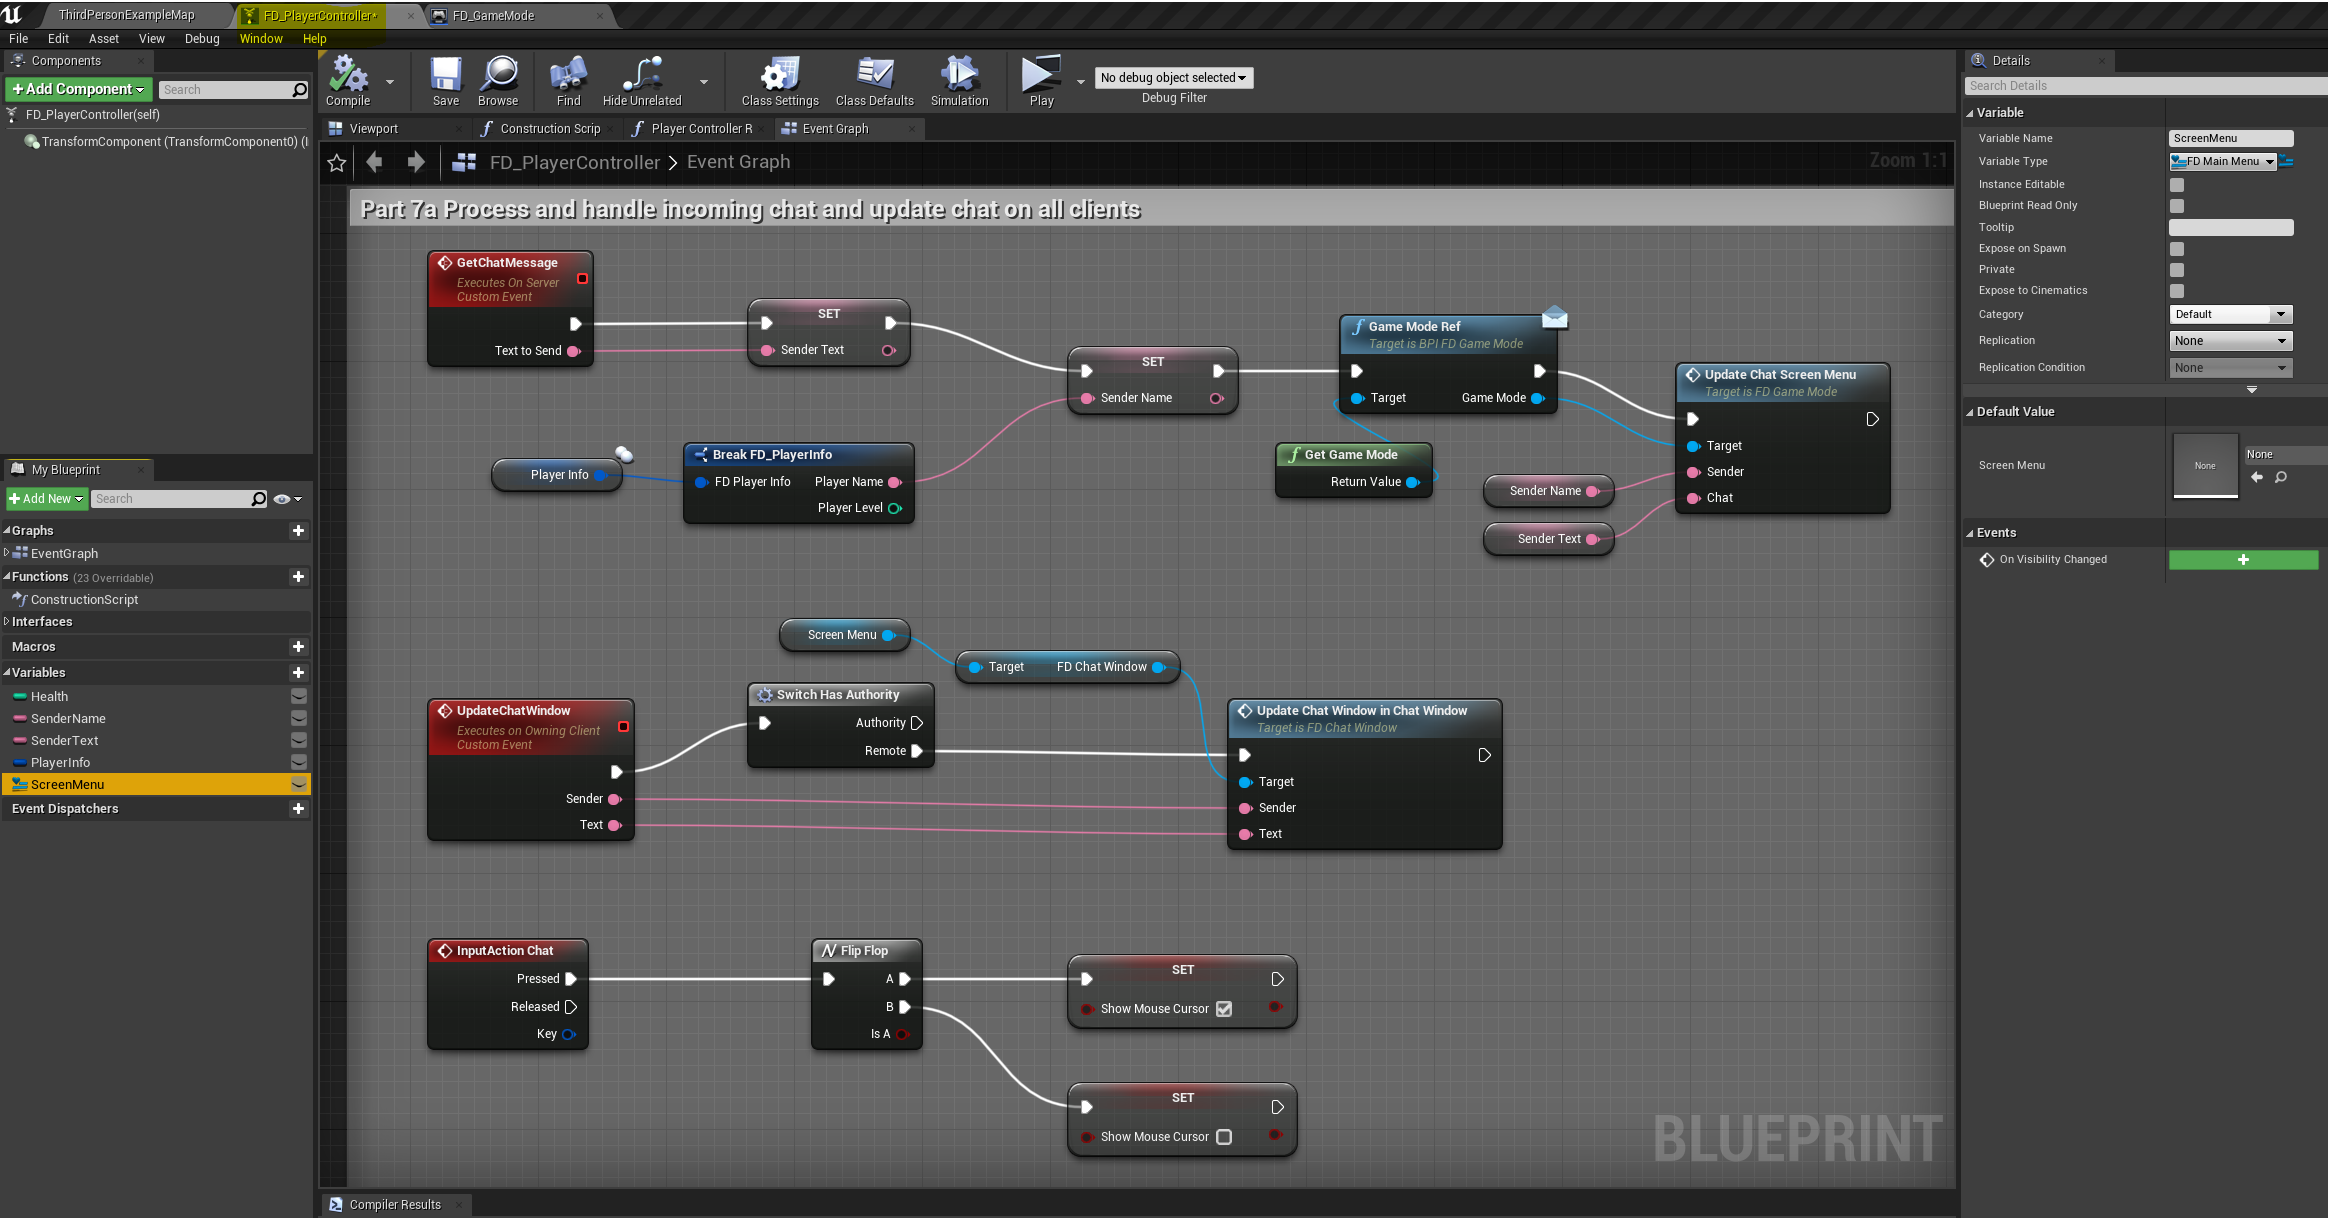
step 6 : Playercontroller
ProjectSettings > Input > add binding chat enter

Video explaining
Video demonstration chatbox
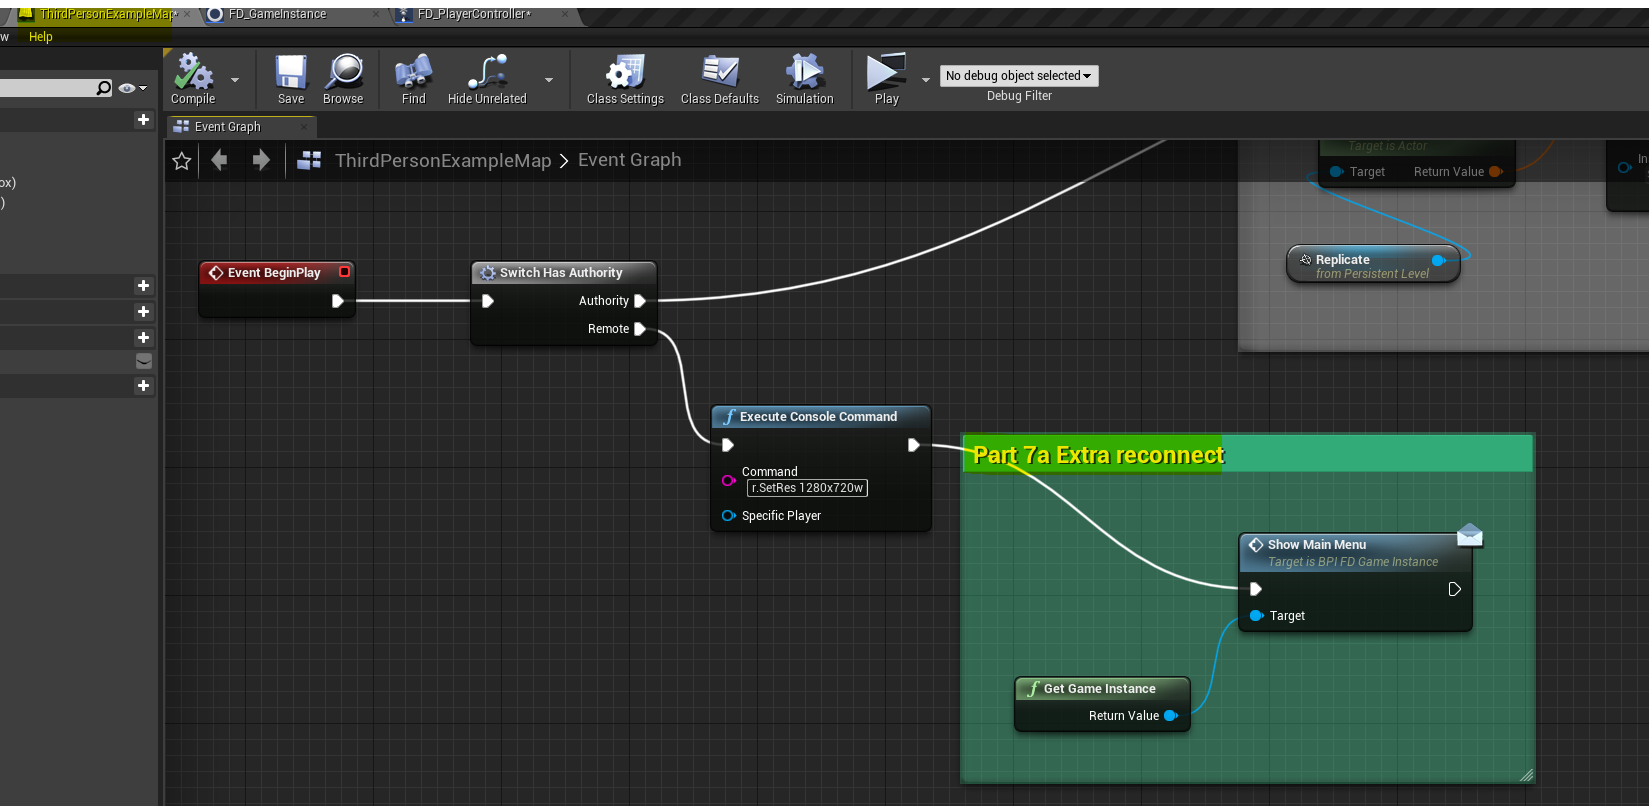
Extra : Adding the mainmenu through the gameinstance.
I did not like my solution, where I added the mainmenu widget in the playercontroller instead of from teh gaminstance. Ofcourse both solutions are correct, but I want to keep the menu widgets on the gameinstance. So I made the next corrections.
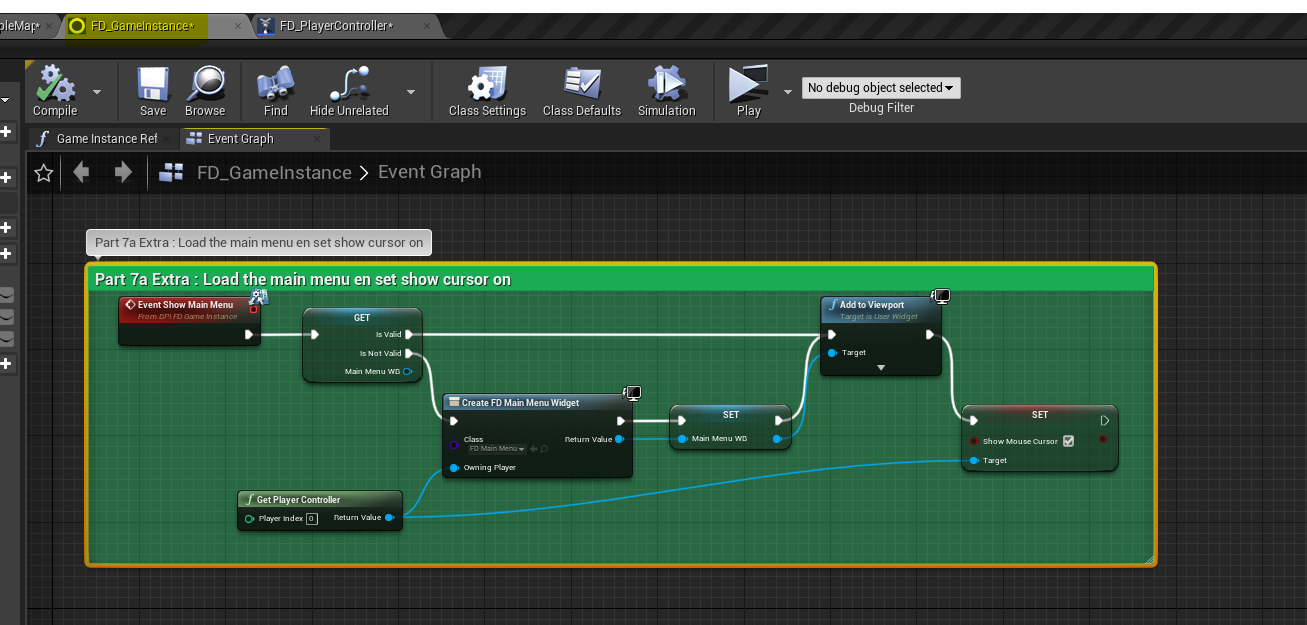
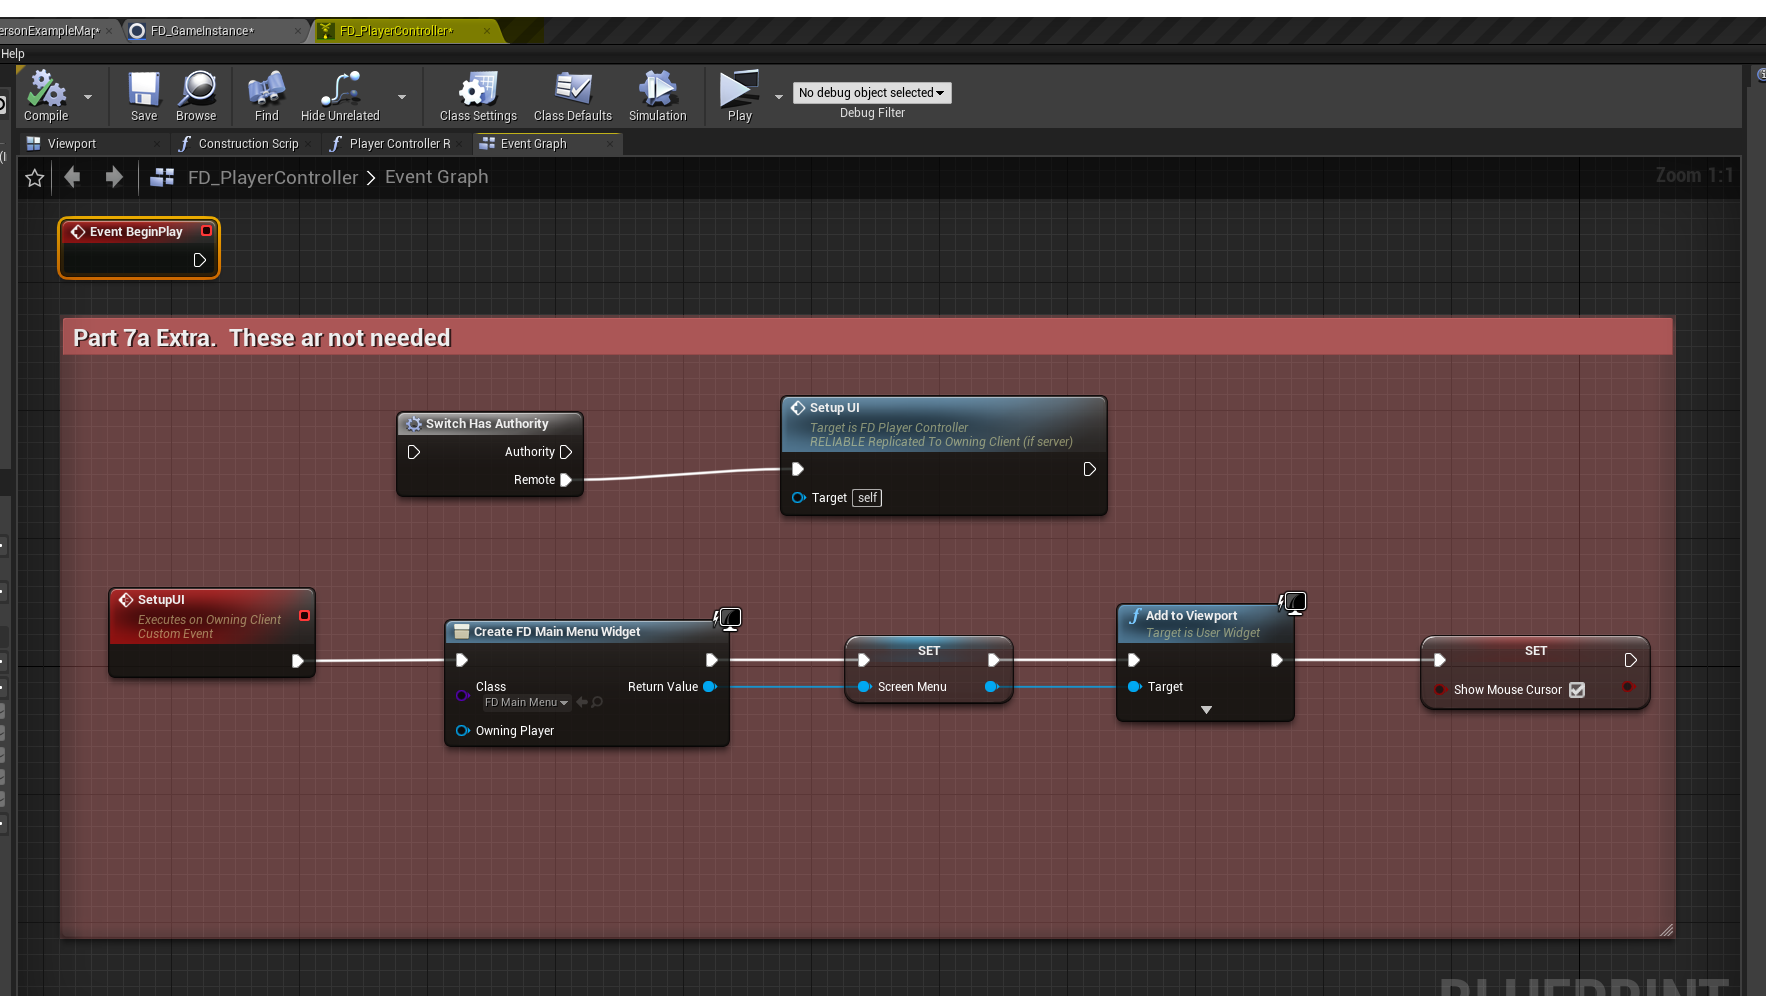
If you run, you will get the same result. In my opinion the second solution is more consistent with the idea to keep the menu’s on the gameinstance
So what did I learn? With focus on the dedicated server.
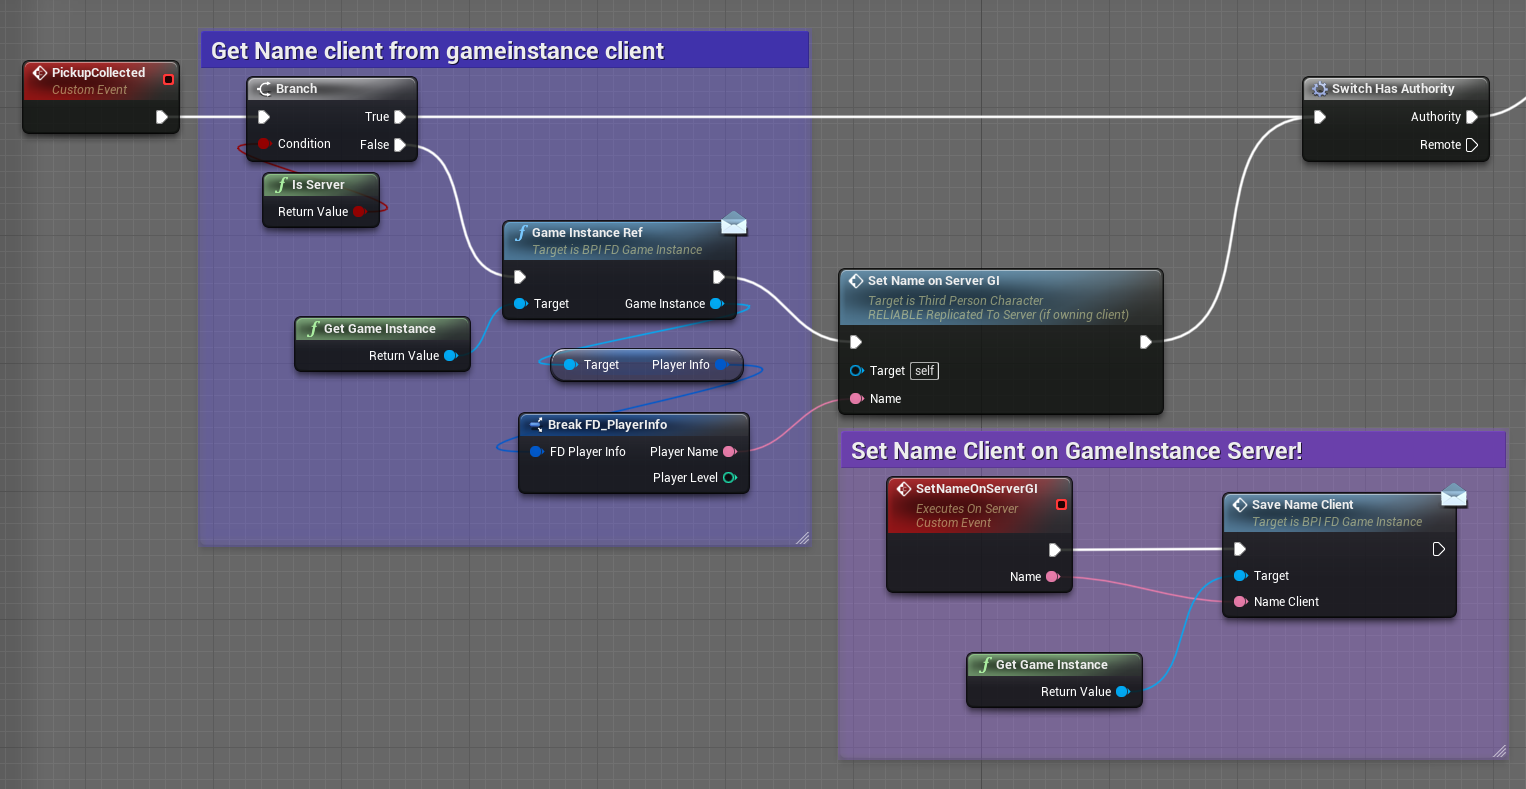
So the branch is set to client, but by using the event SetNameOnServerGI (runs on server) one gets access to the server anyway!!. Although the branch is set on client!!
Same when you set branch or switch to server, you can get access to the client by using an event which is “Runs on owning client”