Step 0 Having a dedicated server
It really is necessary to test on a dedicated server. Several times I did a test in the editor, but when I tested on a real dedicated server other things happened.
Some possibilities
1. Run a local dedicated server on your computer (local host).
This is most of the time my starting point.
2. Get access to a server of you company. I have access to a windows server of my university
3. Get a VPS form a commercial company for example Strato V20 . They are not that expensive. Choose a windows VPS. With linux you have to do a lot of extra compiling. I am not covering this.
You can use “Remote Desktop Connection” to connect to your VPS. This really is great. You are seeing and using windows on your VPS.
For example run CMD and ipconfig on your VPS to check the address of your server.
The unreal engine server needs port 7777 to communicate.
First you have open port 7777 in the firewall of your server
On your server, using your Remote Desktop Connection, search for
“Windows Defender Firewall with Advanced Security”
Add Inbound Rules and Outbound Rules for TCP 7777 en UDP 7777 ports.
Note: I am not sure if both TCP and UDP are necessary.
Note : Without the UDP port it won’t work!
Second: You also have to open the ports in de system of you provider which is controlling the VPS!
This is different for each provider. Strato has a tool called PLESK. You have to search for security and rules. If you don’t open port 7777 in this system, it won’t work.
Note: You have to reboot your VPS server to get the changes working
Note: You also have Gamelift and SpatialOS and others as very high end dedicated servers. I am going to start simple. In this tutorial maybe I will switch to SpatialOS.
Step 1 Building from source
Build UE 4.25.3. from source I used Visual Studio 2019!!
Make a C++ ThirdPersonProject
From part 5 I switched to 4.26.0
Step 2 Build the basic model according to https://docs.unrealengine.com/en-US/Gameplay/Networking/HowTo/DedicatedServers/index.html
Note: In the article the folder Maps from ThirdPersonCPP was moved to content. That did not work for me (got problems with packaging). So I did not moved the folder
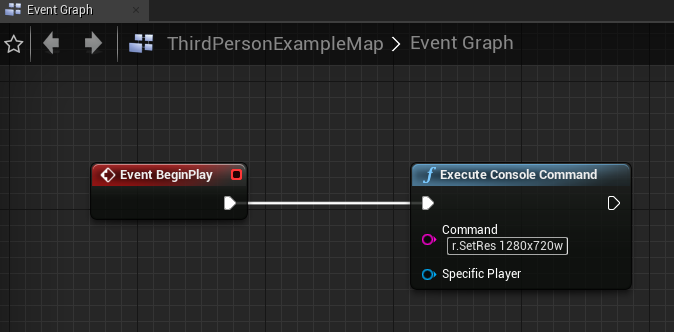
Step 3 To prevent to game to start fullscreen I added the next Blueprint to the Level Blueprint of the ThirdPersonExampleMap.
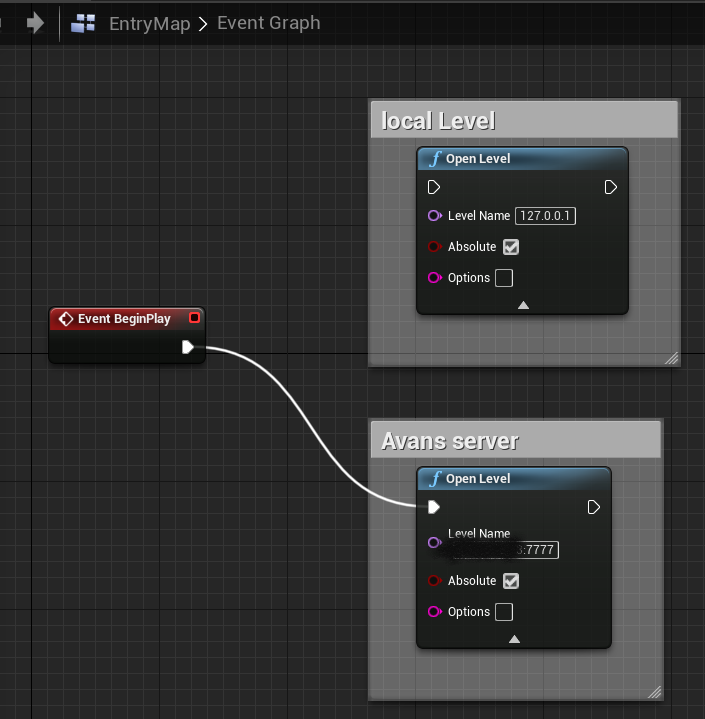
Step 4 Added a local Level with my server address