Esri CityEngine

Met deze tool kan je op basis van GIS 3d modellen van steden maken. Deze zijn vervolgens ook weer in Unreal in te lezen en in VR te bekijken

Je moet een account aanmaken bij de Nederlandse website van Esri. Deze is 22 dagen geldig. Ik had in eerste instantie een account aangemaakt bij de Amerikaanse website, maar kreeg toen in CityEngine geen toegang tot maaiveldhoogtes. Tip: gebruik niet Google of FB, dat geeft later problemen bij het inloggen in CityEngine. 

Vervolgens ga je CityEngine installeren. Er is een 30 dagen trail beschikbaar.

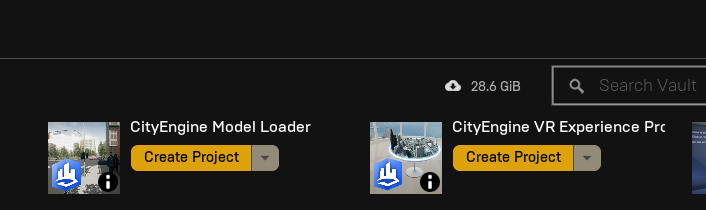
Voor het inlezen van CityEngine modellen zijn er 2 templates in Unreal Engine. Let op deze werken alleen bij Unreal versie 2.20 (Op dit moment nog niet bij versie 2.21). Kortom 2.20 zal je ook moeten installeren. De onderstaande template komen automatisch met het installeren van Unreal Studio.

CityEngine Templates

Hoe je met CityEngine moet werken ga ik hier niet uitleggen. Er zijn goede tutorials

Share Button

VR in Unreal Engine

Terug naar hoofdpagina

Dit zijn tutorials die ik niet gemaakt hebt, mijn tutorials staan op de hoofdpagina. Op deze pagina’s tutorials die volgens mij zinvol zijn. Hier en daar heb ik opmerkingen toegevoegd. 

Als aanvulling op onderstaande video, er is tegenwoordig een derde bril, de Windows Mixed Reality headsets . Deze worden ook door Unreal Engine ondersteund. 

Share Button

Importeren modellen in Unreal Engine

Terug naar hoofdpagina

Dit zijn tutorials die ik niet gemaakt hebt, mijn tutorials staan op de hoofdpagina. Op deze pagina’s tutorials die volgens mij zinvol zijn. Hier en daar heb ik opmerkingen toegevoegd. 

De ontwikkelingen gaan heel snel, zeker bij het omzetten van modellen naar Unreal Engine. Pas dus op dat je bij het zelf zoeken naar tutorials niet terecht komt bij verouderde versies waarin het omzetten een complex geheel is. 

Webinar importeren en verbeteren Revit model

Webinar met uitleg Unreal Studio: 

Ik kwam de volgende serie tutorials tegen waarbij Civil 3D en 3da max gecombineerd worden. Ik heb ze niet doorlopen, maar het ziet er mooi uit.

Share Button

Verbeteren modellen in Unreal Engine

Terug naar hoofdpagina

Knipperen verminderen, lichtsterke verminderen

Zon en wolken toevoegen:

Resultaat in VR:

Onderstaande tutorials heb  ik gemaakt, mijn tutorials staan op de hoofdpagina. Op deze pagina’s tutorials die volgens mij zinvol zijn. Hier en daar heb ik opmerkingen toegevoegd. 

Belangrijke en up to date bron is natuurlijk Unreal Studio zelf. Volgens mij moet je wel even inloggen. 

Als je echt helemaal los wilt gaan academy.unrealengine . Ook hiervoor moet je ingelogd zijn.

Unwrapping UV

Wat is een UV map?
Unwrapping UVs for Lightmaps in Unreal Engine
Working with UV Channels IN UE4.21

Zonlicht

Vanaf Unreal versie 4.21 is er de Geographically Accurate Sun Positioning.

Share Button

Waarom Unreal Engine

Terug naar hoofdpagina

Als het om BIM en VR gaat, dan heb je enerzijds plugins voor de tekensoftware zoals:

Zover ik het kan overzien, zijn het allemaal plugins waarvoor je moet betalen. En vraag ik mij af in hoeverre je extra functionaliteit kan toevoegen.

Anderzijds zijn er de game-engines. Met deze game engines worden top games gemaakt, maar deze tools worden ook steeds meer voor andere zaken ingezet zoals architectuur en animaties. De grafische mogelijkheden zijn top of the bill en de extra functionaliteit die je kan toevoegen is onbegrensd. Ze zijn ook gratis. Het gaat om

En waarom ik dan voor Unreal Engine kies? Ik denk dat het komt door Unreal Tournament, bij 20 jaar geleden speelde ik dat speel voor het eerst tegen één van mijn toen nog hele jonge zoontjes en werd ik door hem afgeslacht. 

Algemeen filmpje Unreal Engine. Ja Fortnite is gemaakt met Unreal Engine :

Korte impressie importeren Revit in Unreal Engine :

Voorbeeld importeren vanuit Revit

Lijst met features https://www.unrealengine.com/en-US/studio/features

Voorbeeld van een woning in VR

https://www.youtube.com/watch?v=opjupX1zGxQ

Voorbeelden architectuur

Onderstaande filmpje is van 2015. Unreal kondigde aan gratis (onder voorwaarden)  te zijn en kan omgaan met enorme werelden.

Share Button

Getting en creating assets

Creating assets from with pictures. Meshroom

To optimise your asset, you could use Proxy Geometry Tool?

Share Button

Optimisation tutorials general

Merge meshes

Culling

LOD / HLOD

Culling methods

Share Button

Vectors

Tutorials and notes on vectors

Documentation vectors

Documentation splines

Documentation transforms

Documentation transformation

Documentation Spline Mesh

Set end offset

Share Button

Tutorial Lighting

Share Button

FD_Surfacewater

Basic commands in editor

Material M_FD_Surfacewater

I have been rewriting this part completely new in C++. So at the moment a lot of the following is out of date.

  • Culvert at dike
    To discharge water from island to sea
  • Pumping station with pipes
    To discharge water from island to sea
  • Ditches
  • Discharge water to Pumping-station of culvert at dike
  • Weirs
    To control waterlevel ditch
  • Culvert in ditch
    When ditch has to cross road
  • Lakes / surface water
    For storage of surplus of rainfall
  • Sewer pipe
  • Storage settling basin (BBB)

The dynamic water system on land is programmed as a blueprint.
FD_Surfacewater contains both the logic and the assets of the water system. The backbone of the FD_Surfacewater  is a spline with points. The points represent a change in the water system, for example: input discharge, different structure (pipe, channel, weir..), different dimension. So each point (=Node) is connected with the database WaterSystemData. So in between 2 points (=branch) of the backbone spline, everything is the same, based on the information of the downstream point.. Spline and point represent the bedlevel of the structure.
Index 0 spline is downstream

Al the programming is done in the so called construction script. This is a cool feature of Unreal Engine.  Al programmed calculations can be done in the editor. It is for example not necessary to run the game, to see what waterlevels will occur. They are already calculated in the editor.

Formulas used for calculation water levels

Some general Notes:

  • The basis of the watersystem is a spline. Between 2 nodes the structure is the same. The location of the spline is the bedlevel.
  • FD_Surfacewater  is one line with no branches and has a fixed direction of flow.
  • A dendritic system is possible, because the 3D world may contain different FD_Surfacewater  which are connected at points. When calculation a dendritic system the sequence of making calculations is important.
  • Strategy for calculating the water-system.We assume a stationary flow. So new calculations are only made when changes are made to the water-system. In the future calculations will be made per time-step and change in storage will also be taken into account.
    Link to page with formulas used
  • To get access to the information, or to change information menu are used.
    Link to page Navigation
  • Internal Unreal uses centimeters, the
    FD_Surfacewater uses m
  • Backbone of FD_Surfacewater is the WaterDataStruct which stores all data (also calculated data) for each branch.

Connect side branches

  • Information on side branch is stored in [ConnectionLeft] and/or [ConnectionRight]
  • In FD_GameMode: FD_WaterSystemsref and FD_WatersystemName. Note This does not work in constructionscript ? So it should be a separate function in the constructionscript.
  • New function Find_Side_Branches
  • Changed variable InputDischarge to a 2dvector. x = de input branch, y is the input from sidebranches

Design Manhole / Sewer

  • If 2 pipes don’t have the same bedlevels, the difference in height is stored in With_Diameter_m.y. Adding this height is only applied the x downstreampoint
  • Manhole is not a separate branch, but is generated when 2 culvert pipes branches connect.
  • The check on manhole is made when type is culvert. If type_down also is a culvert, a manhole can be added.
  • Switch to add manhole is :
    When diameter pipes is different, manhole is added automatically
    When diameter pipes are the same, the following switch is used.
    Slope X = 1 add manhole, Slope X = 0 no manhole  
  • A Boolean variable Manhole  is defined.
  • Manhole is always a rectangle, with max 4 pipes connected.  So 2 other BP_watersytems could be connected to the manhole.
  • Alle dimensions in m
  • When function manhole is activated the following information is defined:
    – bedlevel, based on 4 connections
    – D1, D2 (left), D3, D4(right)
    – Width manhole based on D1 and D4.  Width = Max D1 / D3 + 0,6 m
    – Length manhole based on D2 en D4. Length = Max D2 / D4 + 0,6 m
    – Length manhole / 2 = reduction length (m)
    – Surfacelevel is de highest surfacelevelworld of the 4 connections
  • Manhole is activated before the pipe is drawn. This because the reduction length.
  • Information from the array is also necessary for the Reduction Length for ending and starting pipe.

Design weir

  • Exists of 3 parts, left – middle (=crest) – left
  • Width_Diameter_m.x = width weir.
  • Width_Diameter_m.y = width sides

Blueprints used:

Share Button