According to documentation: The GameState exists on the server and the clients, so the server can use replicated variables on the GameState to keep all clients up-to-date on data about the game. Information that is of interest to all players and spectators, but isn’t associated with any one specific player, is ideal for GameState replication. As an example, a baseball game could replicate each team’s score and the current inning via the GameState.
https://docs.unrealengine.com/en-US/API/Runtime/Engine/GameFramework/AGameState/index.html
According to documentation: A PlayerState will exist for every player connected to the game on both the server and the clients. This class can be used for replicated properties that all clients, not just the owning client, are interested in, such as the individual player’s current score in a free-for-all game. Like the PlayerController, they are associated with individual Pawns, and are not destroyed and respawned when the Pawn is.
https://docs.unrealengine.com/en-US/API/Runtime/Engine/GameFramework/APlayerState/index.html
For this part I will make a little game : Collecting coins.
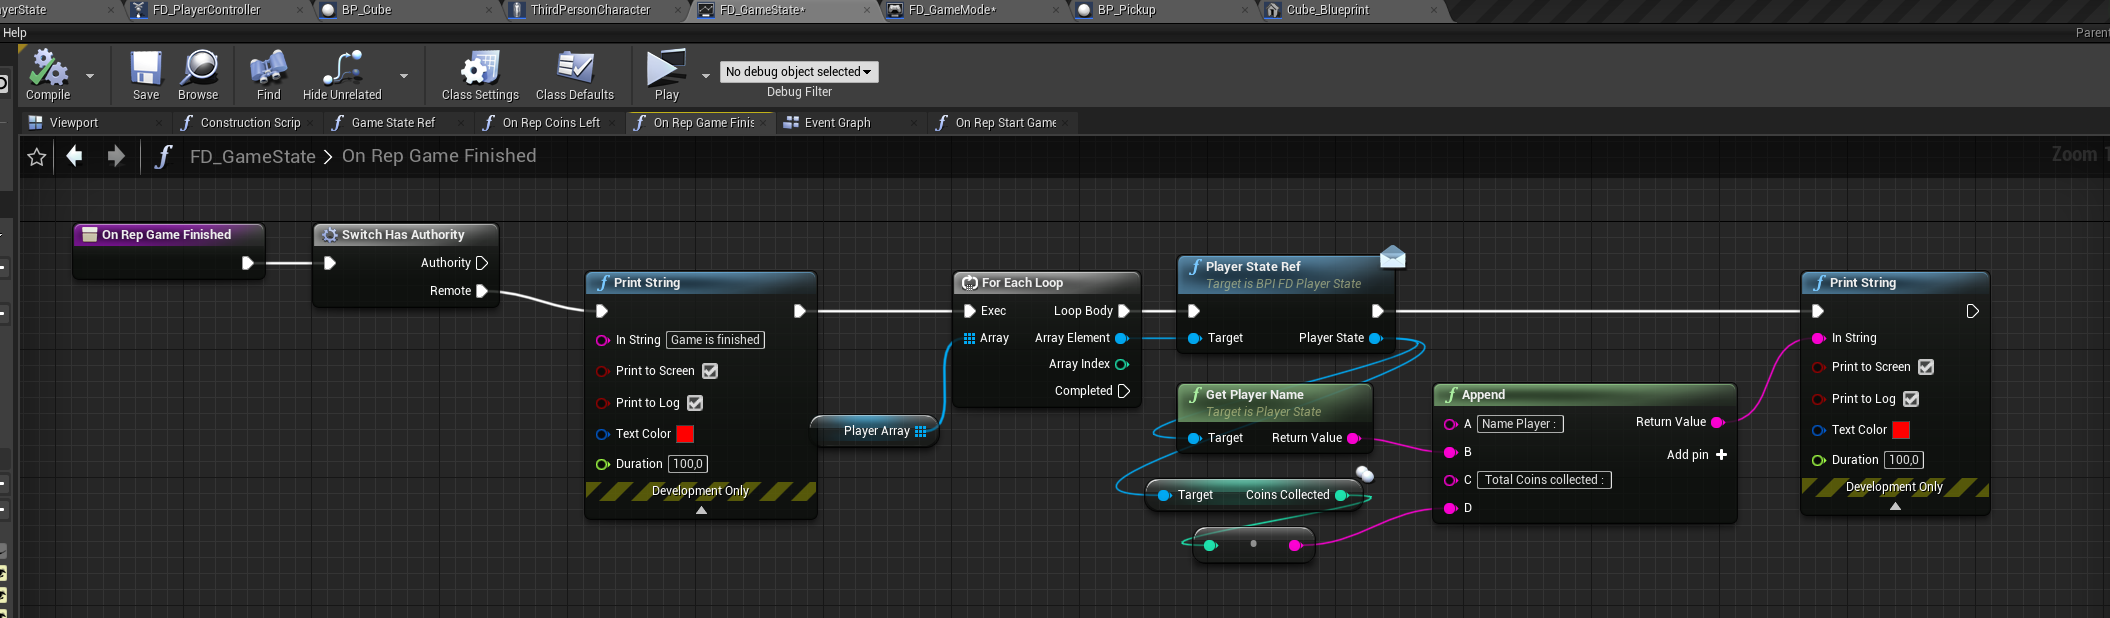
At the start there are for example 1000 coins in the bank. Each player can collected coins. When there are no coins left in the bank, the game is finished. Each client gets a message showing the coins collected by each player.
Although it looks a bit overdone for such a small game, I used gamemode, gamestate and playerstate:
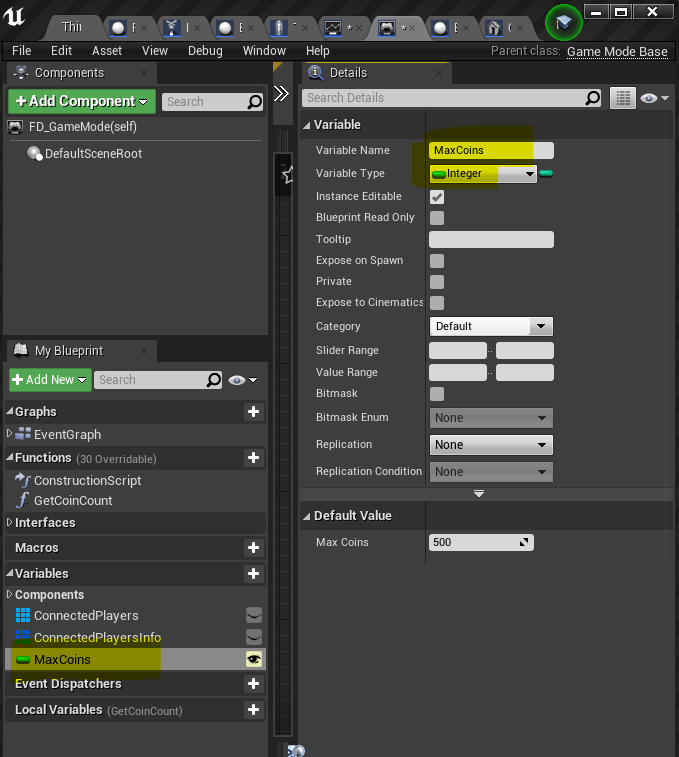
- Gamemode : Setting the max coins in the bank (1000)
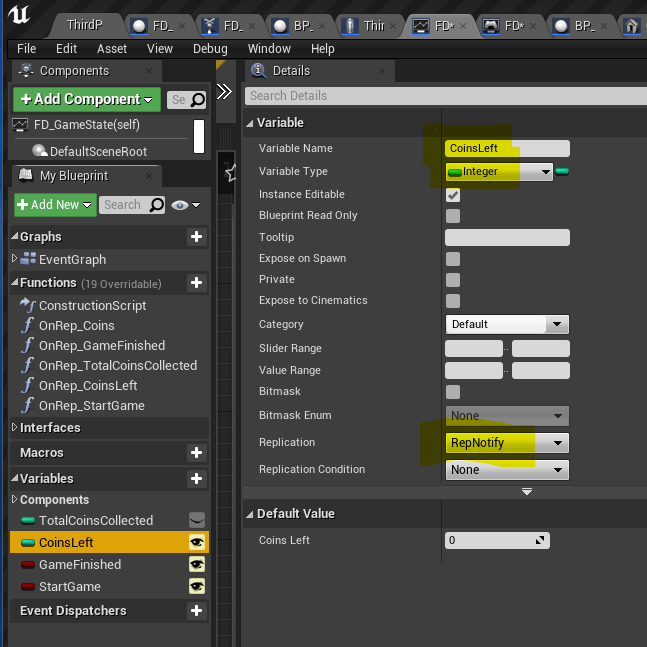
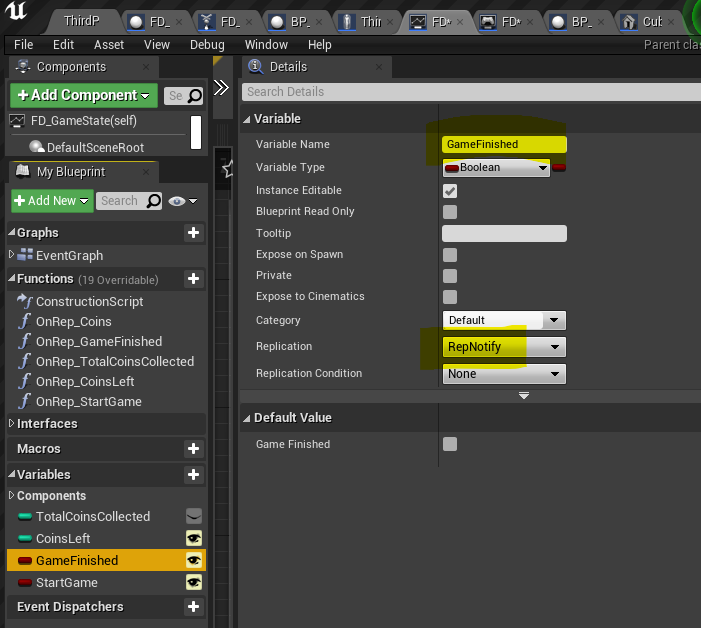
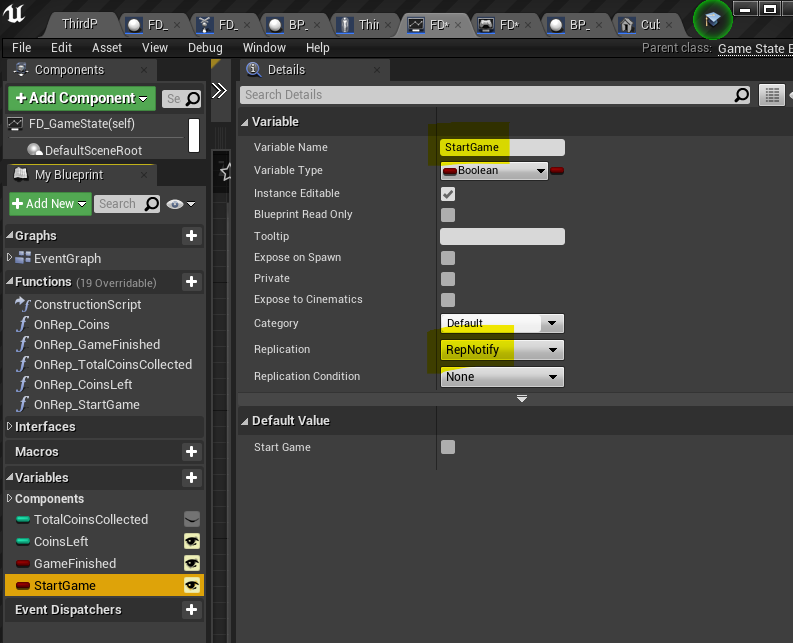
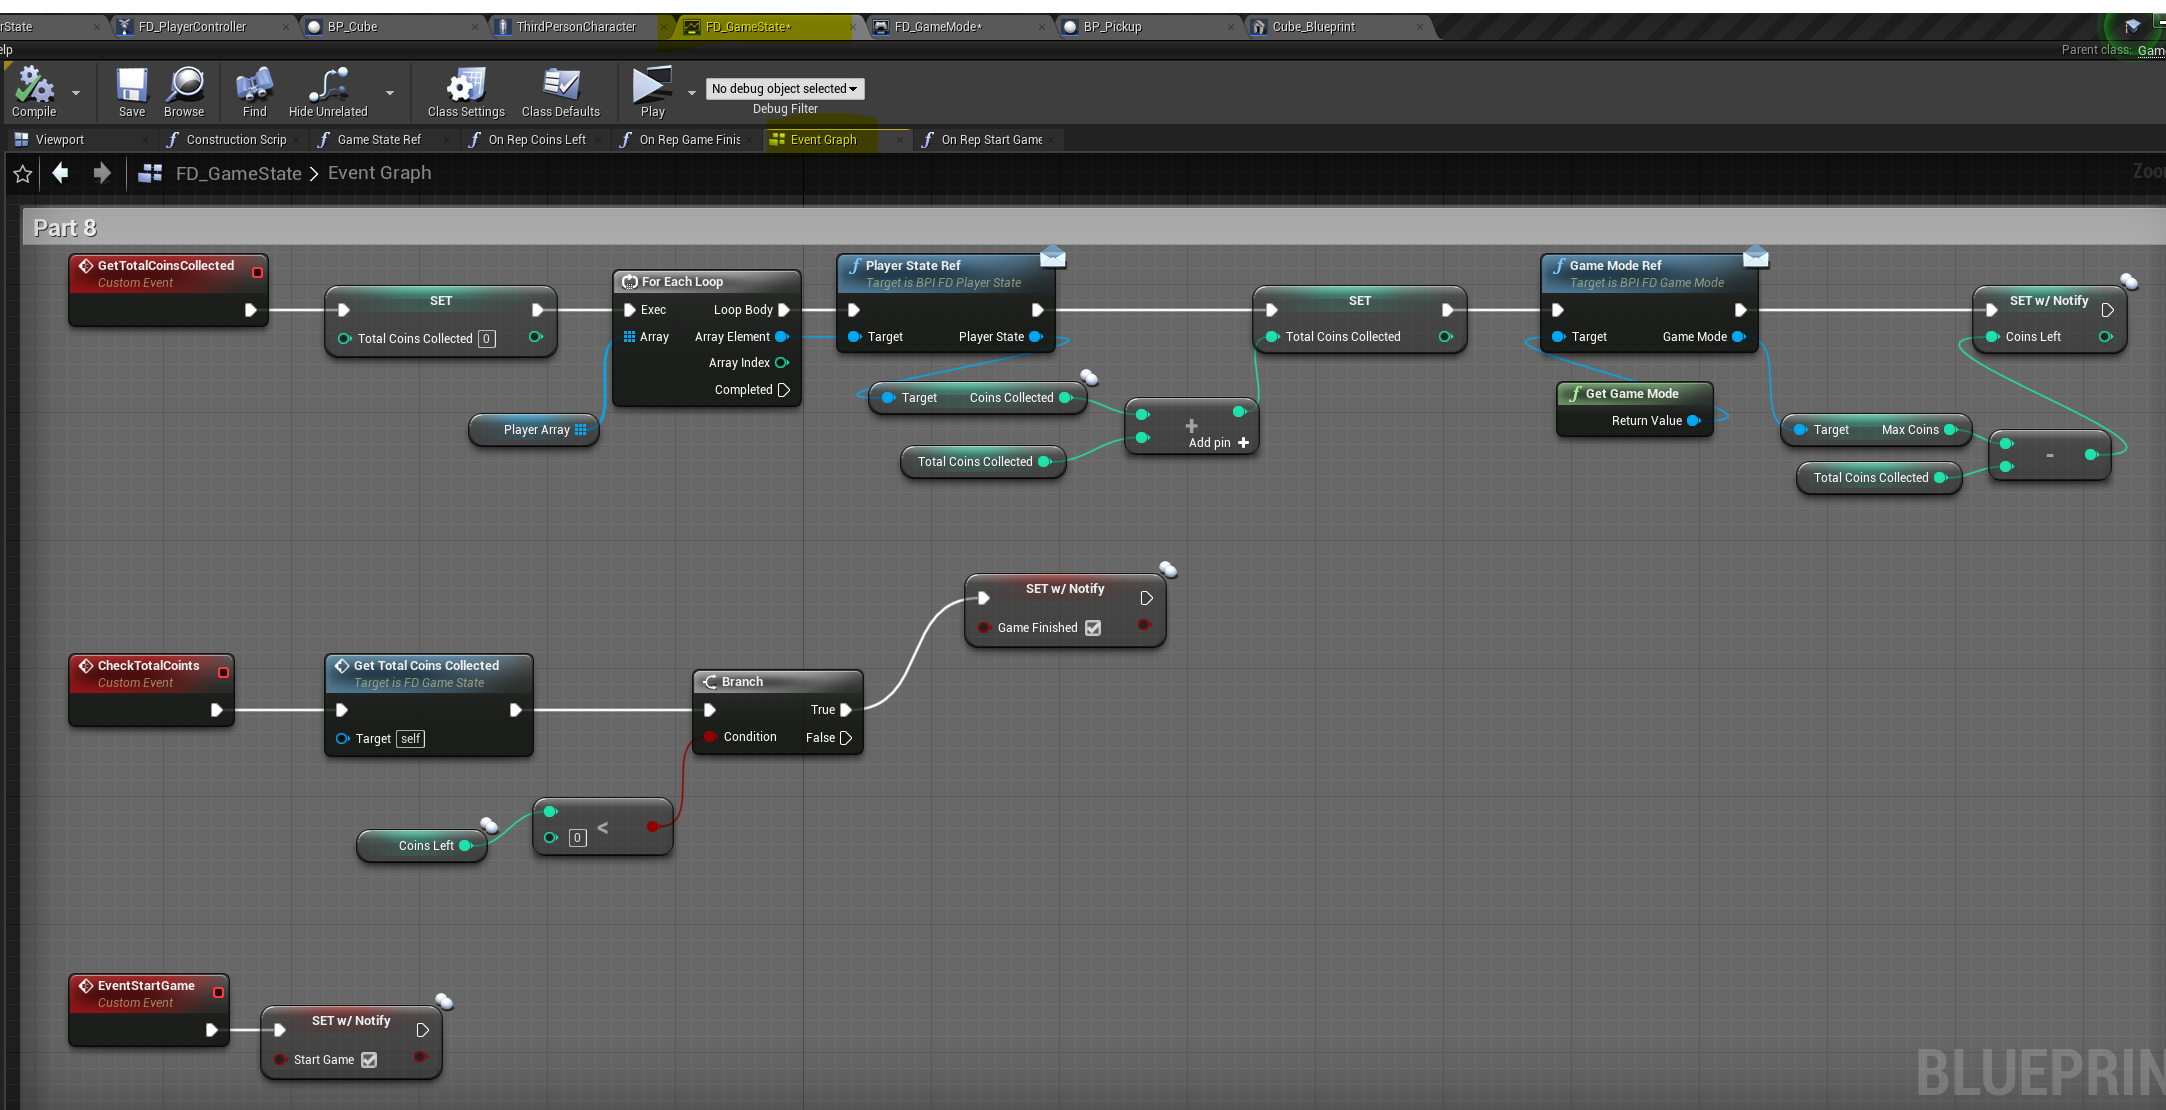
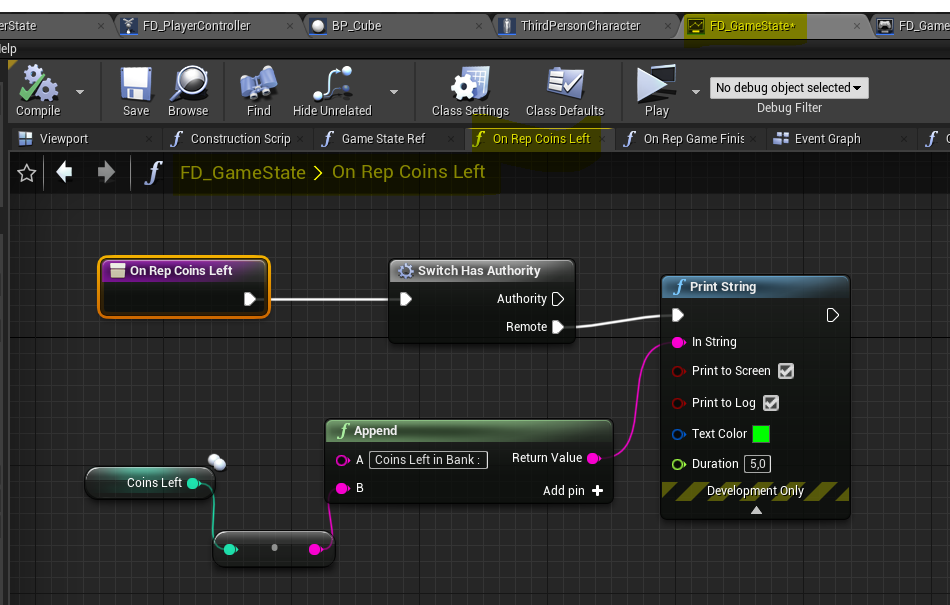
- Gamestate : Calculating collected coins by players and check if coins in bank are finished.
- Playerstate : Tracking number of coins collected by player.
- Playercontroller : used for connecting menu widget with gamestate and playerstate.
In the next screenshots I show the final blueprints, when building you most likely need to go back and forth.
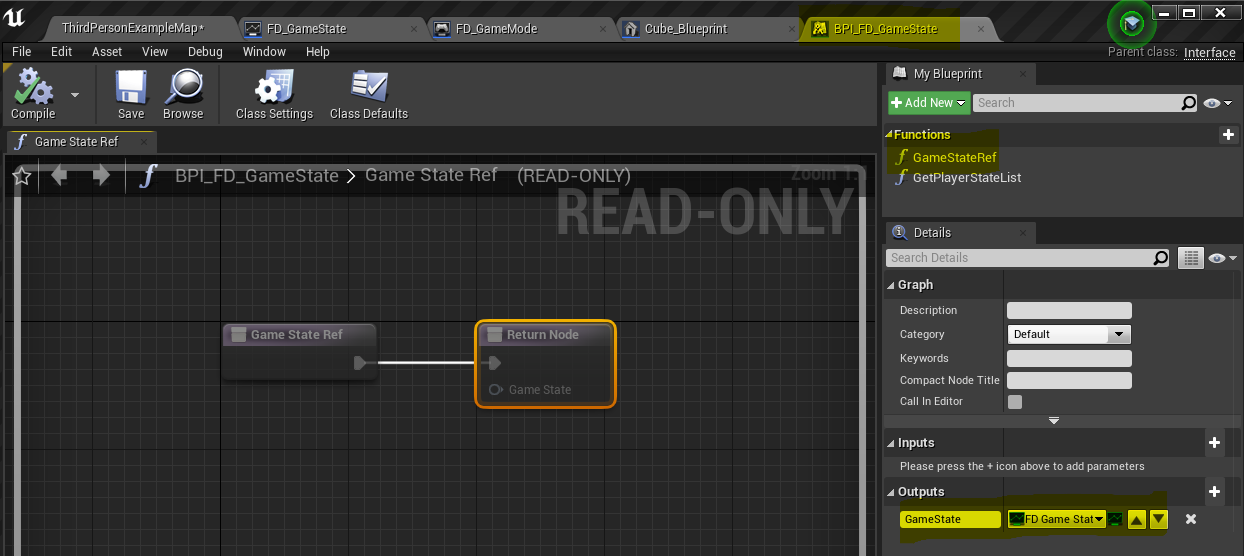
Note: I only used the interface of gamestate and playerstate to get a reference.
I should have used more functions going through the interface.
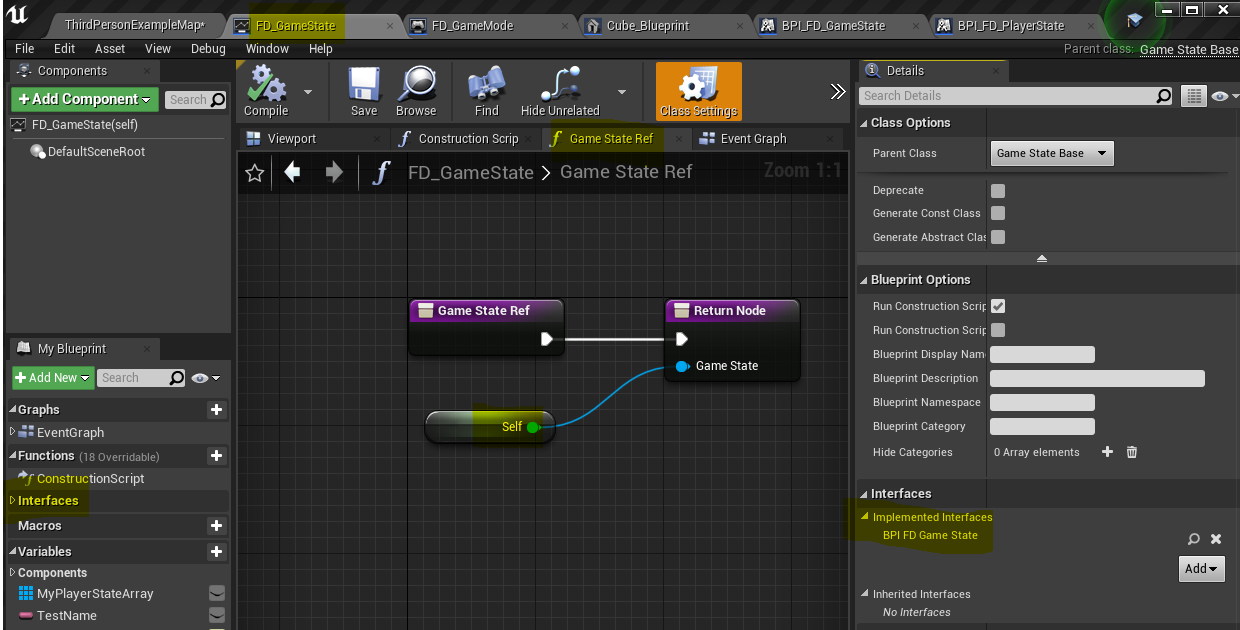
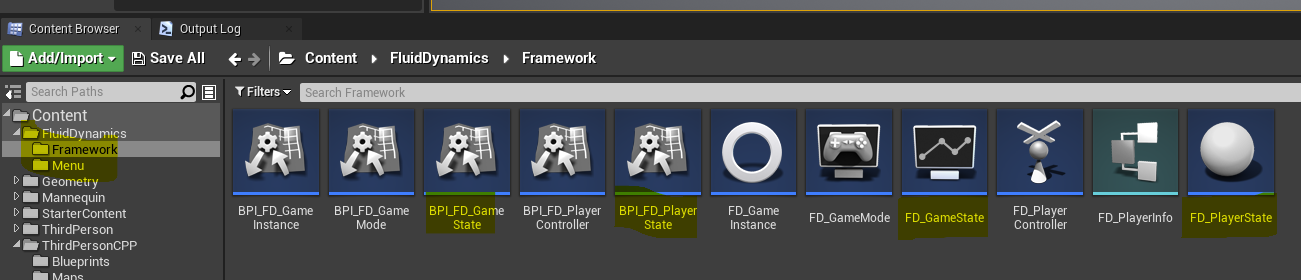
Step 1 Create Gamestate, create interface, create reference

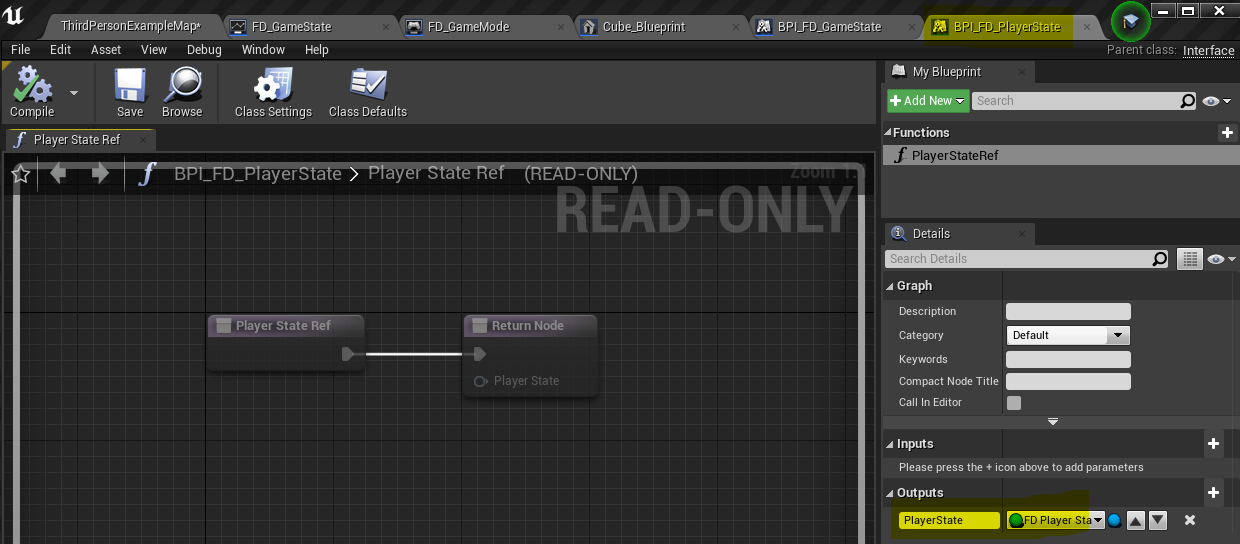
Step 2 Create PlayerState, create interface, create reference
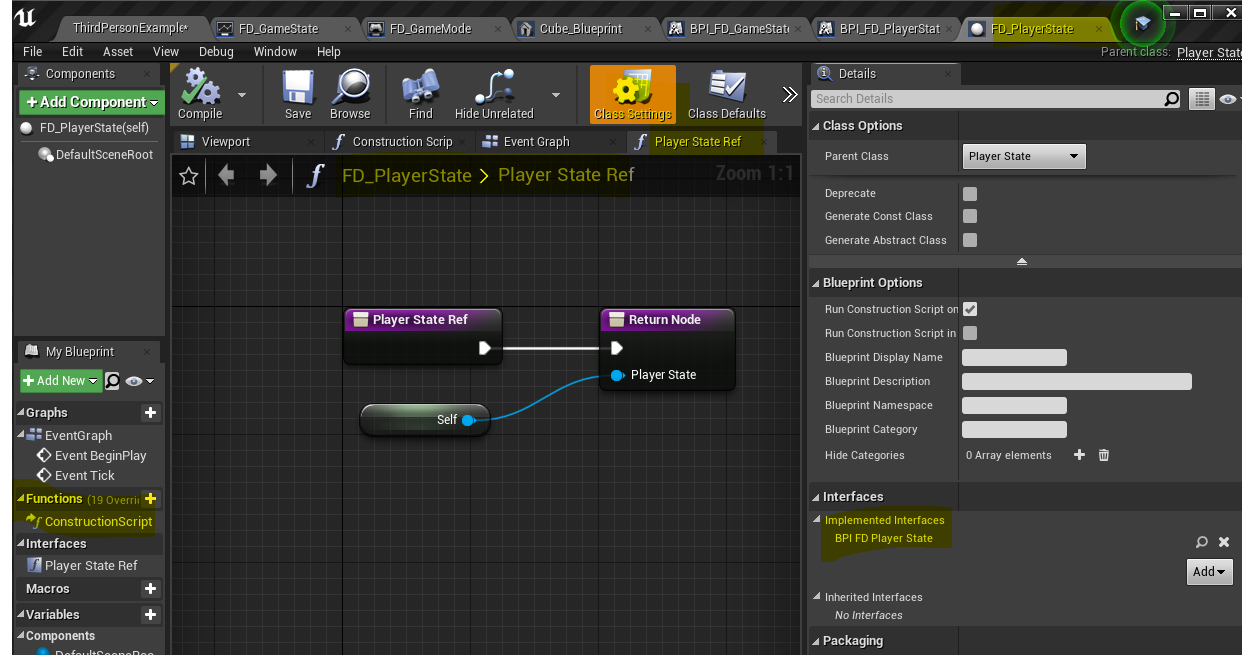
Step 3 Add Gamestate and Playerstate to you gamemode!!
At first I had forgotten to do this 🙁

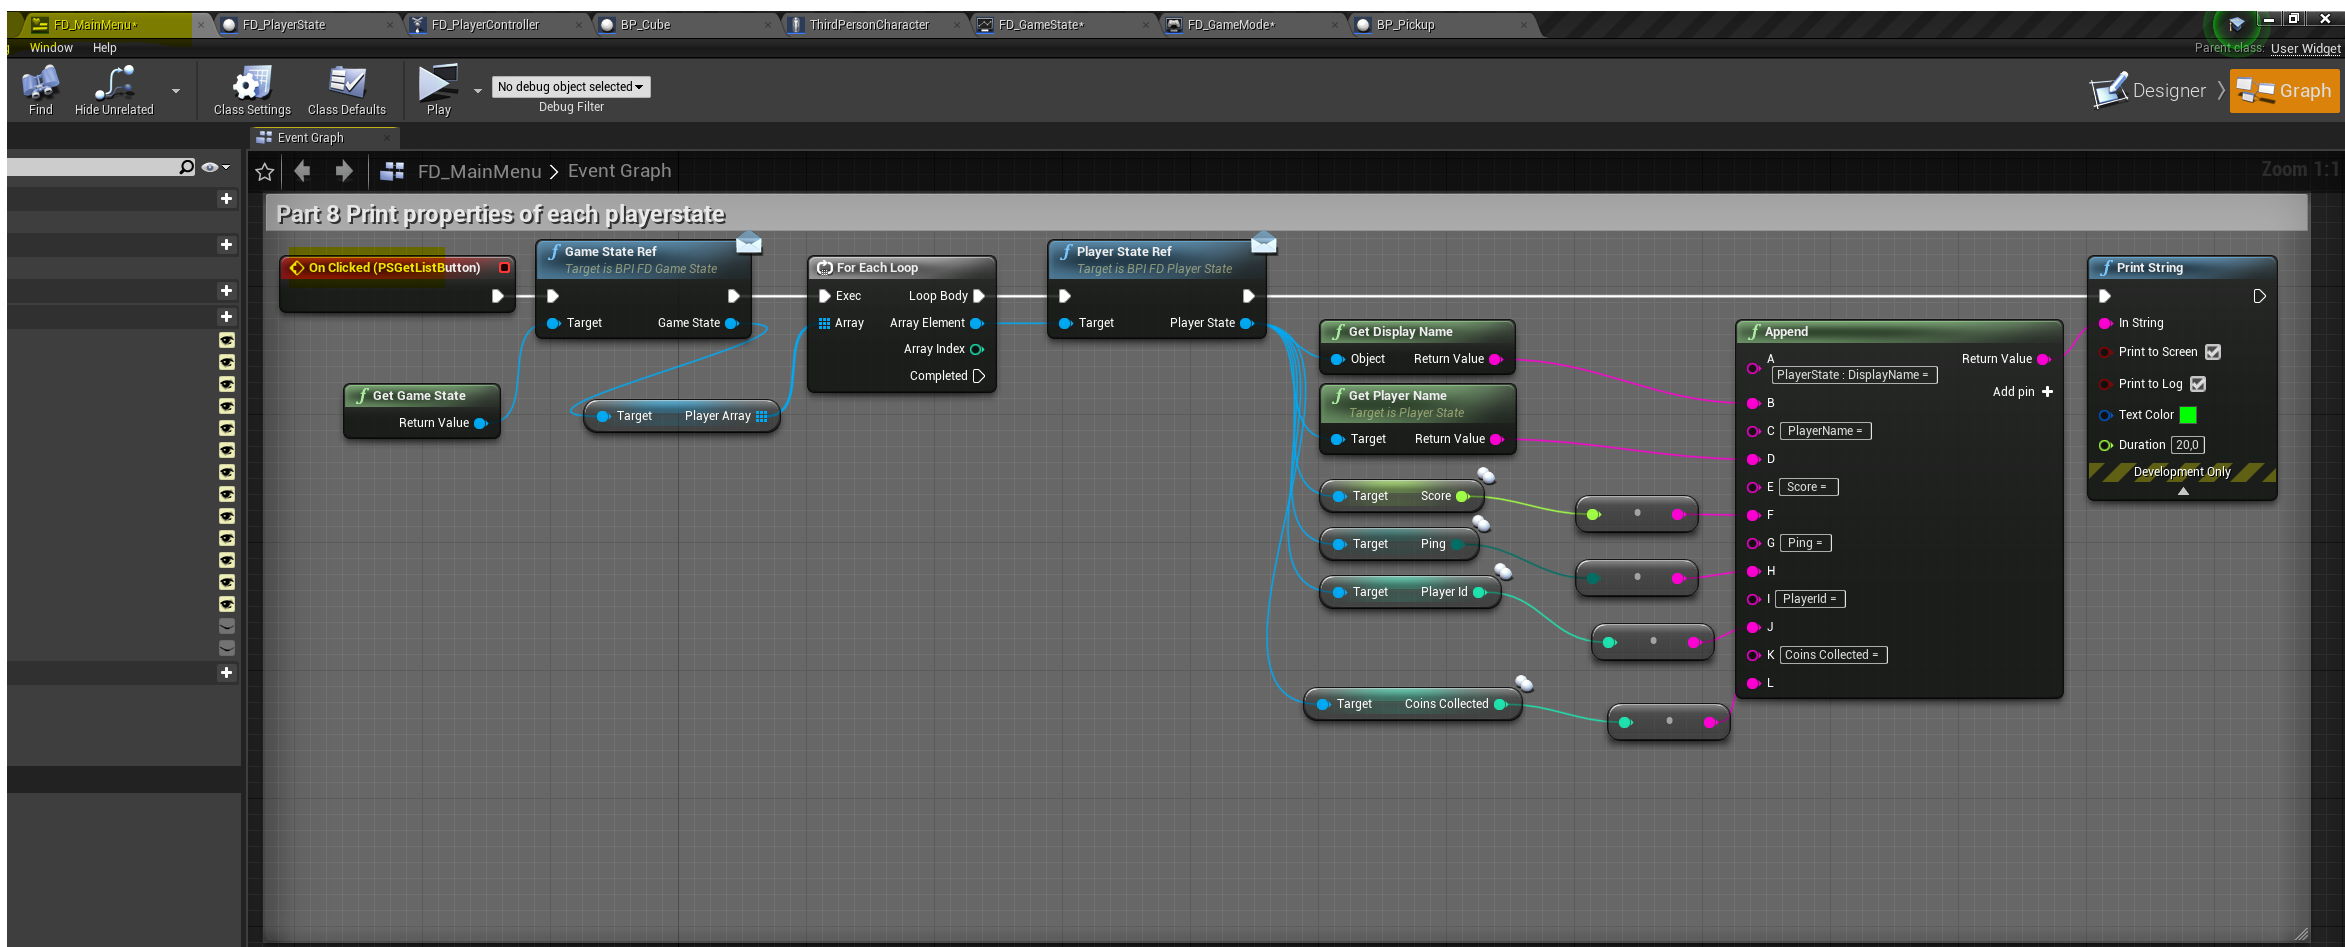
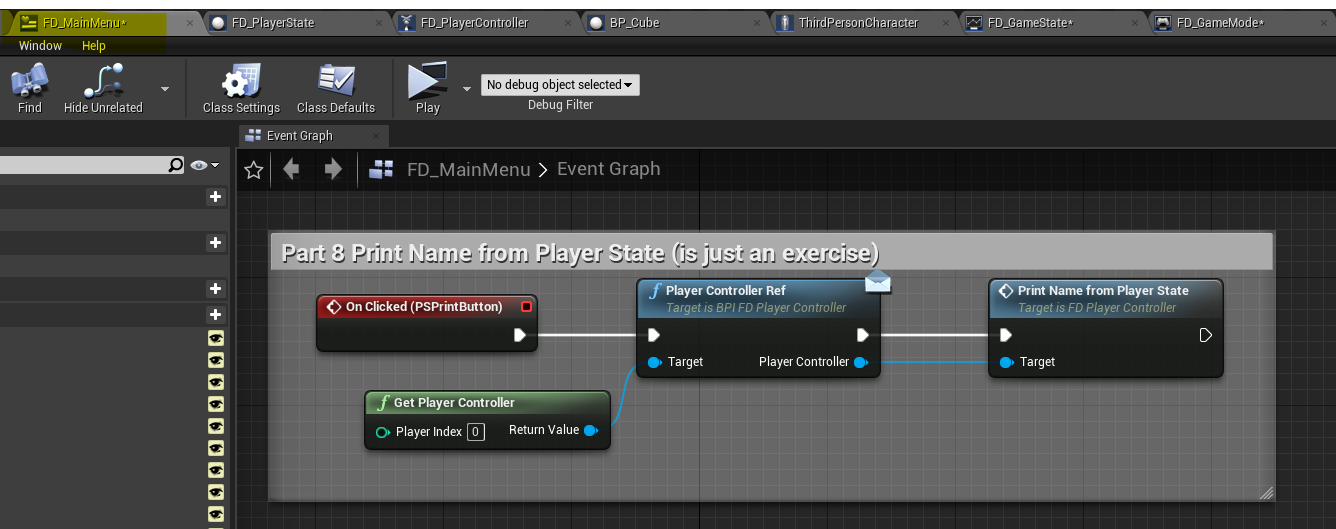
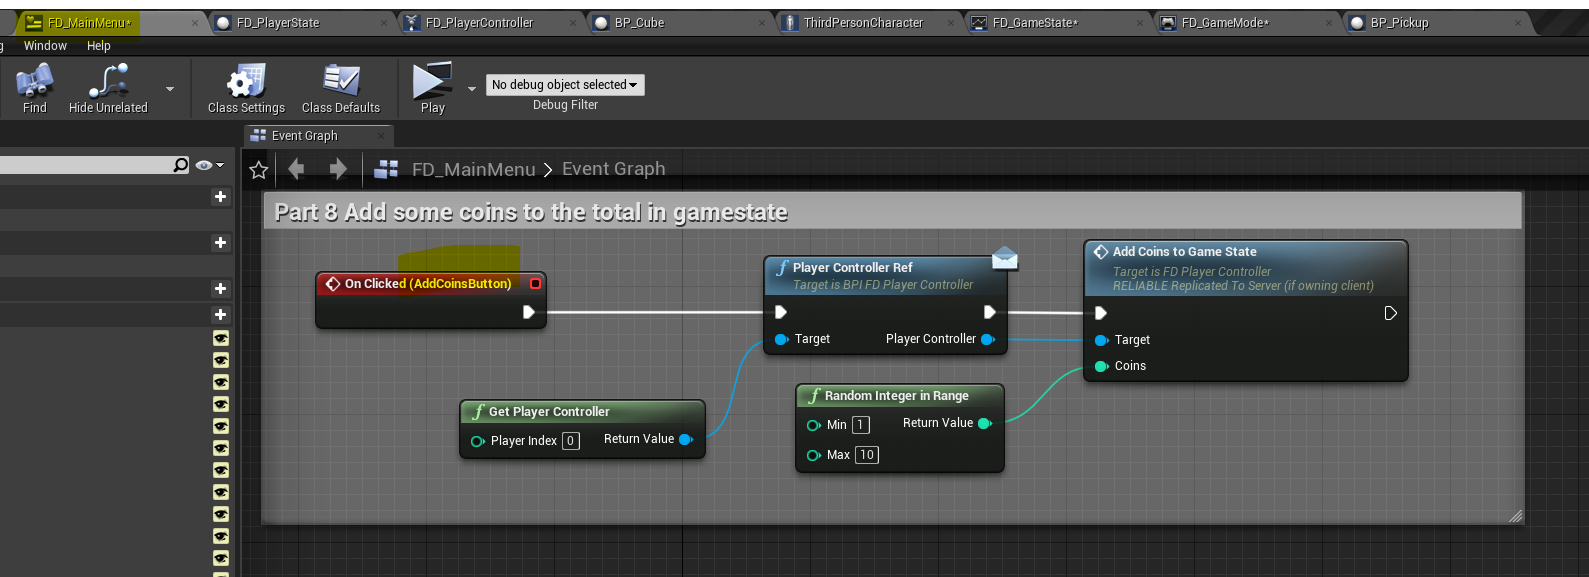
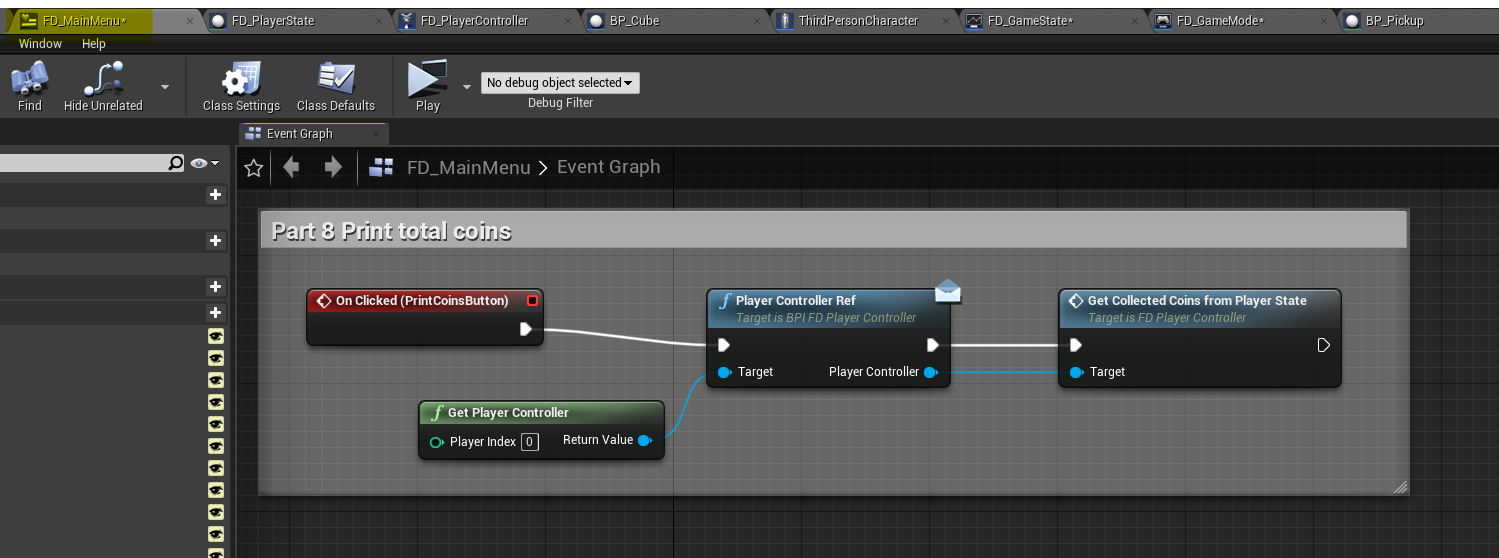
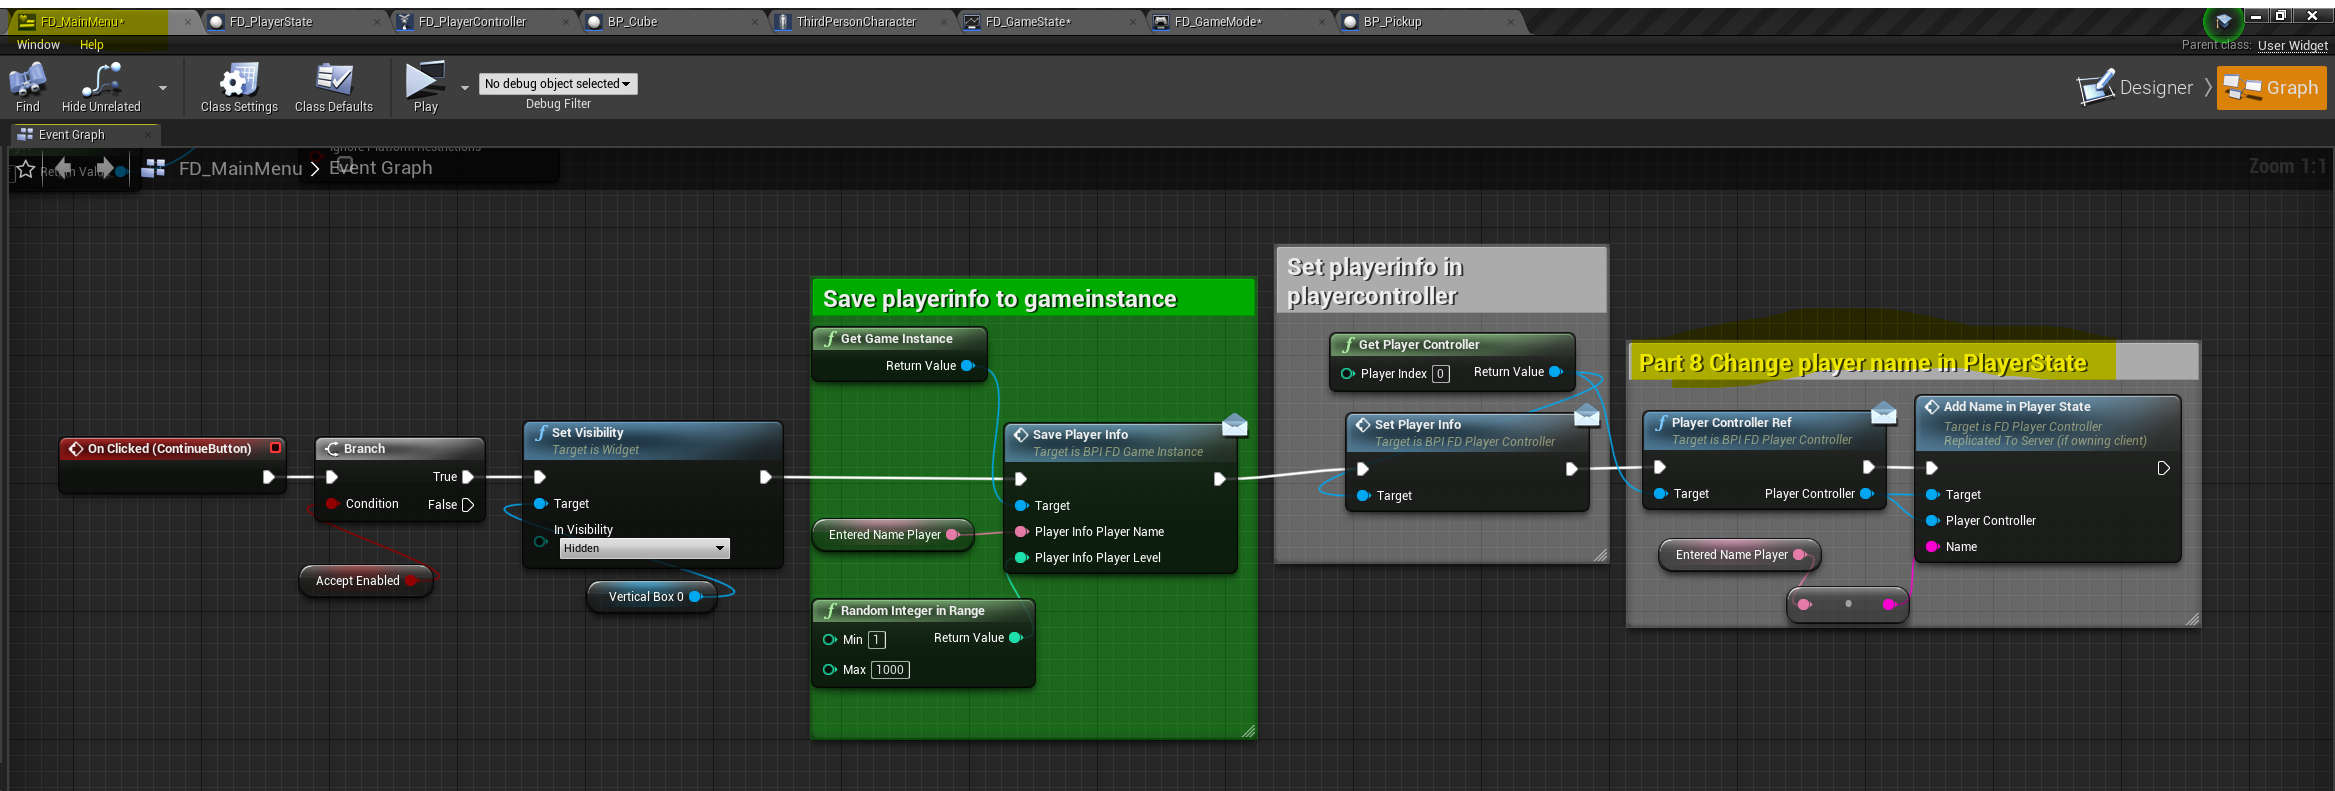
Step 4 Changes to the mainmenu


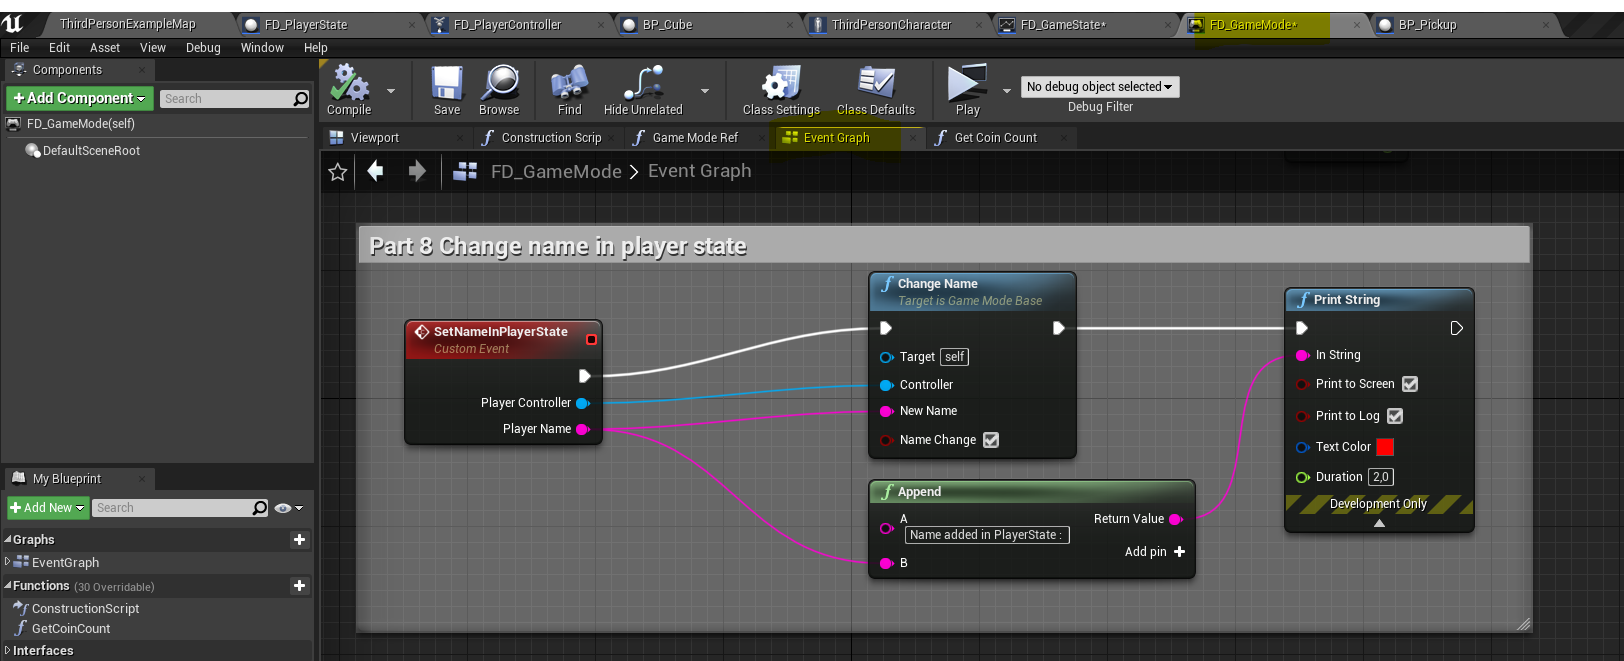
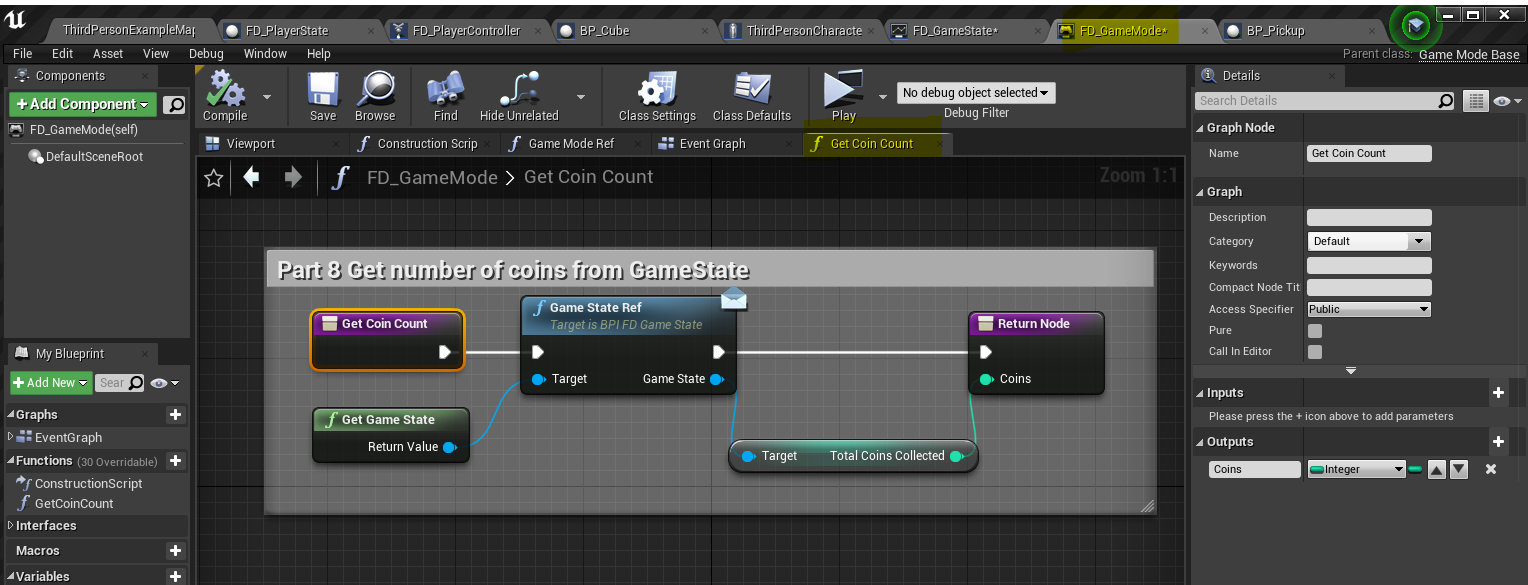
Step 5 GameMode
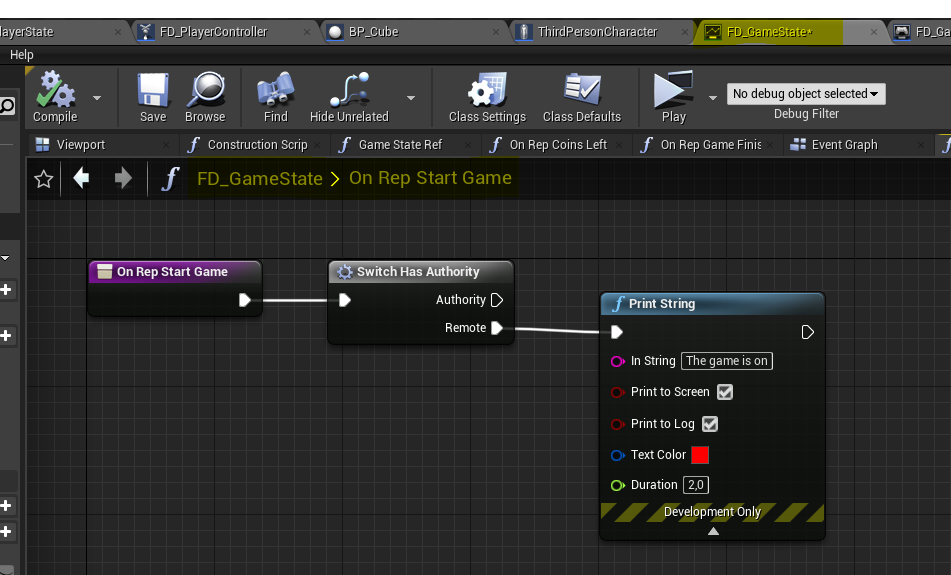
Step 6 GameState

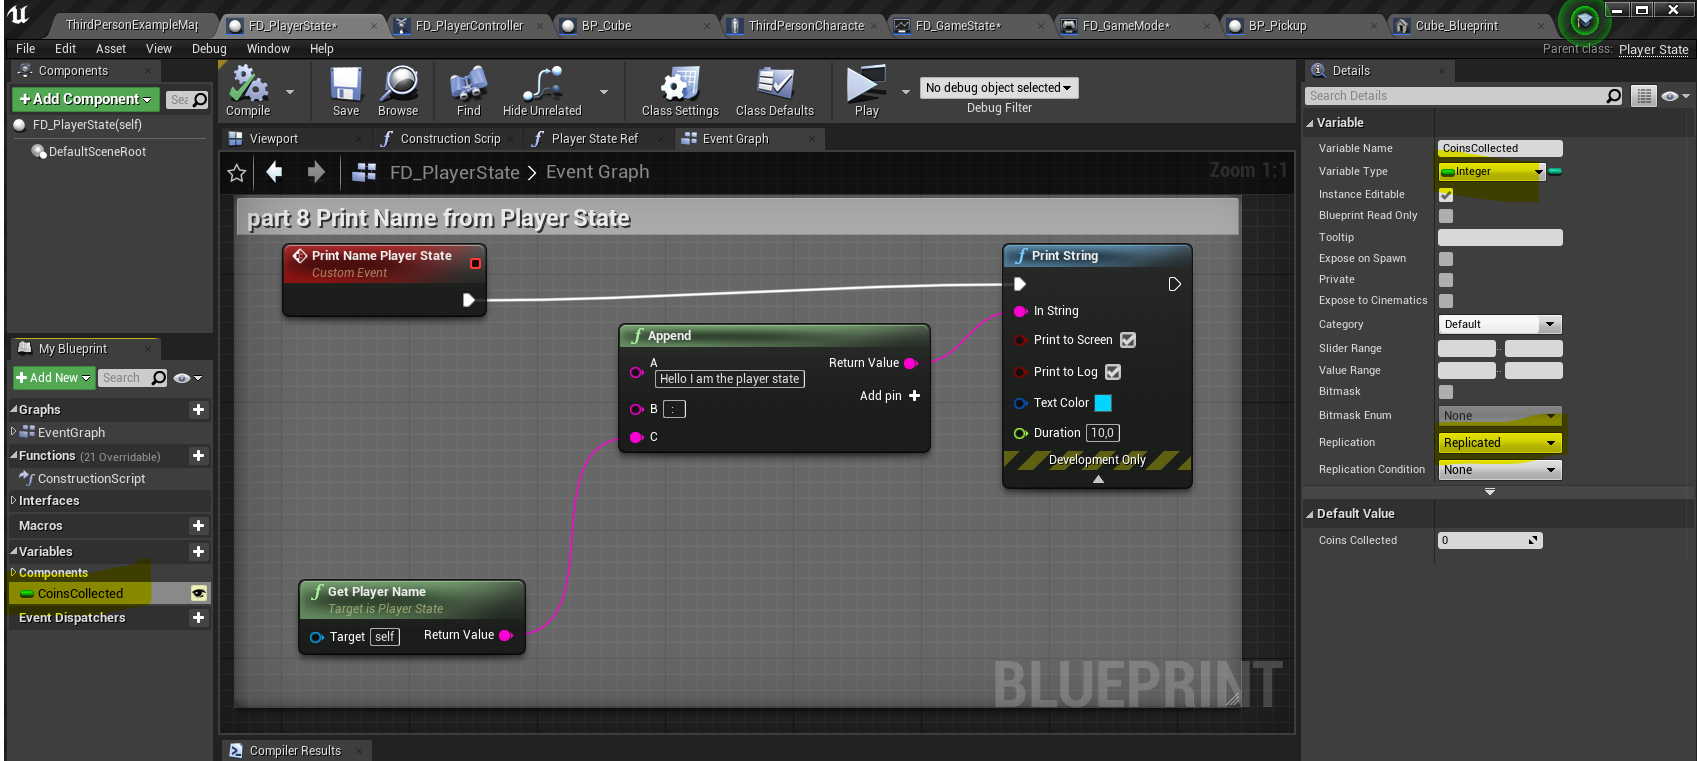
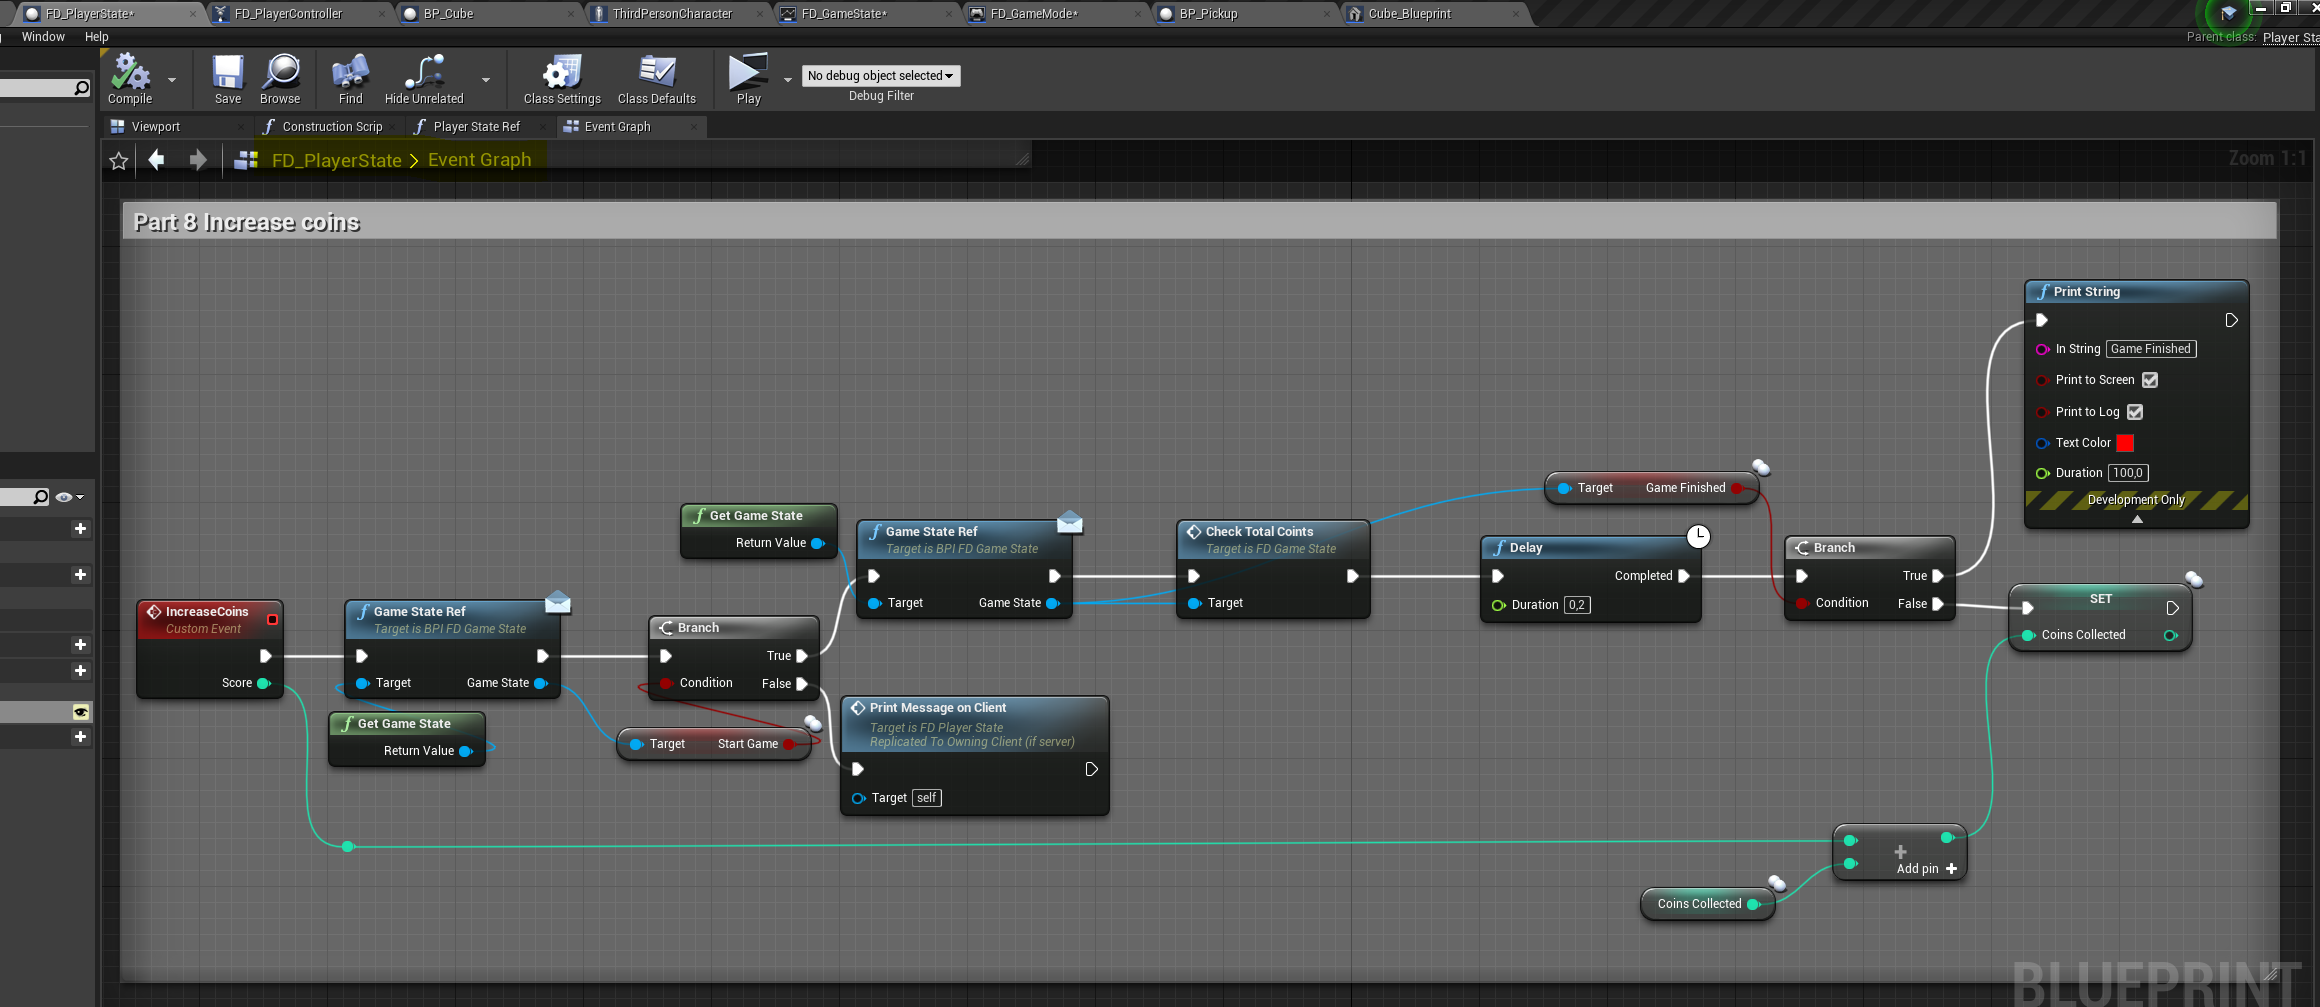
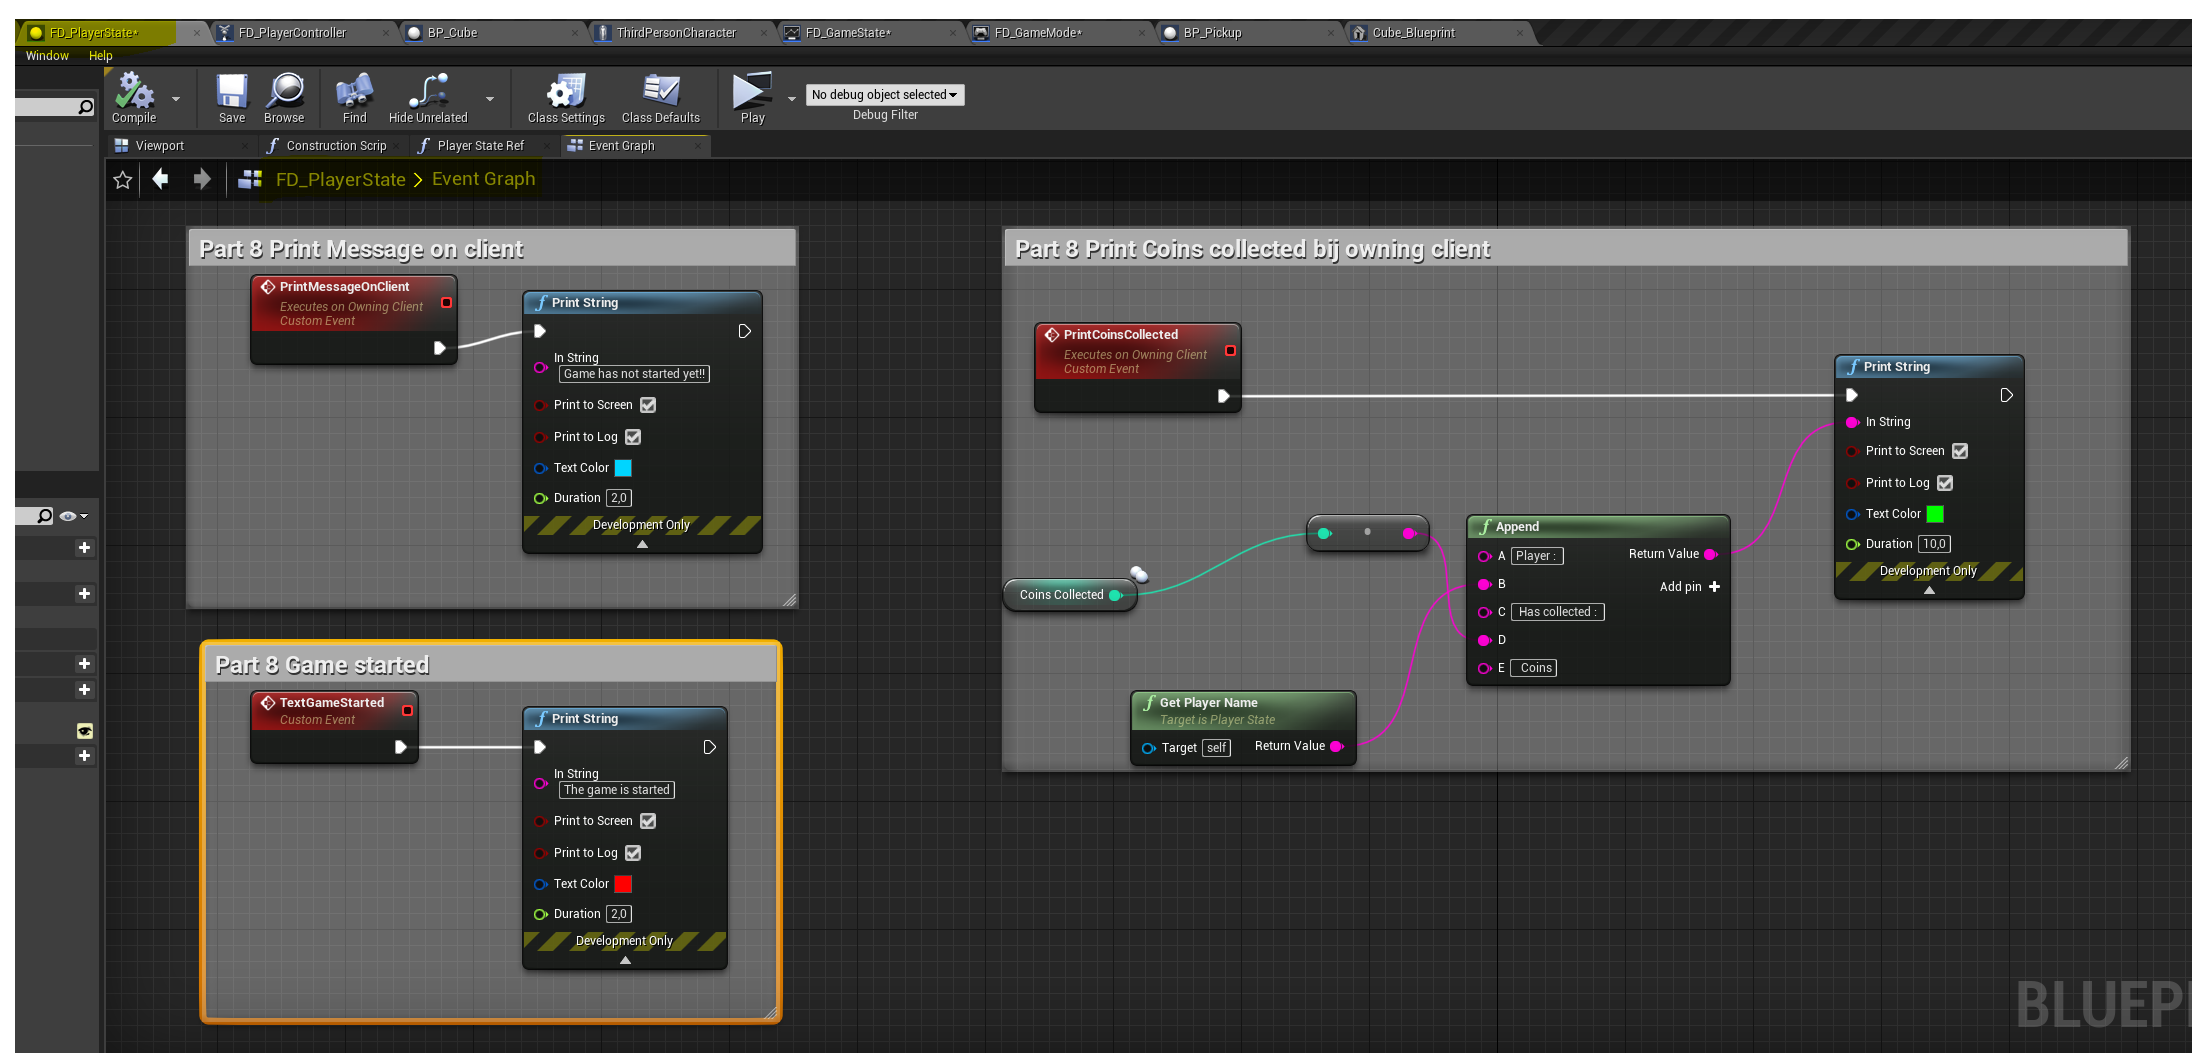
Step 7 : PlayerState
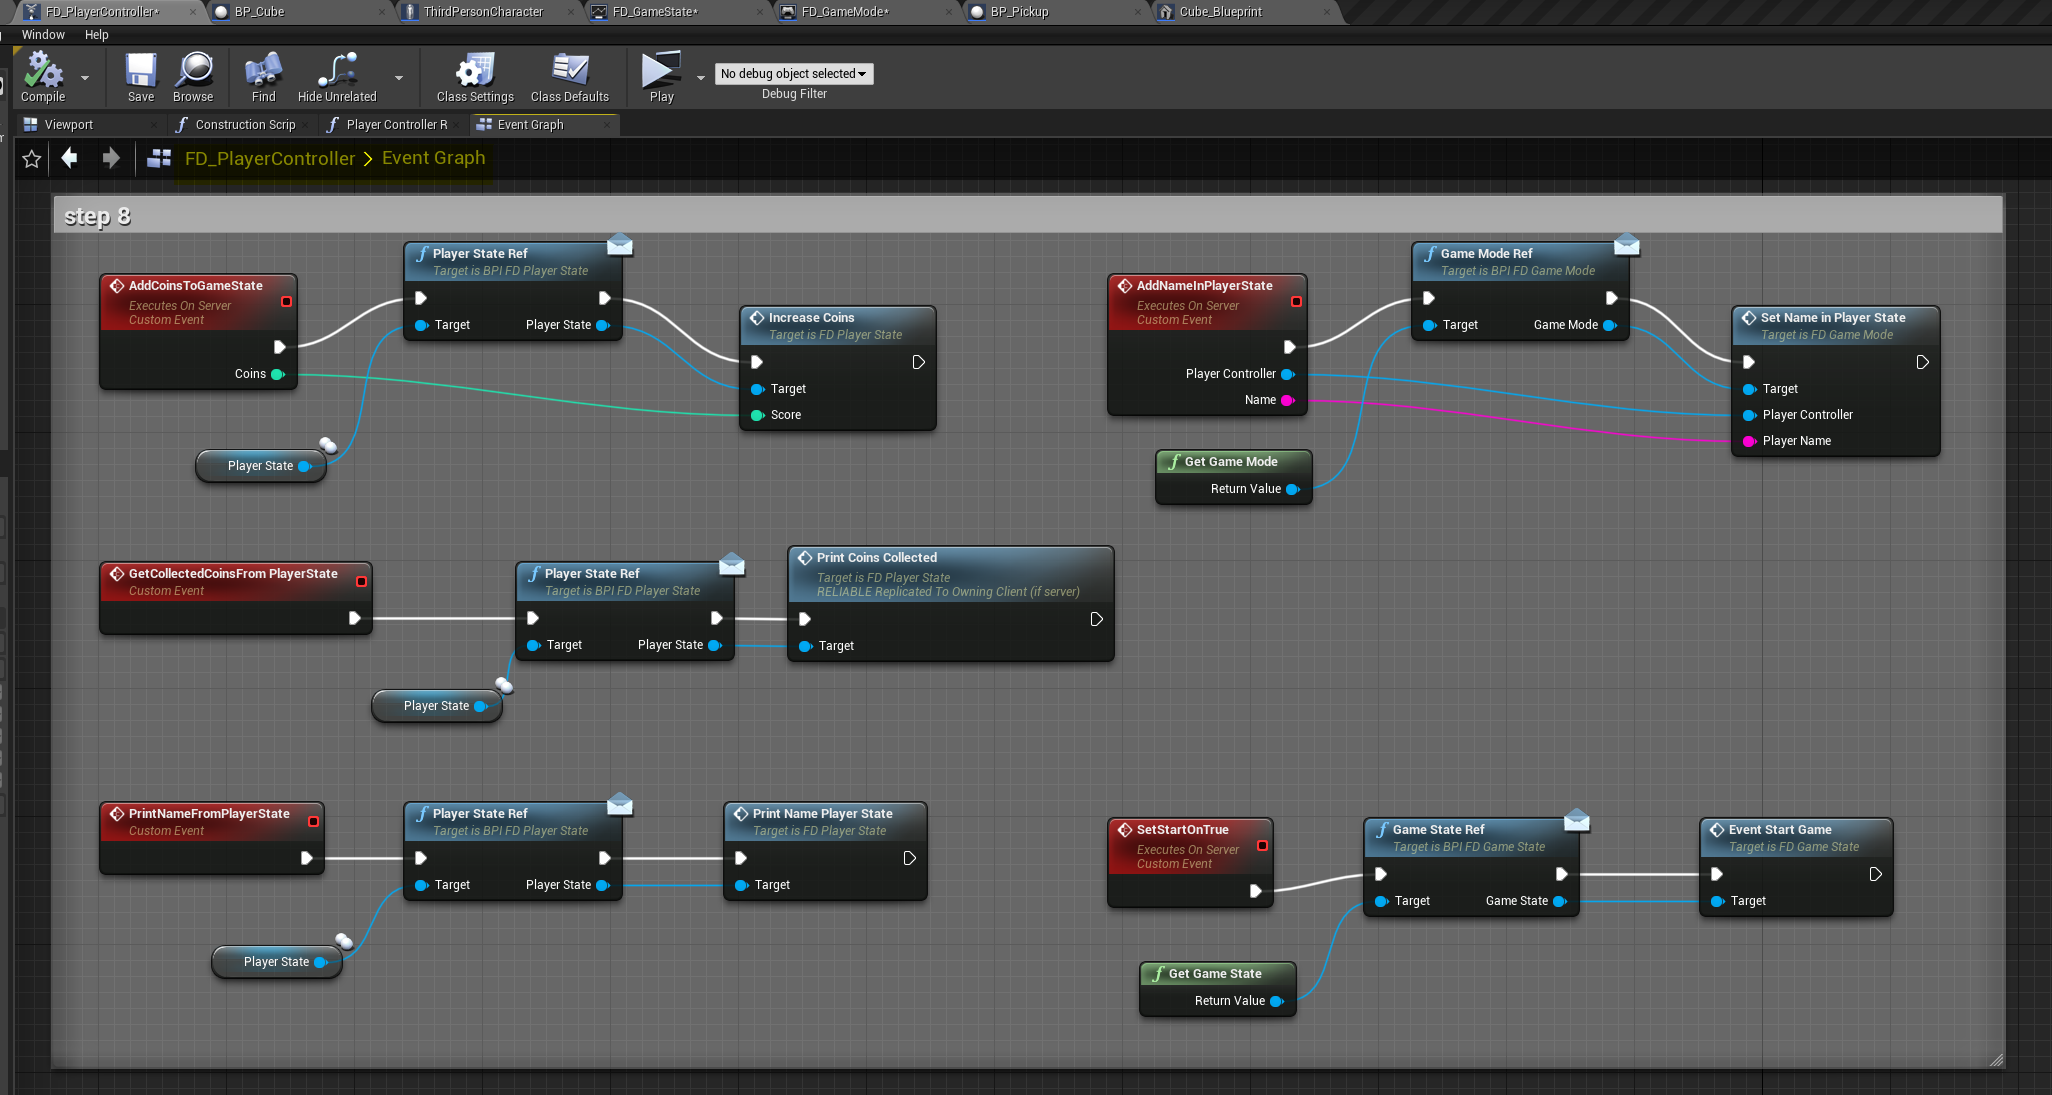
Step 8 : Playercontroller
Most of the events in the playercontroller are necessary to connect the menu widget to the gamestate and playerstate. So they are called from the menu, to get something done in the gamestate or playerstate
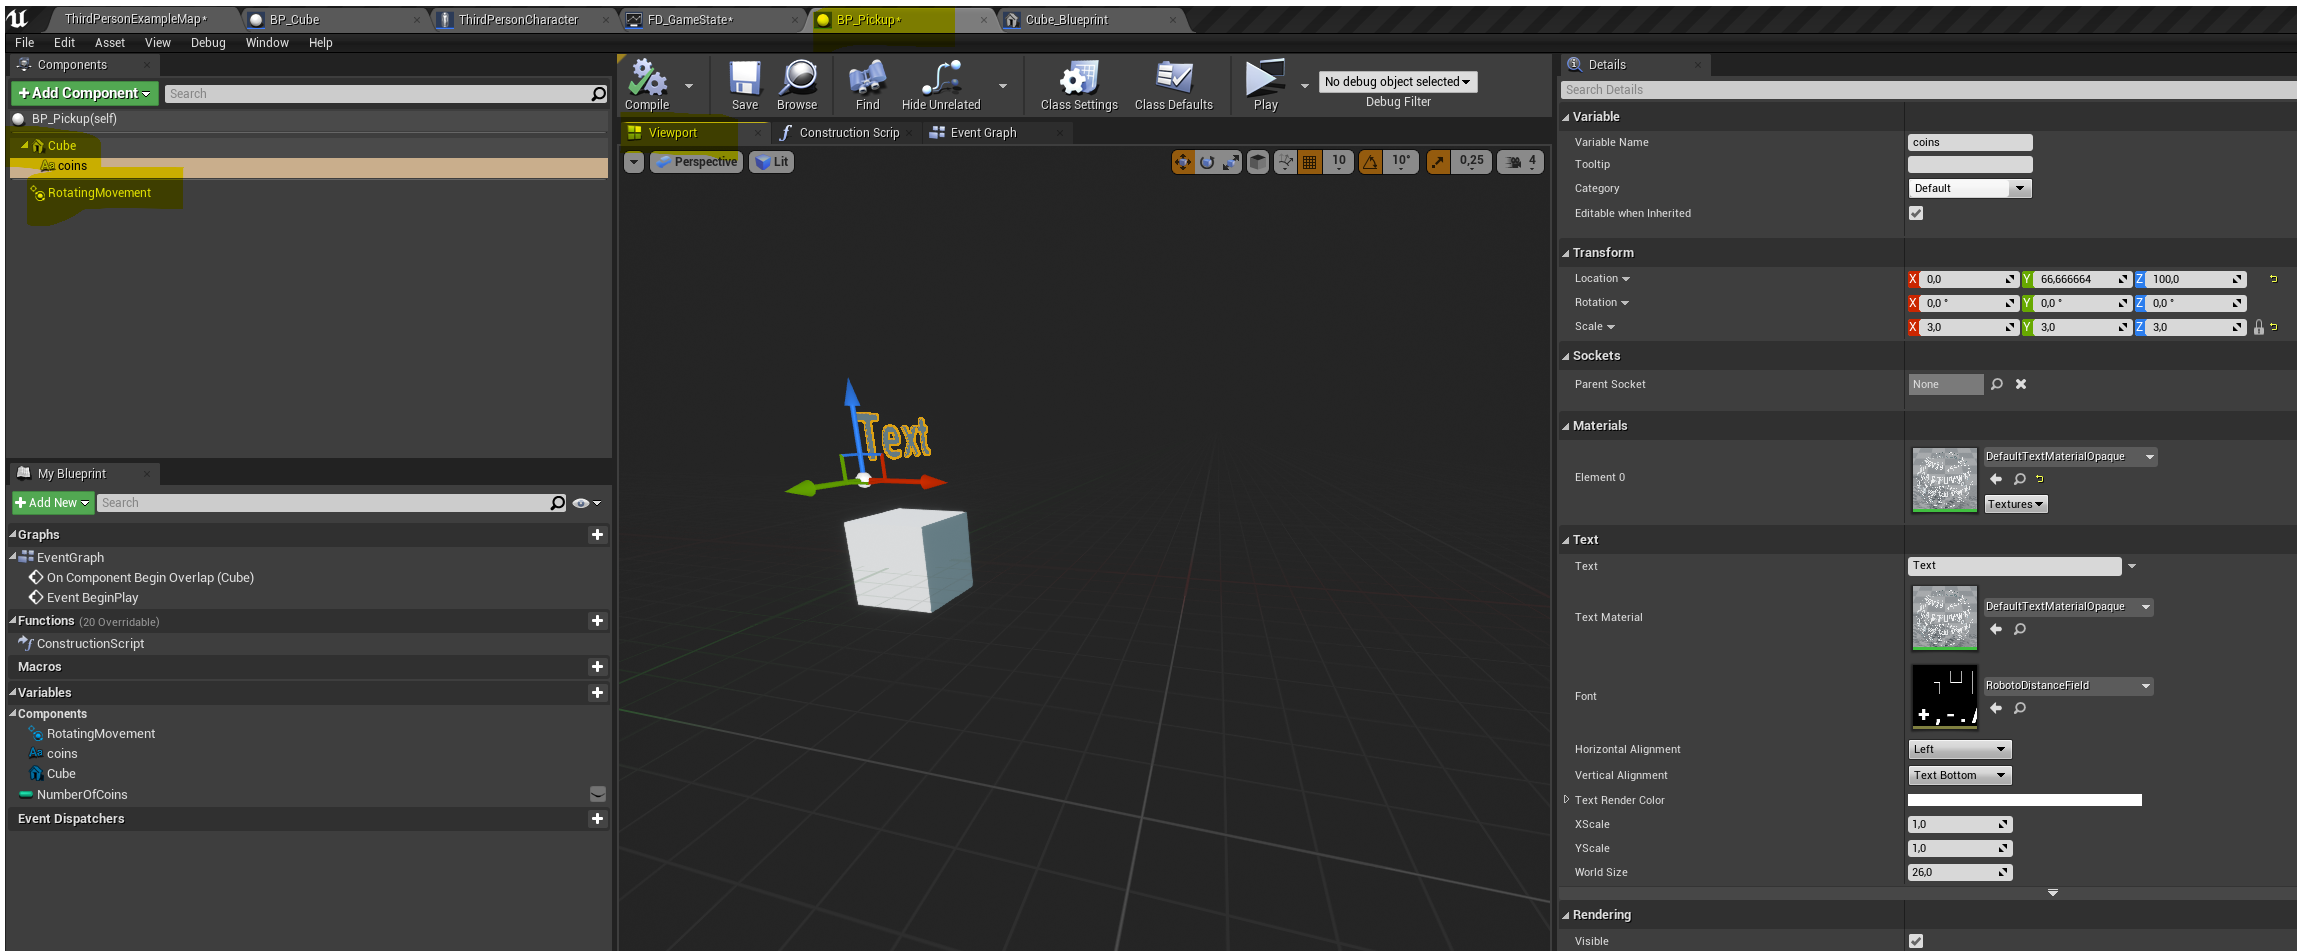
Step 9 : BP_Pickup
Changes made to the existing BP_Pickup. In the first event you should add an has authority switch, to make sure coins is only set on the remote. The dedicatie server has no coins (has no graphical interface). At first I got a warning in the dedicated server log.

Step 10 : New Blueprint with cube (only one) called BP_Cube
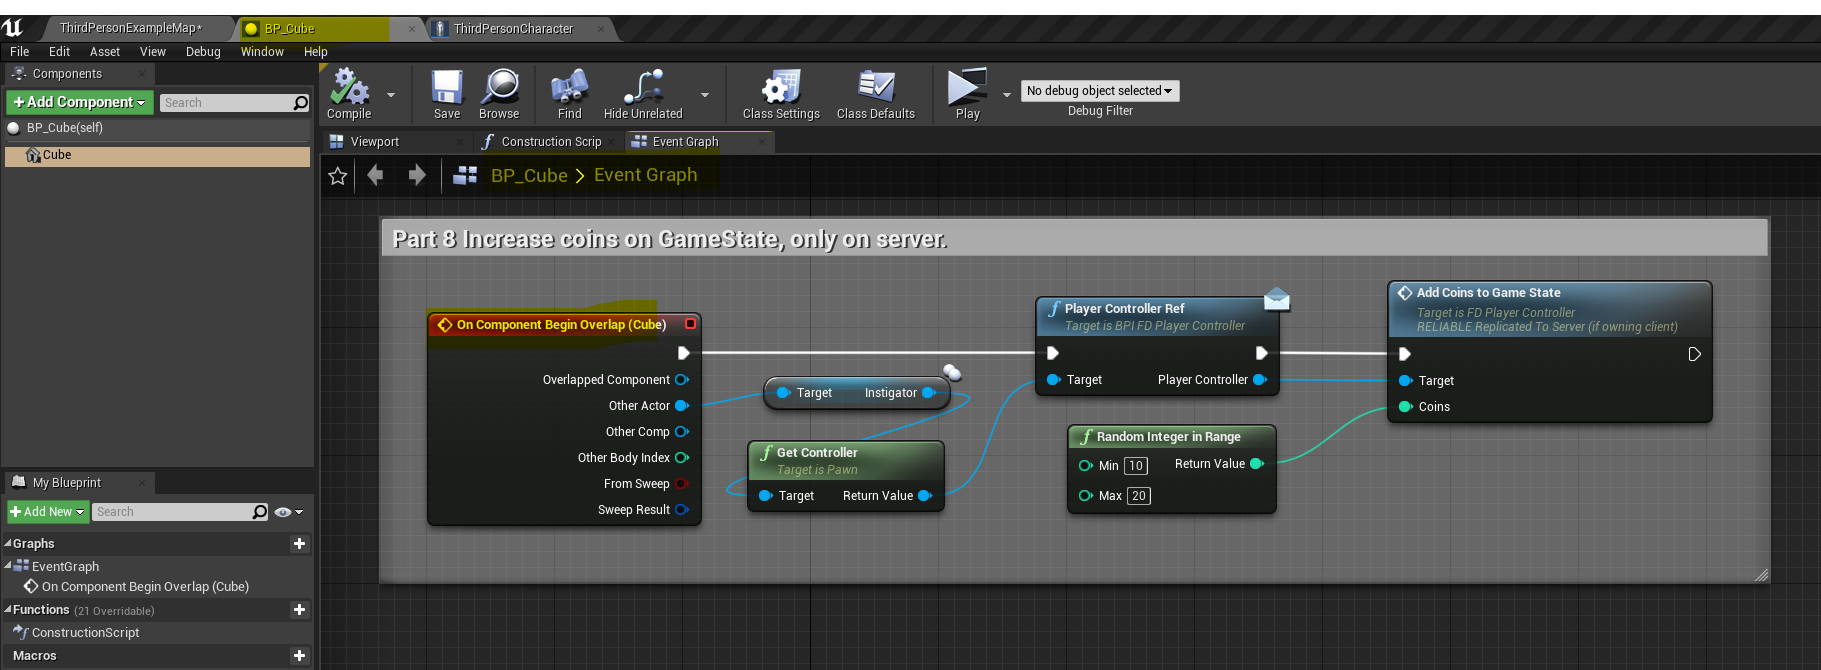
Result when running in multiplayer
