According to the documentation : The GameInstance exists for the duration of the engine’s session, meaning that it is created when the engine starts up and not destroyed or replaced until the engine shuts down. A separate GameInstance exists on the server and on each client, and these instances do not communicate with each other. Because the GameInstance exists outside of the game session and is the only game structure that exists across level loads, it is a good place to store certain types of persistent data, such as lifetime player statistics (e.g. total number of games won), account information (e.g. locked/unlocked status of special items), or even a list of maps to rotate through in a competitive game like Unreal Tournament.
Step 1: Create a Blueprint GameInstance and BP Interface


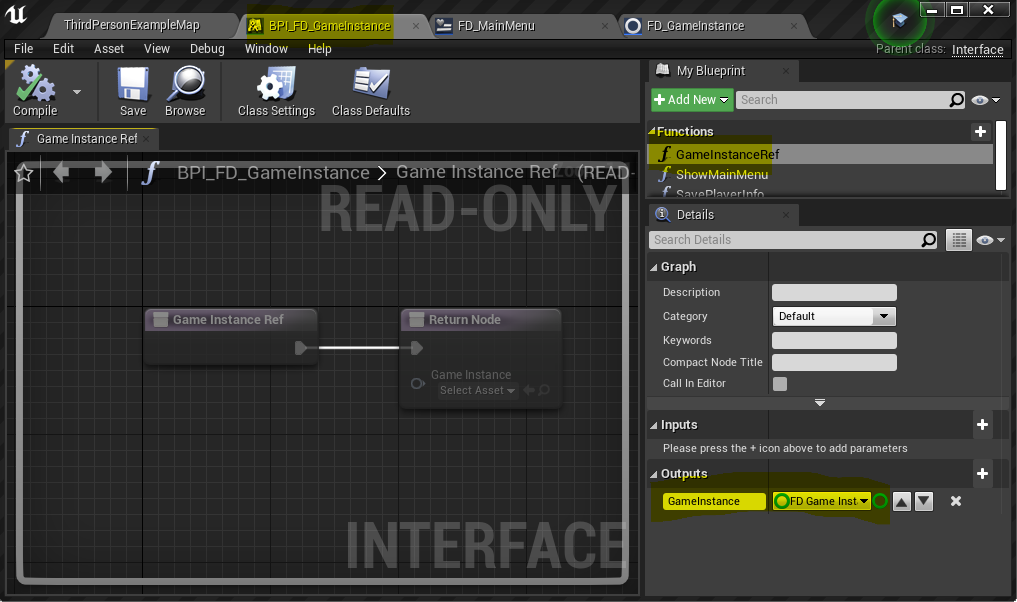
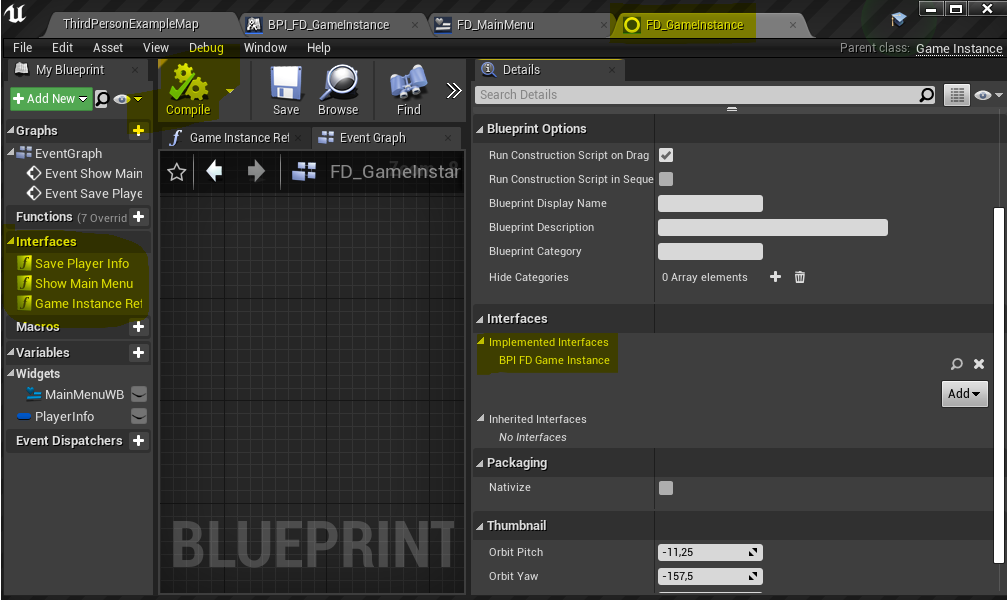
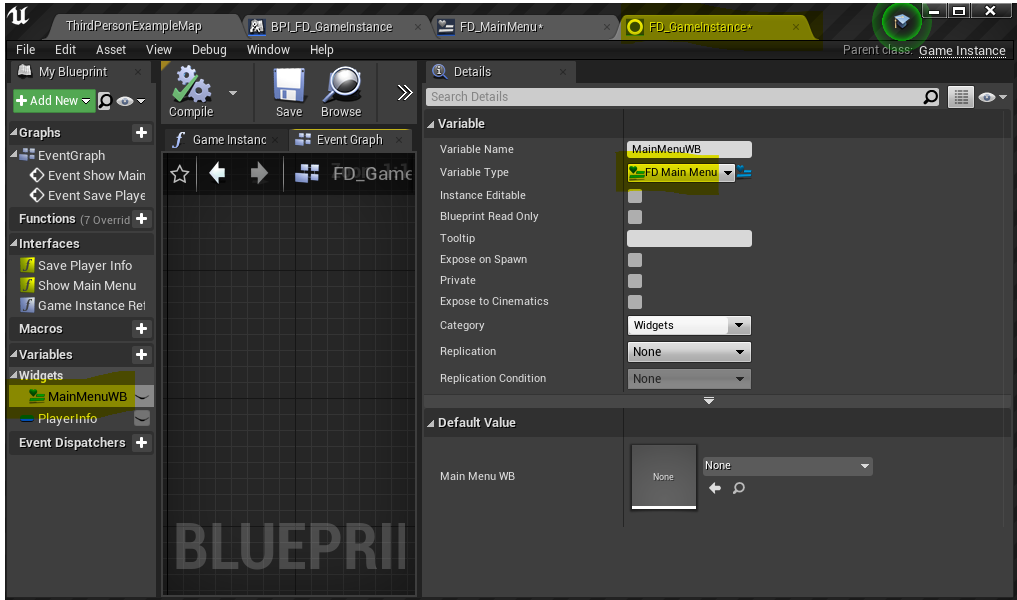
Step 2: Connect Interface to Gameinstance and make Reference

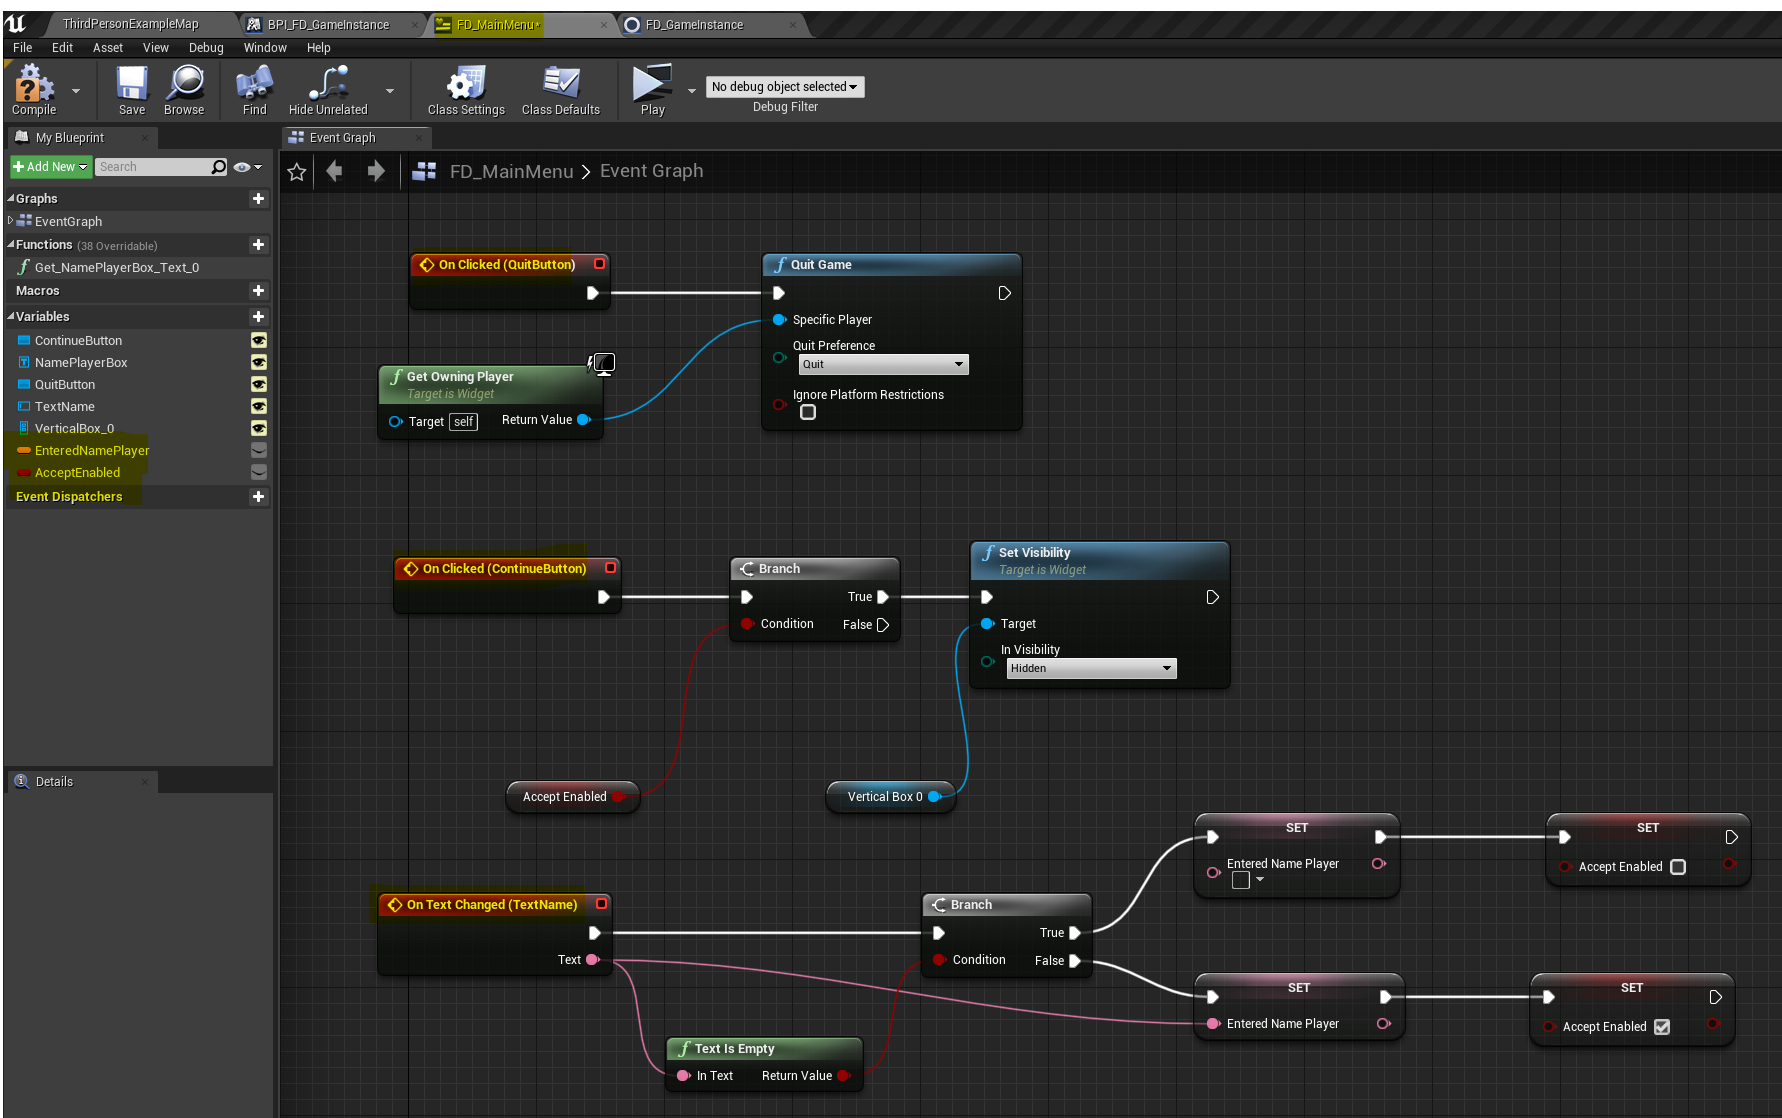
Step 3 : Create Blueprint Widget and add Show MainMenu in Interface

Step 4 : Building the Widget

Step 5 : Event Show Main Menu in GameInstance

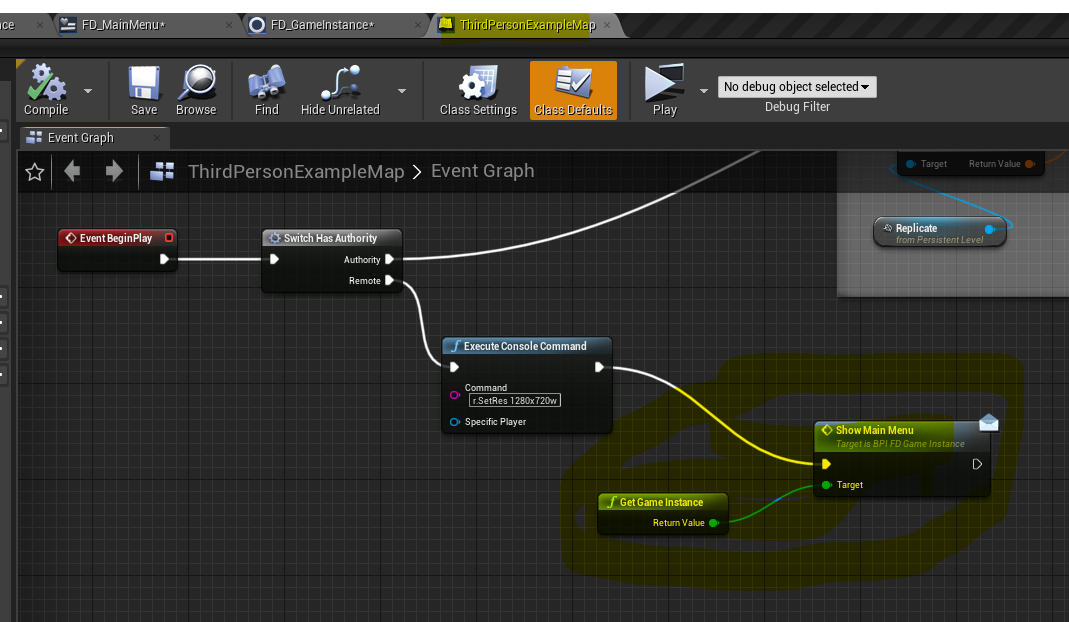
Step 6 : Open main menu from level blueprint
Video step 1 to 6
In the following video I forgot to show that in Project Settings, Maps en Modes, the Game Instance class is set to your created Gameinstance!!
Previous steps are preparation for the real thing 🙂
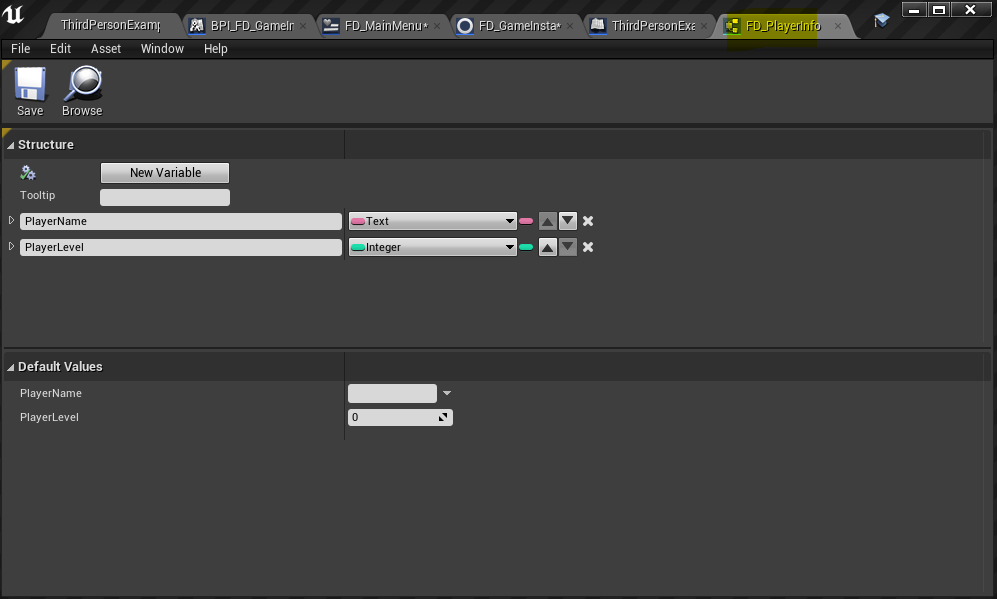
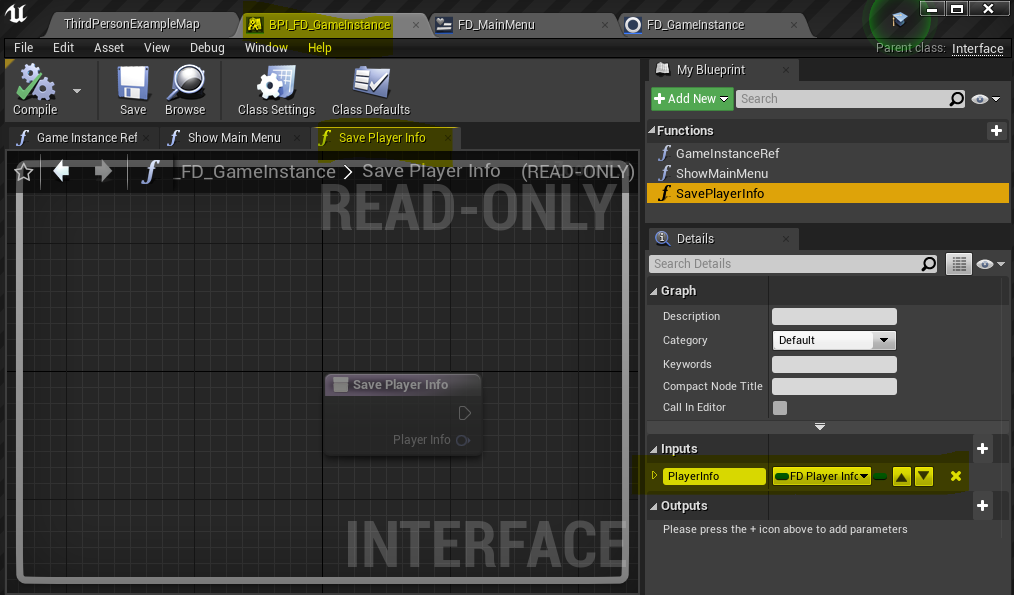
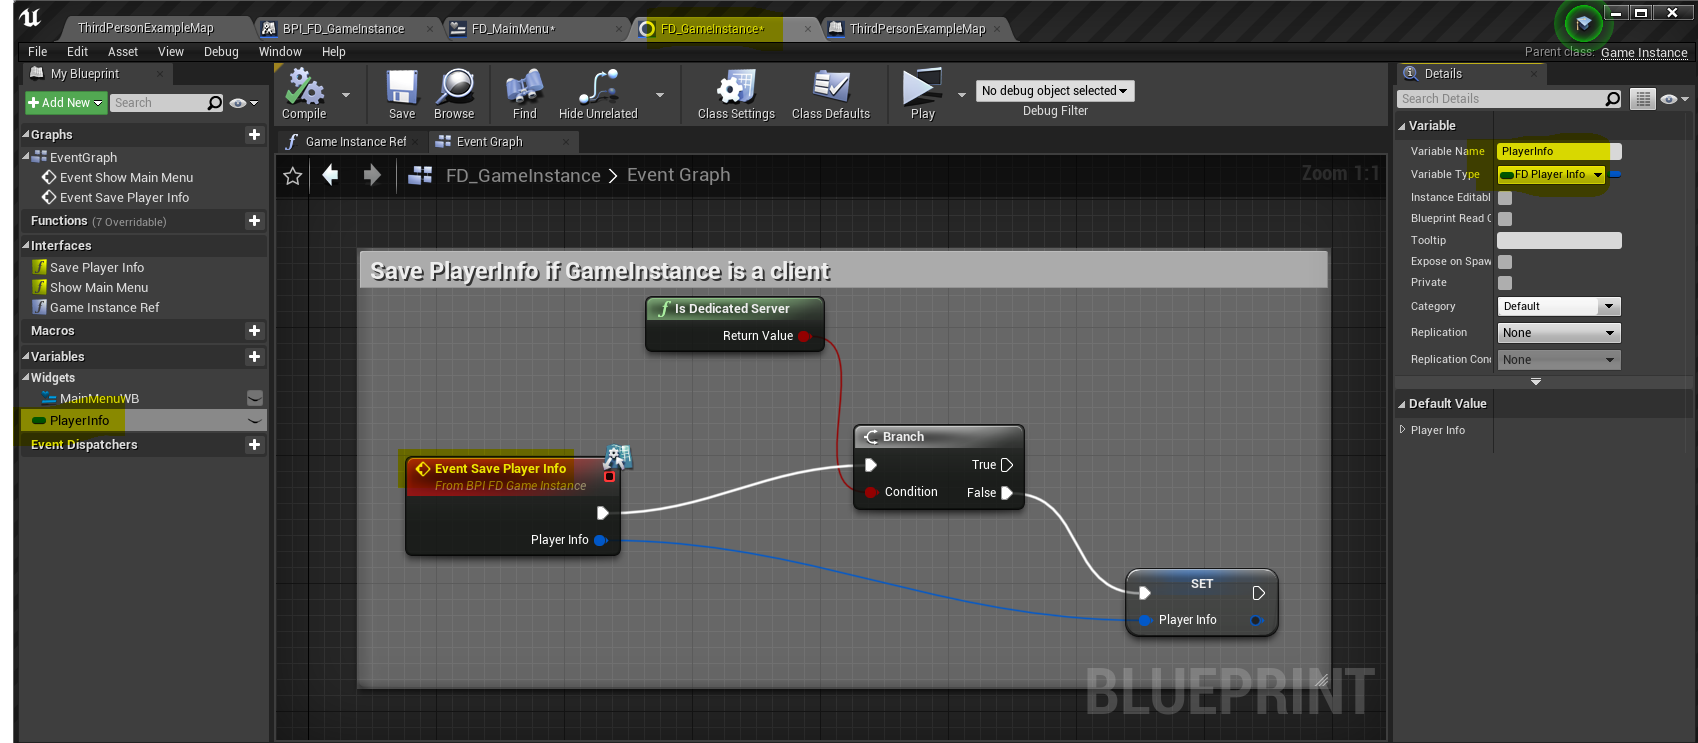
Step 7 Create PlayerInfo Struct, Add to Interface, Store in GameInstance
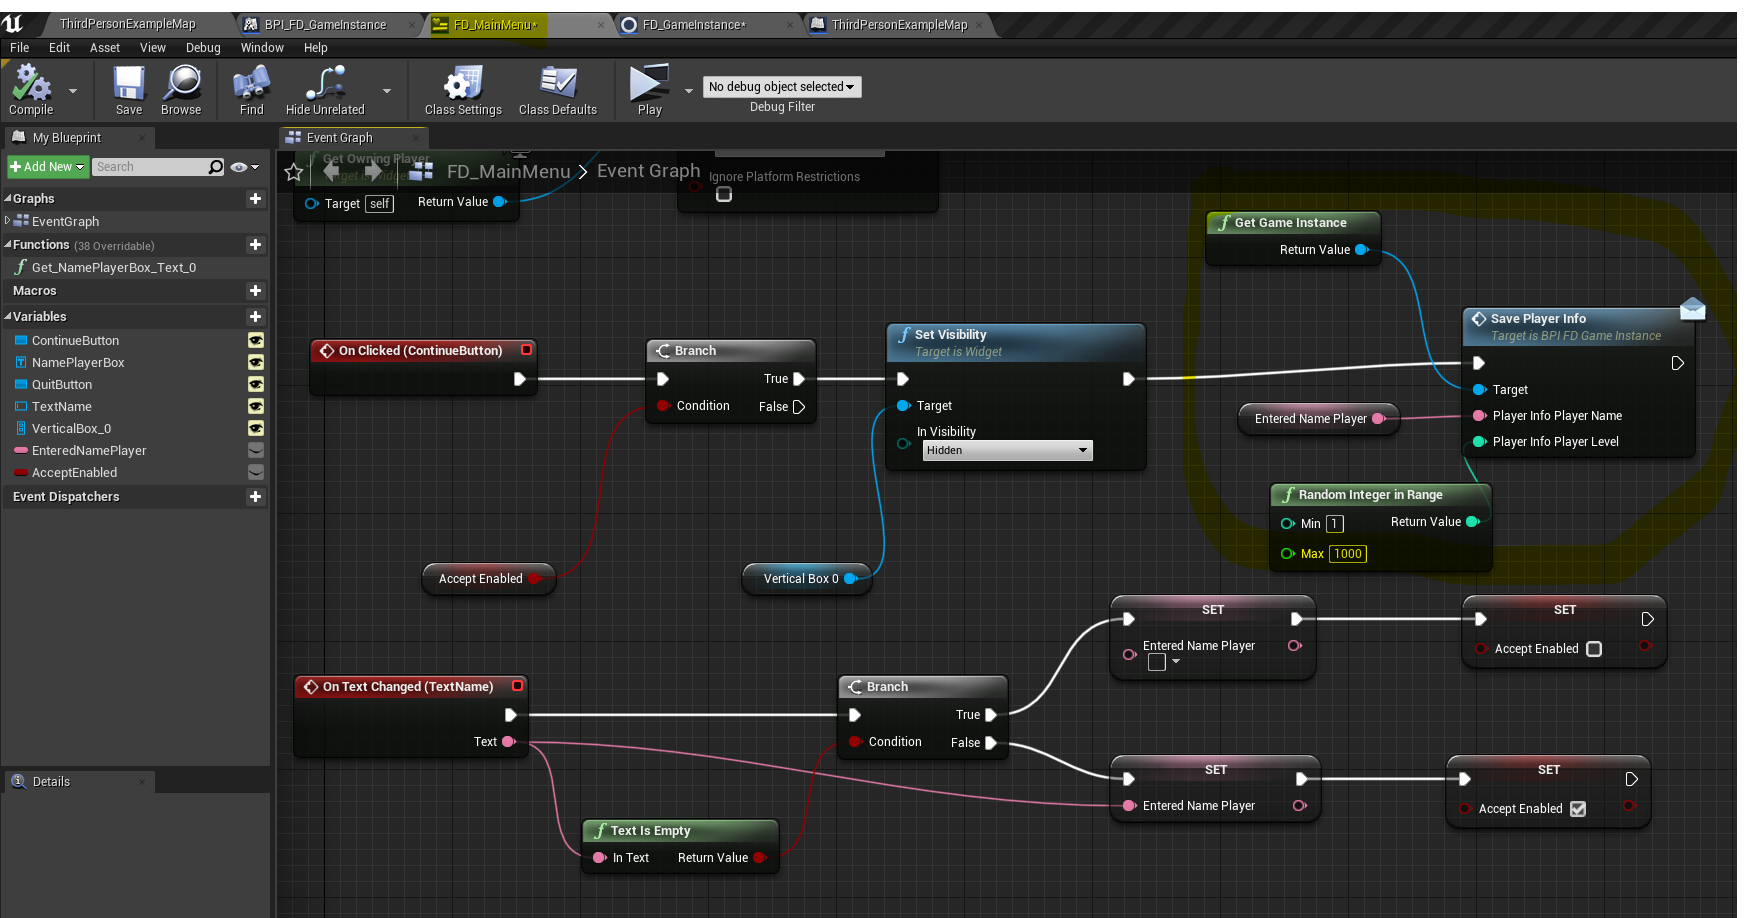
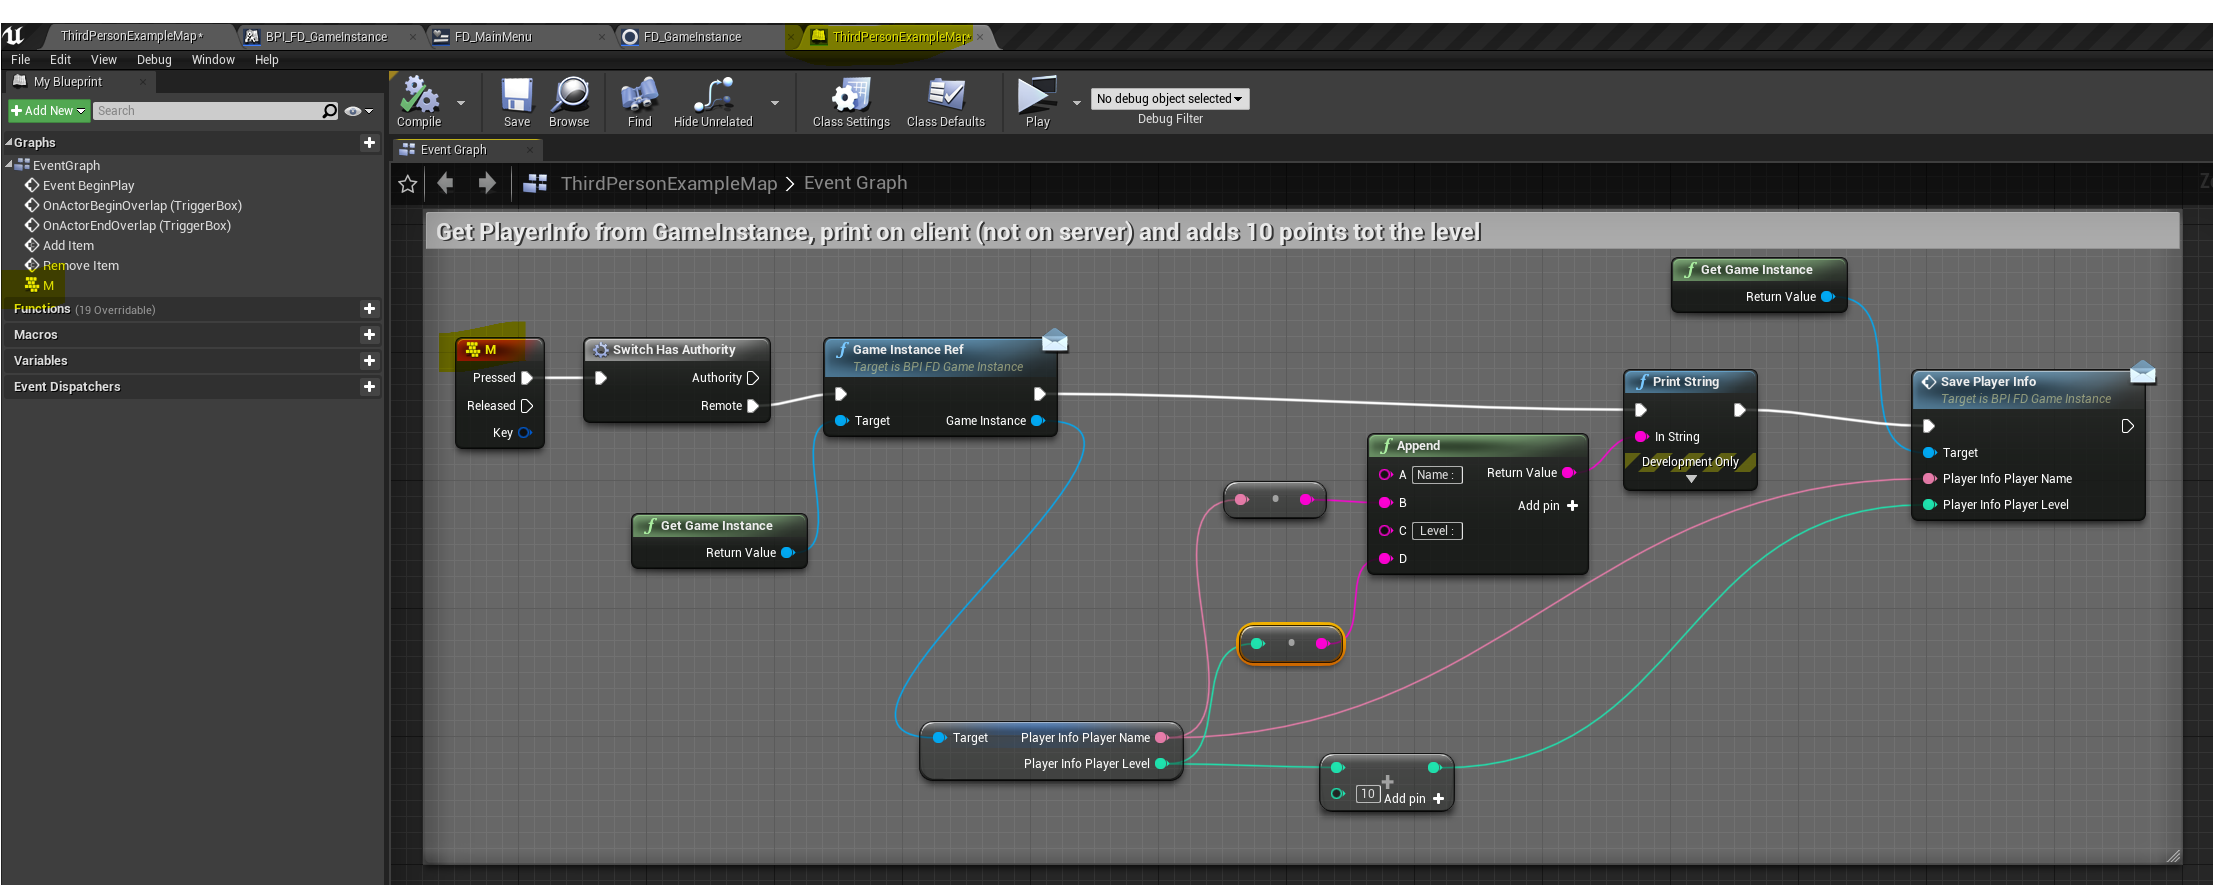
Step 8 Store to PlayerInfo in Menu. Event M to print PlayerInfo
Video step 7 and 8
Wrap up Part 4
Extra
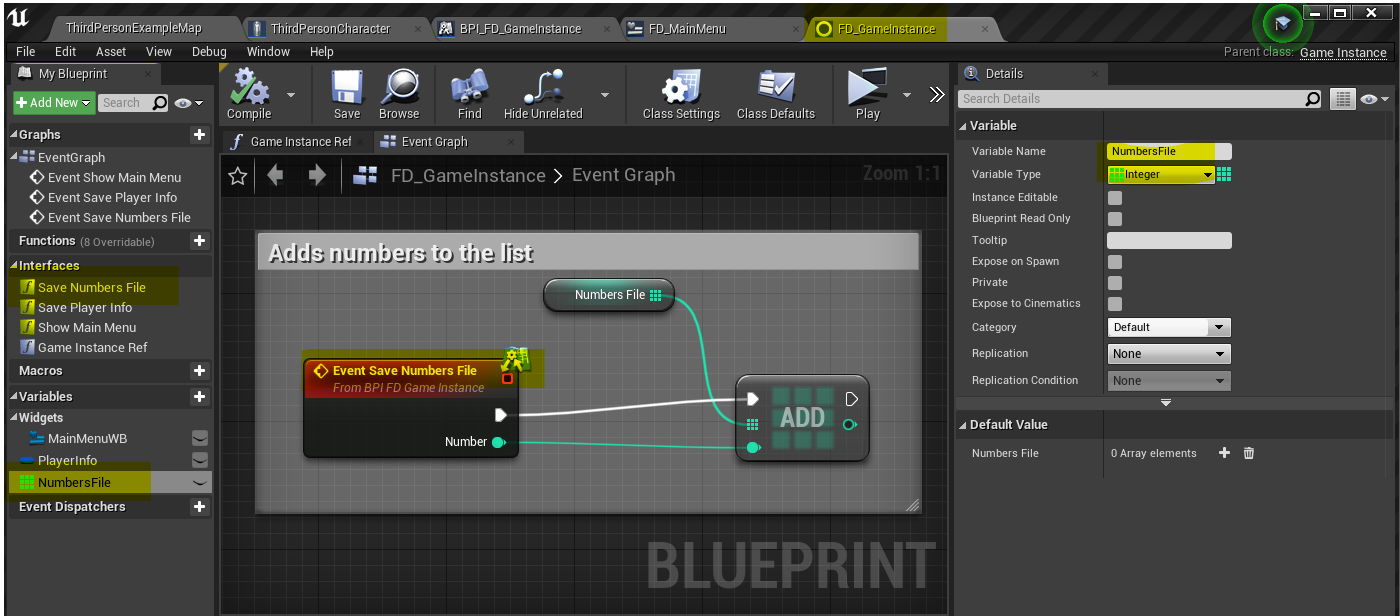
I have added another part, where on the Gameinstance al list of numbers is stored. This list is filled by the clients. In this case I used the character for getting access to the gameinstance of the server
Keys : G and H

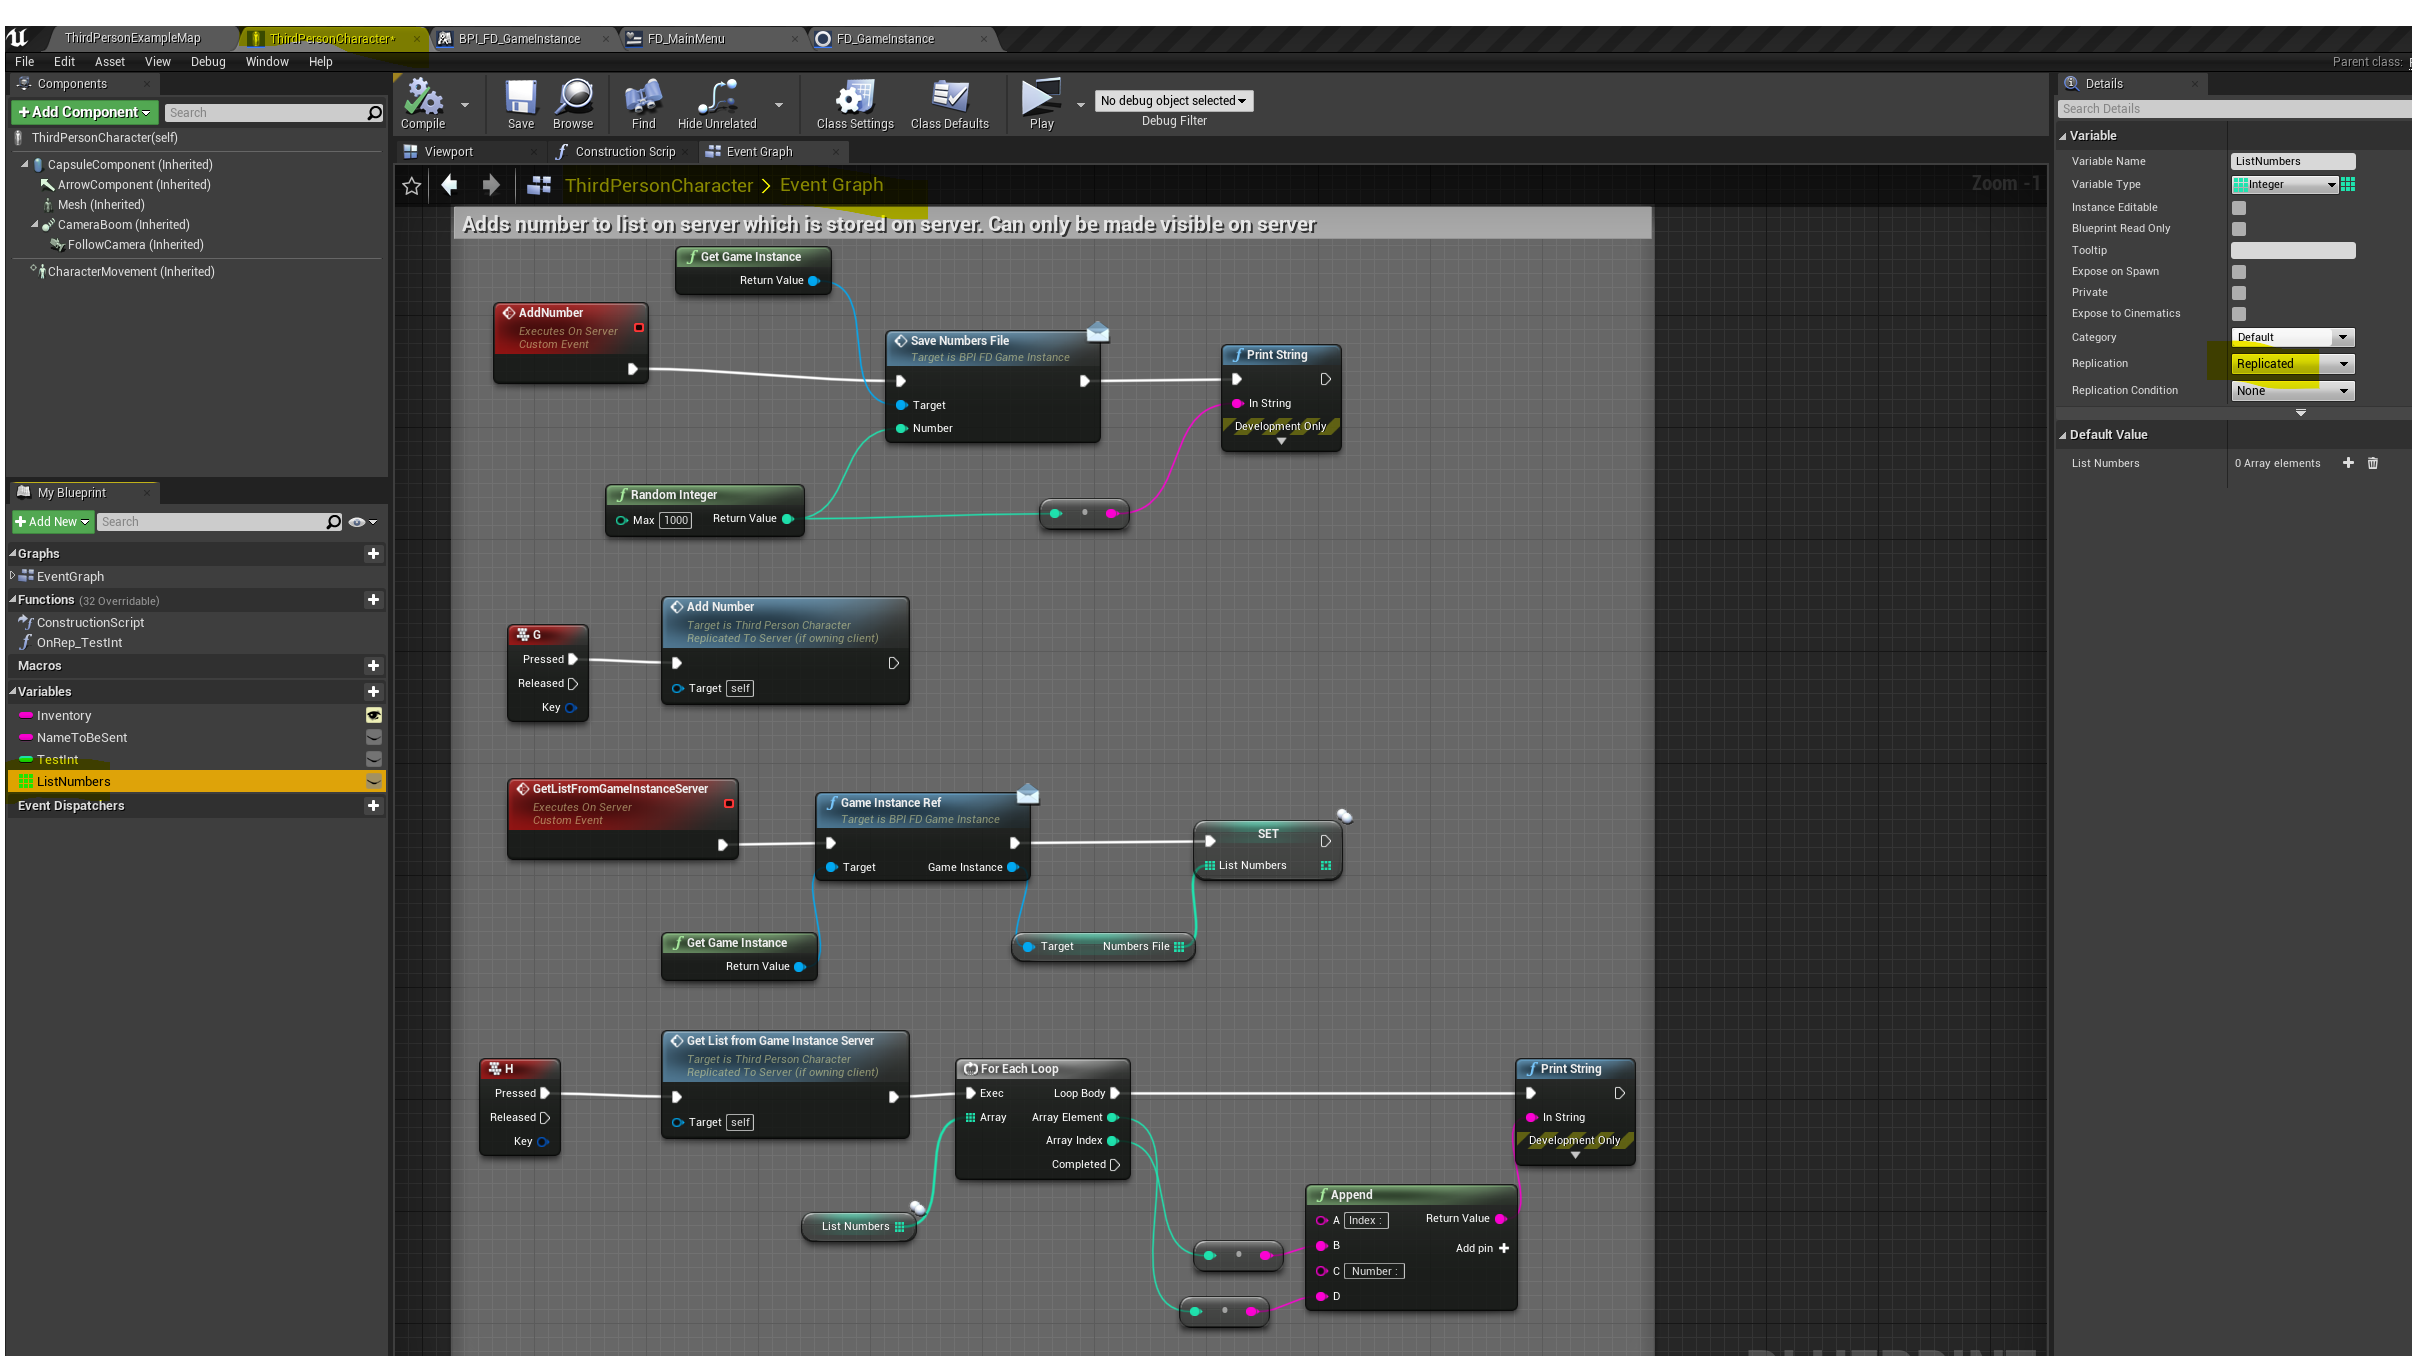
Result
